本篇文章參考:在 Linux 中使用 Grive 指令工具同步 Google 雲端硬碟(Drive)上的檔案 – G. T. Wang
1. 新增套件庫
$ sudo add-apt-repository ppa:nilarimogard/webupd8
For other (specialized) PPAs we maintain, see: https://launchpad.net/~webupd8team
More info: https://launchpad.net/~nilarimogard/+archive/ubuntu/webupd8
Press [ENTER] to continue or ctrl-c to cancel adding it
gpg: `/tmp/tmpZW9M0p/secring.gpg’ 鑰匙圈已建立
gpg: `/tmp/tmpZW9M0p/pubring.gpg’ 鑰匙圈已建立
gpg: 正在請求金鑰 4C9D234C 自 hkp 伺服器 keyserver.ubuntu.com
gpg: /tmp/tmpZW9M0p/trustdb.gpg: 建立了信任資料庫
gpg: 金鑰 4C9D234C: 公鑰 “Launchpad webupd8” 已匯入
gpg: 處理總量: 1
gpg: 已匯入: 1 (RSA: 1)
OK
2. 更新套件庫
$ sudo apt-get update
[@more@]3. 安裝 grive 套件
$ sudo apt-get install grive
4. 建立要同步的目錄
$ sudo mkdir ~/google_drive
5. 切換目錄至要同步的目錄
$ cd ~/google_drive
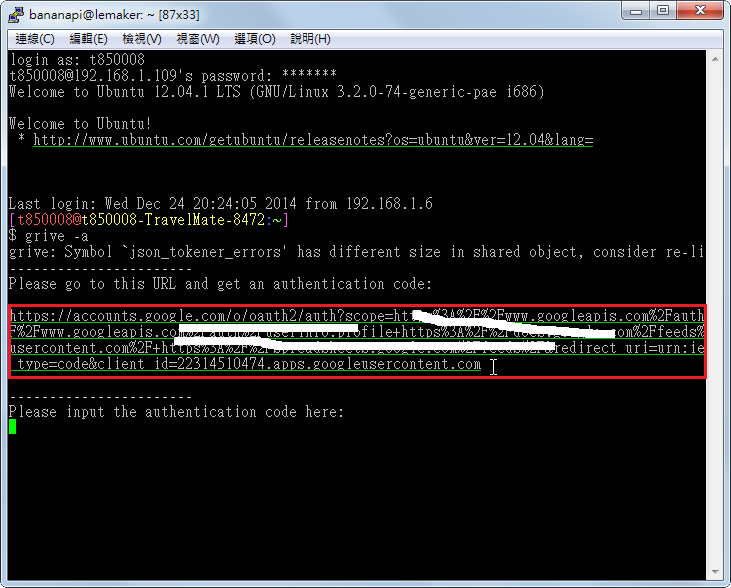
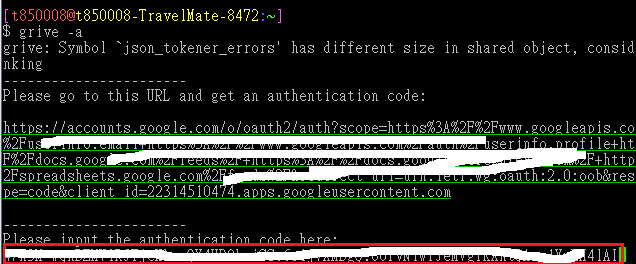
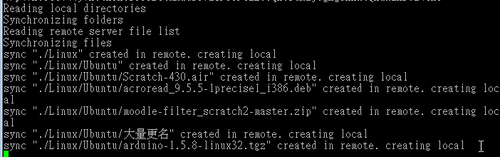
6. 開始進行同步
$ grive -a

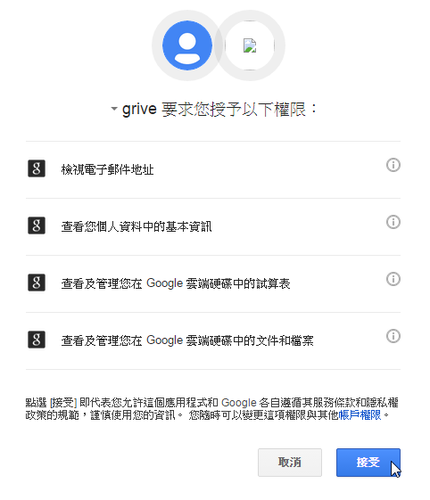
7. 複製紅色框起來的網址,複製到瀏覽器,選擇 接受
8. 複製授權碼
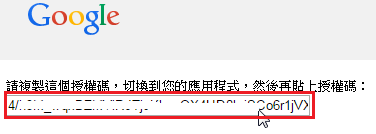
9. 貼到終端機中

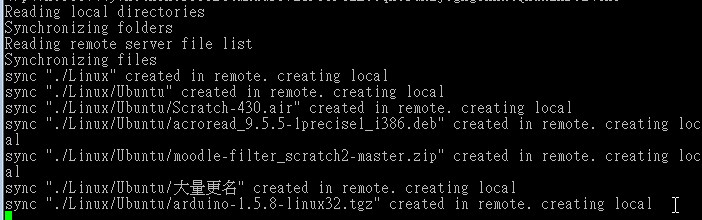
10. 開始同步
grive 指令用法
$ grive -h
grive: Symbol `json_tokener_errors’ has different size in shared object, consider re-linking
Grive options:
-h [ –help ] Produce help message
-v [ –version ] Display Grive version
-a [ –auth ] Request authorization token
-p [ –path ] arg Path to sync
-V [ –verbose ] Verbose mode. Enable more messages than normal.
–log-xml Log more HTTP responses as XML for debugging.
–new-rev Create new revisions in server for updated files.
-d [ –debug ] Enable debug level messages. Implies -v.
-l [ –log ] arg Set log output filename.
-f [ –force ] Force grive to always download a file from Google Drive
instead of uploading it.
–dry-run Only detect which files need to be uploaded/downloaded,
without actually performing them.

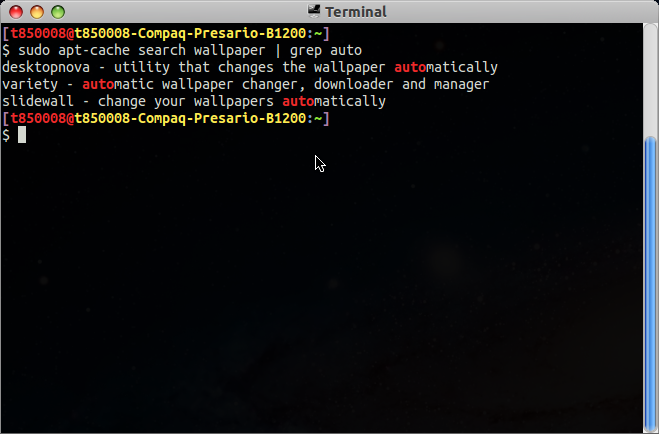
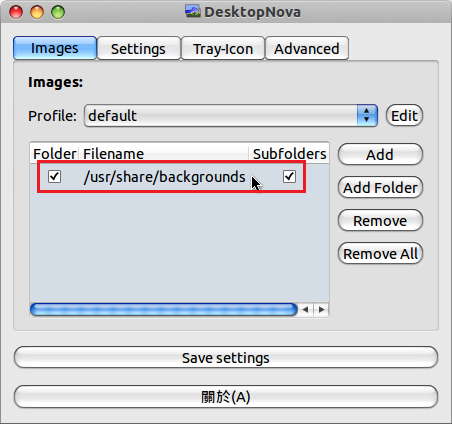
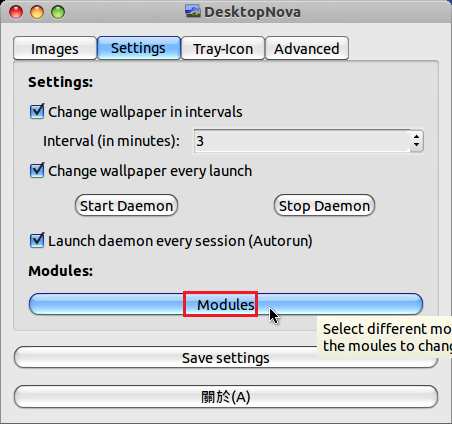
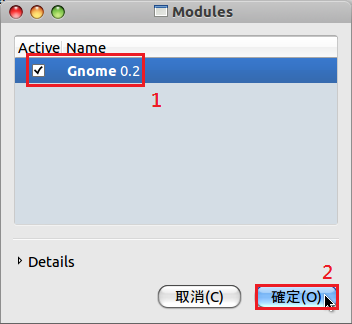
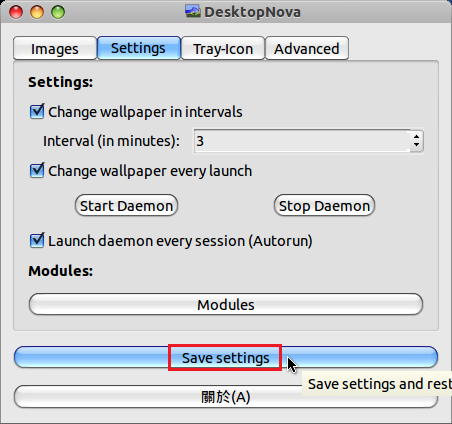
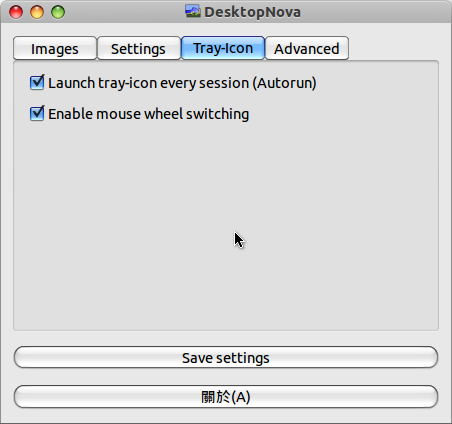
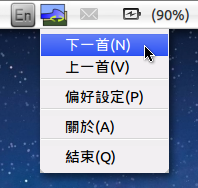
 [@more@]在套件搜尋了一下,尋找可以自動切換桌布的套件