Debian / Ubuntu update-rc.d 用法

長久以來,自己對 RedHat/CentOS Linux 以 rpm 為主的系統比較熟悉,對於以 deb 為主的 Debian/Ubuntu Linux 則比較陌生,但最近因為使用 Raspiberry Pi / Banana Pi / Cubie Truck  這一系列的,每天在操作的,幾乎都是以 Debian / Ubuntu 為主的系統,少部分是 ArchLinux,但對其中系統服務啟動與關閉,並不熟悉。
在 RedHat/CentOS Linux 之前的版本是使用 chkconfig / service,新的版本則改用 systemctl,而 Debian/Ubuntu 則是使用 update-rc.d / service ….。
底下文章參考:
Update-rc.d 命令用法详解 – Shb_derek技术专栏 – 博客频道 – CSDN.NET
小小工程師的生活雜記: [Ubuntu]關於update-rc.d 用法
IT 亂亂寫: 讓ubuntu開機後自動執行指定的script[@more@]
設定開機時啟動 vsftpd FTP Server
# update-rc.d -f vsftpd defaults
update-rc.d: warning: /etc/init.d/vsftpd missing LSB information
update-rc.d: see <http://wiki.debian.org/LSBInitScripts>
 Adding system startup for /etc/init.d/vsftpd …
   /etc/rc0.d/K20vsftpd -> ../init.d/vsftpd
   /etc/rc1.d/K20vsftpd -> ../init.d/vsftpd
   /etc/rc6.d/K20vsftpd -> ../init.d/vsftpd
   /etc/rc2.d/S20vsftpd -> ../init.d/vsftpd
   /etc/rc3.d/S20vsftpd -> ../init.d/vsftpd
   /etc/rc4.d/S20vsftpd -> ../init.d/vsftpd
   /etc/rc5.d/S20vsftpd -> ../init.d/vsftpd

設定開機時關閉 vsftpd FTP Server
# update-rc.d -f vsftpd remove
 Removing any system startup links for /etc/init.d/vsftpd …
   /etc/rc0.d/K20vsftpd
   /etc/rc1.d/K20vsftpd
   /etc/rc2.d/S20vsftpd
   /etc/rc3.d/S20vsftpd
   /etc/rc4.d/S20vsftpd
   /etc/rc5.d/S20vsftpd
   /etc/rc6.d/K20vsftpd

如果 B 服務要 A 服務先啟動時才能正常啟動
第一個數字愈大,代表開機時愈晚被啟動
第二個數字愈大,代表關機時愈晚被關閉
通常會把這二個數字設計成加起來等於 100
# update-rc.d -f A defaults 80 20
# update-rc.d -f B defaults 90 10

使用 sysv-rc-conf 來做檢查
# apt-get install sysv-rc-conf

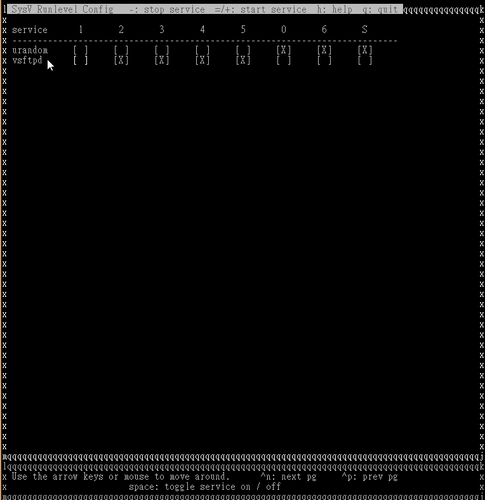
執行 sysv-rc-conf 來檢查 vsftpd 服務
# sysv-rc-conf

開啟 Nginx Web Server 的使用者家目錄

底下是在 Banaana Pi 下使用 Bananian 手動編譯 Nginx Web Server
修改 Nginx Web Server 的設定
# vim /etc/nginx/nginx.conf
        location ~ ^/~(?<userdir_user>.+?)(?<userdir_uri>/.*)?$ {
                 alias /home/$userdir_user/www$userdir_uri;
                 index index.php index.html index.htm;
                 autoindex on;

                 location ~ .*.php(/.*)*$ {
                    fastcgi_pass   unix:/var/run/php5-fpm.sock;
                    fastcgi_index  index.php;
                    fastcgi_param  SCRIPT_FILENAME /home/$userdir_user/www$userdir_uri$fastcgi_script_name;
                    include        fastcgi_params;
                }
        }

關閉 Nginx Web Server
# kill -9 $(ps aux | grep nginx | grep -v grep | awk ‘{print $2}’)

重新啟動 Nginx Web Server
# /usr/sbin/nginx
[@more@]
建立 pi 使用者測試
# /usr/sbin/useradd -d /home/pi -m -s /bin/false pi

建立使用者網頁目錄
# mkdir /home/pi/www

建立 php 測試檔案
# vim /home/pi/www/index.php
<?php
phpinfo();
?>

改變目錄及檔案的擁有者
# chown -R pi:pi /home/pi

更改目錄權限
# chmod 711 /home/pi

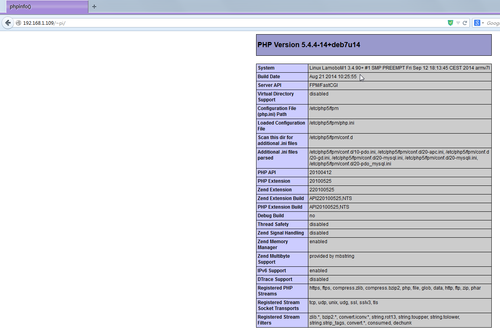
使用瀏覽器檢查

adminer – 管理 MySQL 資料庫的 PHP 程式

一般安裝完 MySQL/MariaDB SQL Server 之後,有些人會安裝 phpMyAdmin 來管理資料庫,不過之前一直有一些安全性上的漏洞,容易遭受攻擊,所以我通常不會安裝,或者是臨時須要時才安裝。
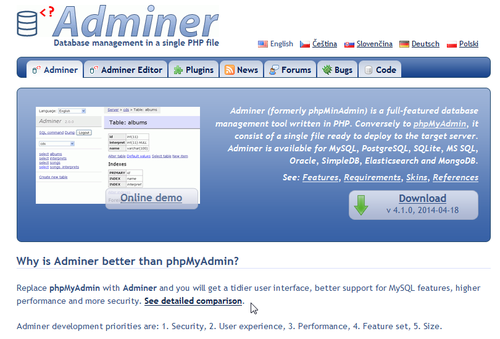
adminer 是一套和 phpMyAdmin 一樣,可以用來管理 SQL Server 的 PHP 程式,而且整個程式只需要一個檔案。
adminer 官方網站:http://www.adminer.org
[@more@]下載
http://www.adminer.org/#download

切換到網站根目錄
# cd /var/www

下載
# wget http://downloads.sourceforge.net/project/adminer/Adminer/Adminer%204.1.0/adminer-4.1.0-mysql.php

更改檔名
# mv adminer-4.1.0-mysql.php adminer.php

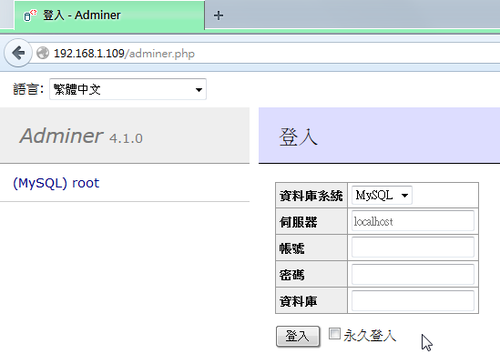
輸入 MySQL SQL Server 的管理者帳號及密碼

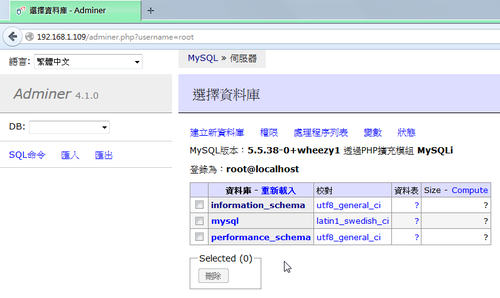
登入成功後就可以進行管理

Cubie Truck 測試 – Lubuntu 篇 – 擴展 root 分割區

Cubie Truck  Lubuntu Desktop 硬碟分割
$ sudo fdisk -l

Disk /dev/nand: 15.9 GB, 15938355200 bytes
255 heads, 63 sectors/track, 1937 cylinders, total 31129600 sectors
Units = sectors of 1 * 512 = 512 bytes
Sector size (logical/physical): 512 bytes / 512 bytes
I/O size (minimum/optimal): 512 bytes / 512 bytes
Disk identifier: 0x00000000

Disk /dev/nand doesn’t contain a valid partition table

Disk /dev/nanda: 67 MB, 67108864 bytes
255 heads, 63 sectors/track, 8 cylinders, total 131072 sectors
Units = sectors of 1 * 512 = 512 bytes
Sector size (logical/physical): 512 bytes / 512 bytes
I/O size (minimum/optimal): 512 bytes / 512 bytes
Disk identifier: 0x00000000

     Device Boot      Start         End      Blocks   Id  System

Disk /dev/nandb: 2147 MB, 2147483648 bytes
255 heads, 63 sectors/track, 261 cylinders, total 4194304 sectors
Units = sectors of 1 * 512 = 512 bytes
Sector size (logical/physical): 512 bytes / 512 bytes
I/O size (minimum/optimal): 512 bytes / 512 bytes
Disk identifier: 0x00000000

Disk /dev/nandb doesn’t contain a valid partition table

Disk /dev/nandc: 13.7 GB, 13706985472 bytes
255 heads, 63 sectors/track, 1666 cylinders, total 26771456 sectors
Units = sectors of 1 * 512 = 512 bytes
Sector size (logical/physical): 512 bytes / 512 bytes
I/O size (minimum/optimal): 512 bytes / 512 bytes
Disk identifier: 0xffffffff

Disk /dev/nandc doesn’t contain a valid partition table[@more@]/dev/nanda 是系統開機分割區
/dev/nandb 是 /root 分割區
/dev/nandc 是還沒使用的區域

參考網頁:
Cubietruck-Resize NAND | www.maruscha.org
cubieboard nand 重新分区扩容 – 我喜欢智能化 – 博客频道 – CSDN.NET

查看 Nand 硬碟分割表資訊
$ sudo nand-part -f a20 /dev/nand
check partition table copy 0: mbr: version 0x00000200, magic softw411
OK
check partition table copy 1: mbr: version 0x00000200, magic softw411
OK
check partition table copy 2: mbr: version 0x00000200, magic softw411
OK
check partition table copy 3: mbr: version 0x00000200, magic softw411
OK
mbr: version 0x00000200, magic softw411
3 partitions
partition  1: class =         DISK, name =   bootloader, partition start =    32768, partition size =   131072 user_type=0
partition  2: class =         DISK, name =       rootfs, partition start =   163840, partition size =  4194304 user_type=0
partition  3: class =         DISK, name =        UDISK, partition start =  4358144, partition size = 26574848 user_type=0

綠色是分割區的名字,粉紅色是分割區的起始位置,橘色是分割區的大小
以 root 分割為例
它的大小是 size =4194304  ; 4194304/1024/2=2048 = 2G
UDISK 是還未用到的區域,也就是 root 分割區要擴展的區域
如果要把全部的空間用完,root 分割區的大小 = 4194304 + 26574848 = 30769152

進行設定
$ sudo nand-part -f a20 /dev/nand 32768 ‘boot 131072’ ‘rootfs 30769152’  
check partition table copy 0: mbr: version 0x00000200, magic softw411
OK
check partition table copy 1: mbr: version 0x00000200, magic softw411
OK
check partition table copy 2: mbr: version 0x00000200, magic softw411
OK
check partition table copy 3: mbr: version 0x00000200, magic softw411
OK
mbr: version 0x00000200, magic softw411
3 partitions
partition  1: class =         DISK, name =   bootloader, partition start =    32768, partition size =   131072 user_type=0
partition  2: class =         DISK, name =       rootfs, partition start =   163840, partition size =  4194304 user_type=0
partition  3: class =         DISK, name =        UDISK, partition start =  4358144, partition size = 26574848 user_type=0
check partition table copy 0: mbr: version 0x00000200, magic softw411
check partition table copy 1: mbr: version 0x00000200, magic softw411
check partition table copy 2: mbr: version 0x00000200, magic softw411
check partition table copy 3: mbr: version 0x00000200, magic softw411

ready to write new partition tables:
mbr: version 0x00000200, magic softw411
2 partitions
partition  1: class =         DISK, name =         boot, partition start =    32768, partition size =   131072 user_type=0
partition  2: class =         DISK, name =       rootfs, partition start =   163840, partition size = 30769152 user_type=0

write new partition tables? (Y/N)
y
Failed rereading partition table: Device or resource busy

verifying new partition tables:
check partition table copy 0: mbr: version 0x00000200, magic softw411
OK
check partition table copy 1: mbr: version 0x00000200, magic softw411
OK
check partition table copy 2: mbr: version 0x00000200, magic softw411
OK
check partition table copy 3: mbr: version 0x00000200, magic softw411
OK
mbr: version 0x00000200, magic softw411
2 partitions
partition  1: class =         DISK, name =         boot, partition start =    32768, partition size =   131072 user_type=0
partition  2: class =         DISK, name =       rootfs, partition start =   163840, partition size = 30769152 user_type=0
rereading partition table… returned -1

重新啟動電腦
$ sudo reboot

重新設定 /dev/nandb 分割區大小
$ sudo resize2fs /dev/nandb
resize2fs 1.42.5 (29-Jul-2012)
Filesystem at /dev/nandb is mounted on /; on-line resizing required
old_desc_blocks = 1, new_desc_blocks = 1
The filesystem on /dev/nandb is now 3870720 blocks long.

原本 /root 分割區的大小
$ df -h
Filesystem      Size  Used Avail Use% Mounted on
/dev/root       2.0G 1020M  894M  54% /
devtmpfs        889M  4.0K  889M   1% /dev
tmpfs            20M  224K   20M   2% /tmp
none            197M  220K  197M   1% /run
none            5.0M     0  5.0M   0% /run/lock
none            985M  132K  985M   1% /run/shm
none            100M   12K  100M   1% /run/user

擴展 /root 分割區後的大小
$ df -h
Filesystem      Size  Used Avail Use% Mounted on
/dev/root        15G 1021M   13G   8% /
devtmpfs        889M  4.0K  889M   1% /dev
tmpfs            20M  4.0K   20M   1% /tmp
none            197M  212K  197M   1% /run
none            5.0M     0  5.0M   0% /run/lock
none            985M     0  985M   0% /run/shm
none            100M   12K  100M   1% /run/user

Lamobo M1 測試 – Bananian 篇 安裝 Nginx / MySQL / PHP Server

安裝 Nginx Web Server
# apt-get install nginx

不過安裝的版本有些舊
# nginx -v
nginx version: nginx/1.2.1

移除 nginx 套件
# apt-get remove –purge libfreetype6 libgd2-noxpm libgeoip1 libjpeg8 libpcre3 libpng12-0 libxml2 libxslt1.1 nginx-common nginx-full nginx

所以改用 Source Code 的方式來安裝[@more@]底下文章參考 Linux Pi的奇幻旅程(22)-編譯Nginx – iT邦幫忙::IT知識分享社群

安裝編譯時所需套件
# apt-get install build-essential

Nginx 官方網站:http://nginx.org/

下載 Source Code
# wget http://nginx.org/download/nginx-1.6.2.tar.gz

解壓縮
# tar xvzf nginx-1.6.2.tar.gz

切換目錄
# cd nginx-1.6.2

安裝編譯 nginx 所需套件
# apt-get install libpcre3* libssl-dev

進行編譯
# ./configure –prefix=/usr –sbin-path=/usr/sbin/nginx –conf-path=/etc/nginx/nginx.conf –pid-path=/var/run/nginx.pid –lock-path=/var/lock/nginx.lock –user=www-data –group=www-data –http-log-path=/var/log/nginx/access.log –error-log-path=/var/log/nginx/error.log –http-client-body-temp-path=/var/lib/nginx/body –http-proxy-temp-path=/var/lib/nginx/proxy –http-fastcgi-temp-path=/var/lib/nginx/proxy –http-uwsgi-temp-path=/var/lib/nginx/uwsgi –http-scgi-temp-path=/var/lib/nginx/scgi –with-http_ssl_module –with-http_stub_status_module –with-debug

進行安裝
# make;make install

執行時出現錯誤
# /usr/sbin/nginx
nginx: [emerg] mkdir() “/var/lib/nginx/body” failed (2: No such file or directory)

建立目錄
# mkdir -p /var/lib/nginx/body

檢查是否有執行成功
# netstat -ant | grep :80
tcp        0      0 0.0.0.0:80              0.0.0.0:*               LISTEN

安裝的 nginx 版本
# nginx -v
nginx version: nginx/1.6.2

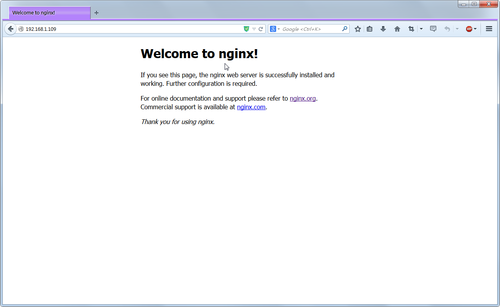
使用瀏覽器檢查

安裝 MySQL Server
# apt-get install mysql-server mysql-client

MySQL Server 安裝後設定
# /usr/bin/mysql_secure_installation

安裝 PHP
# apt-get install php5-fpm php5-mysql php5-gd php-apc php5

PHP 版本
# php5-fpm -v
PHP 5.4.4-14+deb7u14 (fpm-fcgi) (built: Aug 21 2014 10:32:42)
Copyright (c) 1997-2009 The PHP Group
Zend Engine v2.4.0, Copyright (c) 1998-2012 Zend Technologies

建立網站根目錄
# mkdir /var/www

改變目錄擁有者及群組
# chown -R www-data:www-data /var/www

查看 php5-fpm 執行時產生的 socket 檔
# ls -ls /var/run/php5-fpm.sock
0 srw-rw—- 1 www-data www-data 0 Sep 27 16:20 /var/run/php5-fpm.sock

修改 nginx Web Server 設定檔
# vim /etc/nginx/nginx.conf
    server {
        listen       80;
        server_name  localhost;

        #charset koi8-r;

        #access_log  logs/host.access.log  main;

        location / {
            root   /var/www;
            index  index.php index.html index.htm;
        }

        #error_page  404              /404.html;

        # redirect server error pages to the static page /50x.html
        #
        error_page   500 502 503 504  /50x.html;
        location = /50x.html {
            root   html;
        }

        # proxy the PHP scripts to Apache listening on 127.0.0.1:80
        #
        #location ~ .php$ {
        #    proxy_pass   http://127.0.0.1;
        #}

        # pass the PHP scripts to FastCGI server listening on 127.0.0.1:9000
        #
        location ~ .php$ {
            root           /var/www;
        #    fastcgi_pass   127.0.0.1:9000;
            try_files $uri =404;
            fastcgi_split_path_info ^(.+.php)(/.+)$;
            fastcgi_pass unix:/var/run/php5-fpm.sock;
            fastcgi_index  index.php;
            fastcgi_param  SCRIPT_FILENAME $document_root$fastcgi_script_name;
            include        fastcgi_params;
        }

        # deny access to .htaccess files, if Apache’s document root
        # concurs with nginx’s one
        #
        location ~ /.ht {
            deny  all;
        }
    }

檢查設定檔是否正確
# /usr/sbin/nginx -t
nginx: the configuration file /etc/nginx/nginx.conf syntax is ok
nginx: configuration file /etc/nginx/nginx.conf test is successful

關閉 nginx web Server
# kill -9 $(ps aux | grep nginx | grep -v grep | awk ‘{print $2}’)
or
# killall nginx

重新執行
# /usr/sbin/nginx

執行 php5-fpm
# /etc/init.d/php5-fpm start

檢查 php 是否能正常執行
# vim /var/www/index.php
<?php
phpinfo();
?>

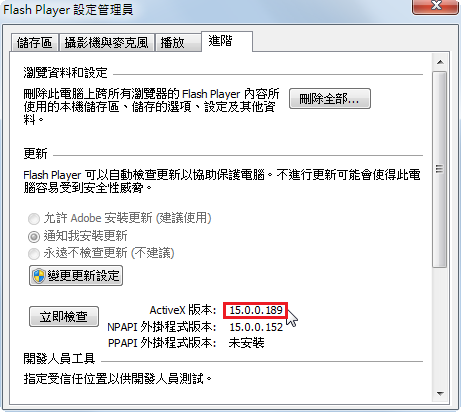
Adobe Flash Player 15.0.0.189

Adobe Flash Player 15.0.0.189 釋出

Windows 平台
Internet Explorer:
http://download.macromedia.com/pub/flashplayer/current/support/install_flash_player_ax.exe
Windows 8/8.1 版則要從 Windows Update 中更新

All Other Browsers(Firefox,Safari & Opera):
http://download.macromedia.com/pub/flashplayer/current/support/install_flash_player.exe

Mac 版本:
http://download.macromedia.com/pub/flashplayer/current/support/install_flash_player_osx.dmg

Cubie Truck 測試 – 解決無法 ssh 連線的問題

亂玩了一下子,Lubuntu 系統被玩掛了,所以又重新使用 PhoenixSuit 燒錄系統到 Nand Flash。
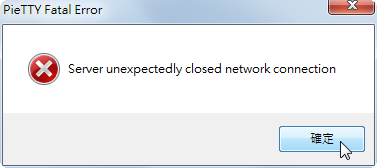
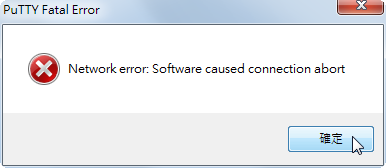
系統開機後,發現竟然無法 ssh 連線
Pietty 錯誤訊息

Putty 錯誤訊息
[@more@]ssh 連線出現的錯誤訊息
# ssh linaro@192.168.1.110
Read from socket failed: Connection reset by peer

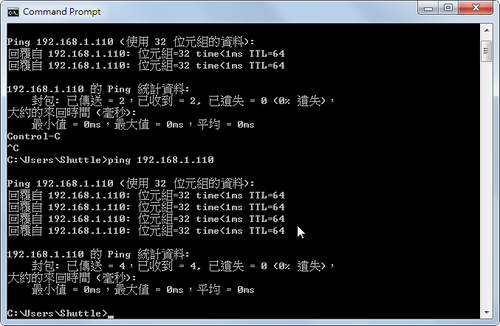
但系統 Ping 的到

ssh 服務有開放
# netstat -ant | grep :22 | grep LISTEN
tcp        0      0 0.0.0.0:22              0.0.0.0:*               LISTEN
tcp6       0      0 :::22                   :::*                    LISTEN

iptables 防火牆也沒有阻擋
# iptables -L -n
Chain INPUT (policy ACCEPT)
target     prot opt source               destination

Chain FORWARD (policy ACCEPT)
target     prot opt source               destination

Chain OUTPUT (policy ACCEPT)
target     prot opt source               destination

後來檢查 ssh server 的設定檔目錄
# cd /etc/ssh
# ls -latr
total 156
-rw-r–r–  1 root root   1669 Sep  6  2012 ssh_config
-rw-r–r–  1 root root 136156 Sep  6  2012 moduli
-rw-r–r–  1 root root      0 Oct  8 13:40 sshd_config
-rw-r–r–  1 root root      0 Oct  8 13:40 ssh_host_rsa_key.pub
-rw——-  1 root root      0 Oct  8 13:40 ssh_host_rsa_key
-rw-r–r–  1 root root      0 Oct  8 13:40 ssh_host_dsa_key.pub
-rw——-  1 root root      0 Oct  8 13:40 ssh_host_dsa_key
-rw-r–r–  1 root root      0 Oct  8 13:40 ssh_host_ecdsa_key.pub
-rw——-  1 root root      0 Oct  8 13:40 ssh_host_ecdsa_key
-rw——-  1 root root    980 Oct  8 13:42 ssh_host_key
drwxr-xr-x  2 root root   4096 Oct  8 13:42 .
-rw-r–r–  1 root root    645 Oct  8 13:42 ssh_host_key.pub
drwxrwxr-x 97 root root   4096 Oct  8 13:51 ..

發現 ssh_host_* key 的檔案大小都是 0

建立 ssh_host_key
# ssh-keygen -t rsa -f /etc/ssh/ssh_host_rsa_key
Generating public/private rsa key pair.
/etc/ssh/ssh_host_rsa_key already exists.
Overwrite (y/n)? y
Enter passphrase (empty for no passphrase):
Enter same passphrase again:
Your identification has been saved in /etc/ssh/ssh_host_rsa_key.
Your public key has been saved in /etc/ssh/ssh_host_rsa_key.pub.
The key fingerprint is:
8c:0a:32:2a:1b:02:6f:70:a1:2e:44:50:ee:35:f3:de root@cubietruck
The key’s randomart image is:
+–[ RSA 2048]—-+
|…              |
|..               |
| .o +            |
|.o o + o         |
|*.+   o S        |
|=* . o .         |
|*.o . . E        |
|++               |
|.                |
+—————–+
# ssh-keygen -t dsa -f /etc/ssh/ssh_host_dsa_key
Generating public/private dsa key pair.
/etc/ssh/ssh_host_dsa_key already exists.
Overwrite (y/n)? y
Enter passphrase (empty for no passphrase):
Enter same passphrase again:
Your identification has been saved in /etc/ssh/ssh_host_dsa_key.
Your public key has been saved in /etc/ssh/ssh_host_dsa_key.pub.
The key fingerprint is:
2f:36:fc:7c:5b:d4:d9:33:f4:2a:e6:fb:9b:5f:8c:81 root@cubietruck
The key’s randomart image is:
+–[ DSA 1024]—-+
|                 |
|                 |
|               . |
|             …+|
|        S   E o++|
|       . .   . =o|
|        = . o + o|
|       . = o.o ..|
|          o.+++o.|
+—————–+

建立完成後,就可以正常連線了!
# ssh linaro@192.168.1.110
The authenticity of host ‘192.168.1.110 (192.168.1.110)’ can’t be established.
RSA key fingerprint is 8c:0a:32:2a:1b:02:6f:70:a1:2e:44:50:ee:35:f3:de.
Are you sure you want to continue connecting (yes/no)? yes