光碟開機畫面,選擇 Install SL 7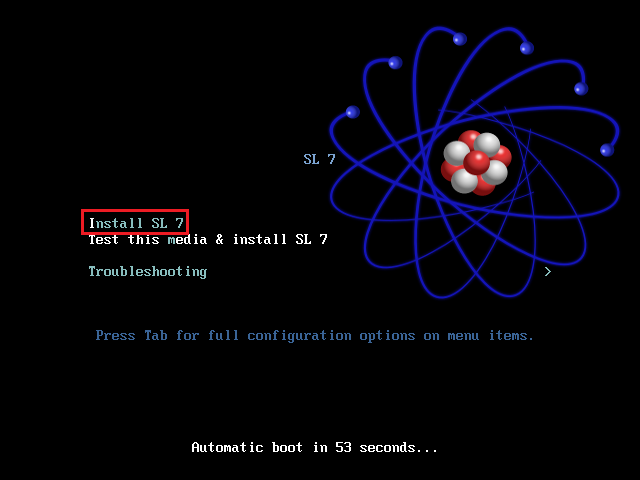
選擇安裝的語系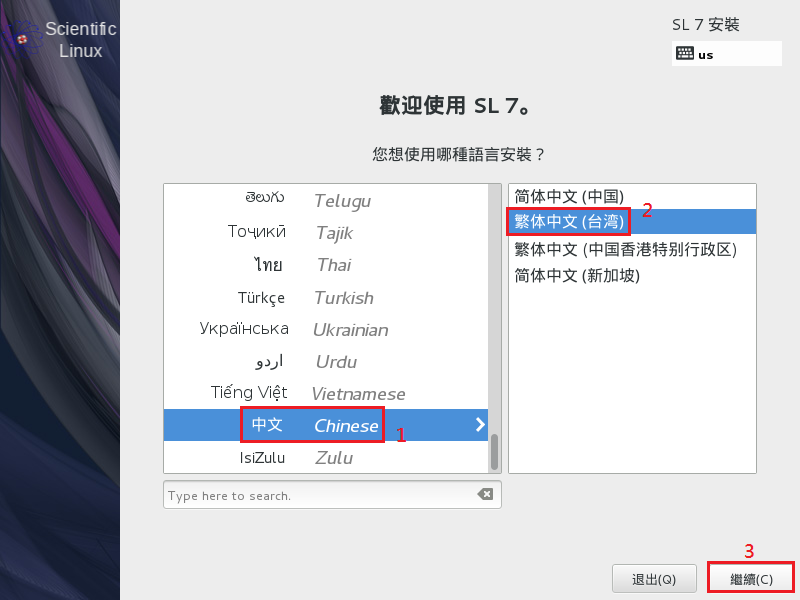 [@more@]
設定要安裝的套件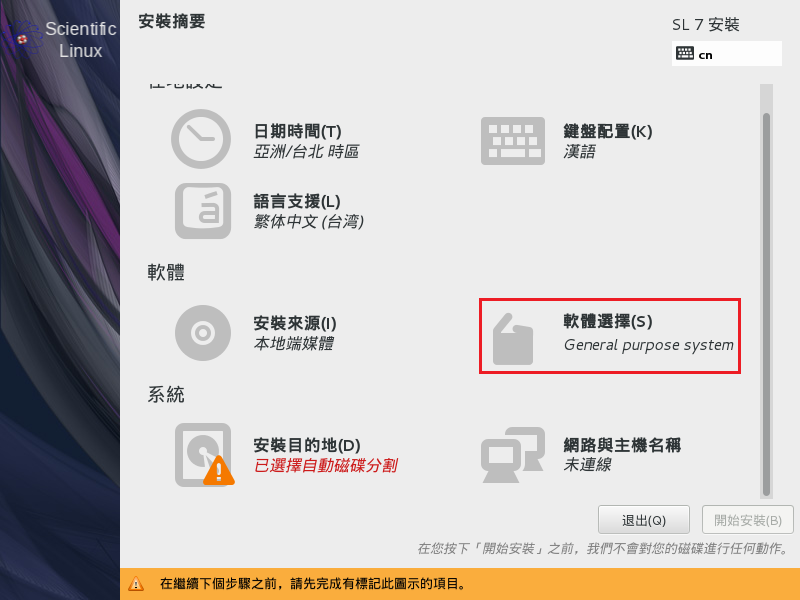
依需求選擇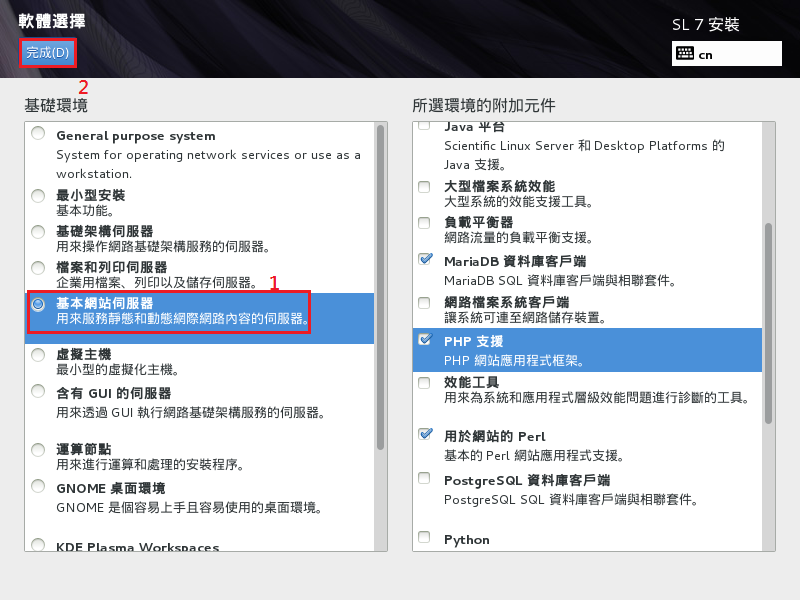
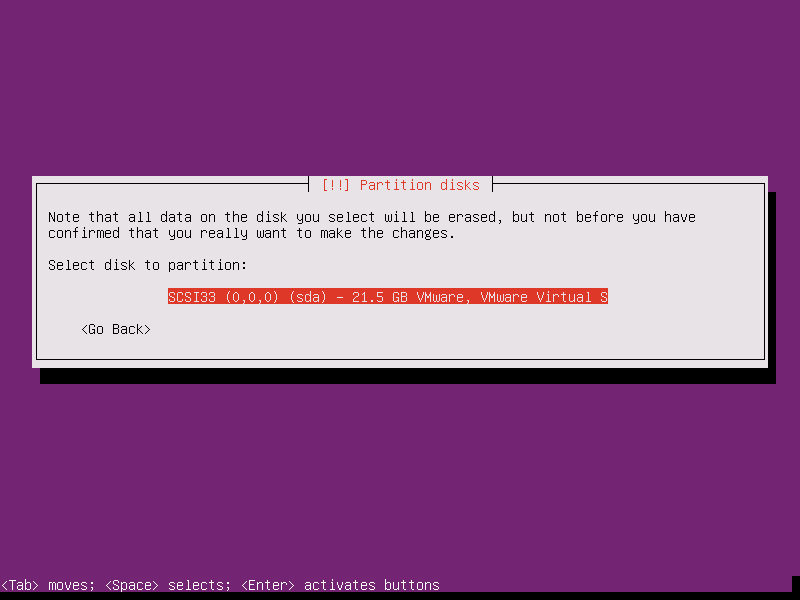
分割硬碟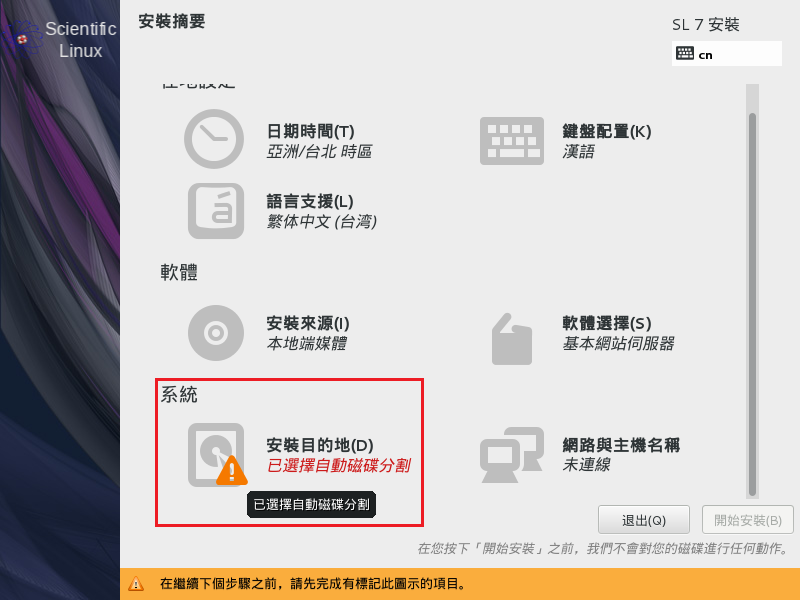
硬碟分割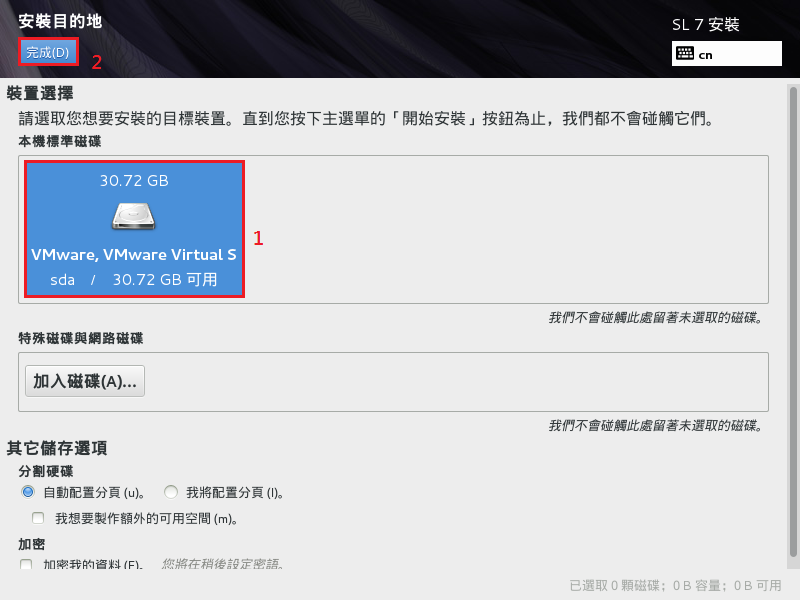
網路設定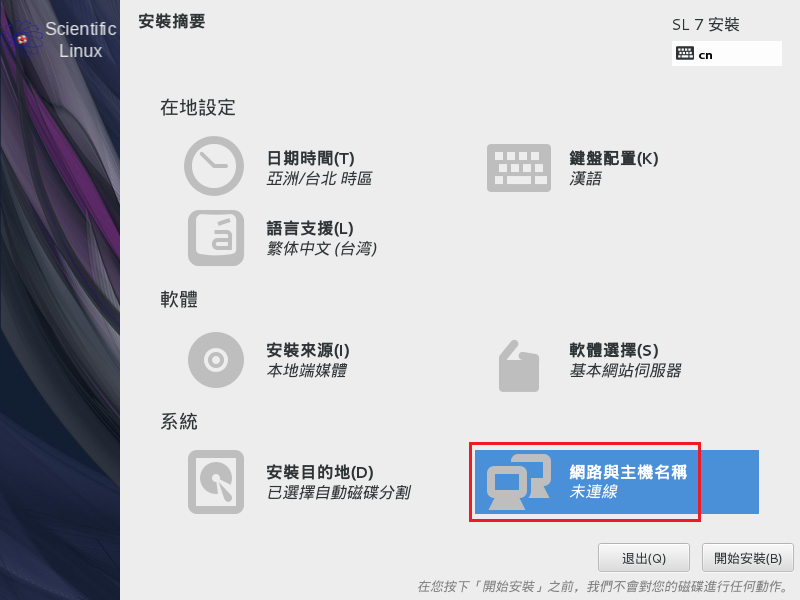
開啟網路,使用 DHCP 自動取得 IP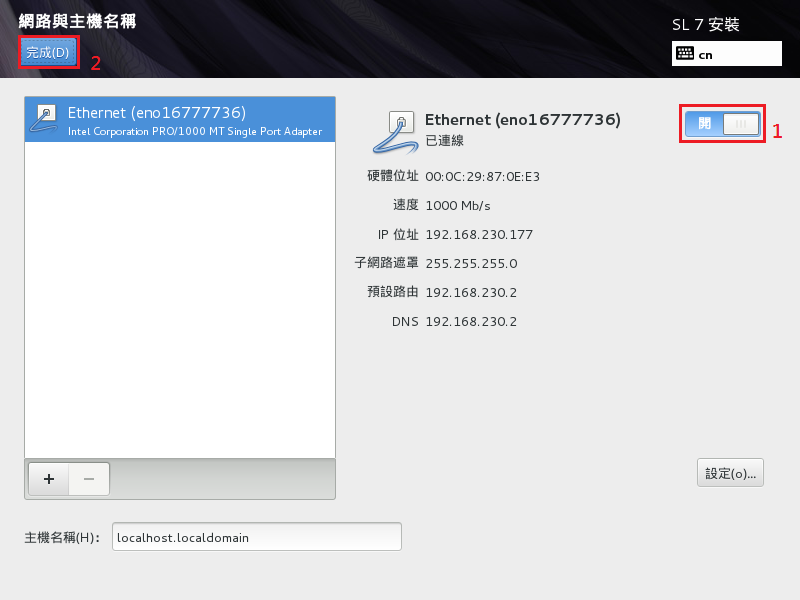
選擇 開始安裝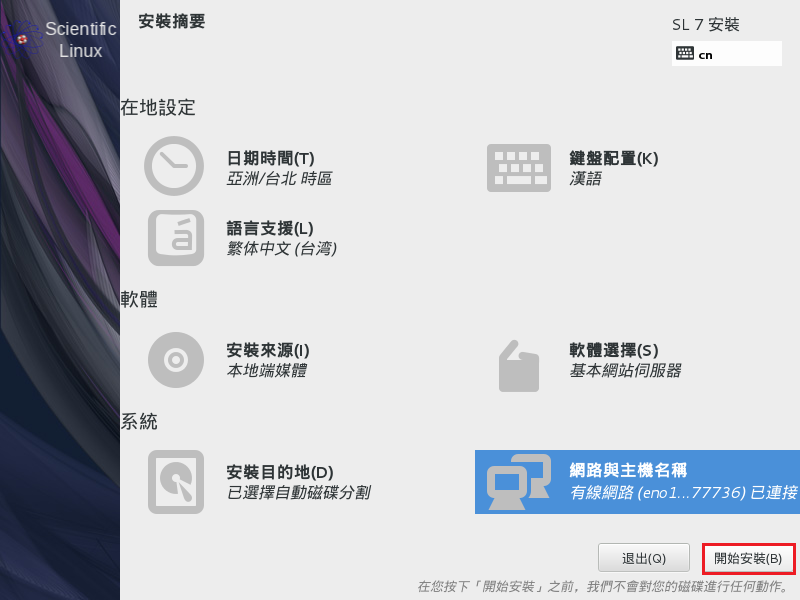
設定 root 密碼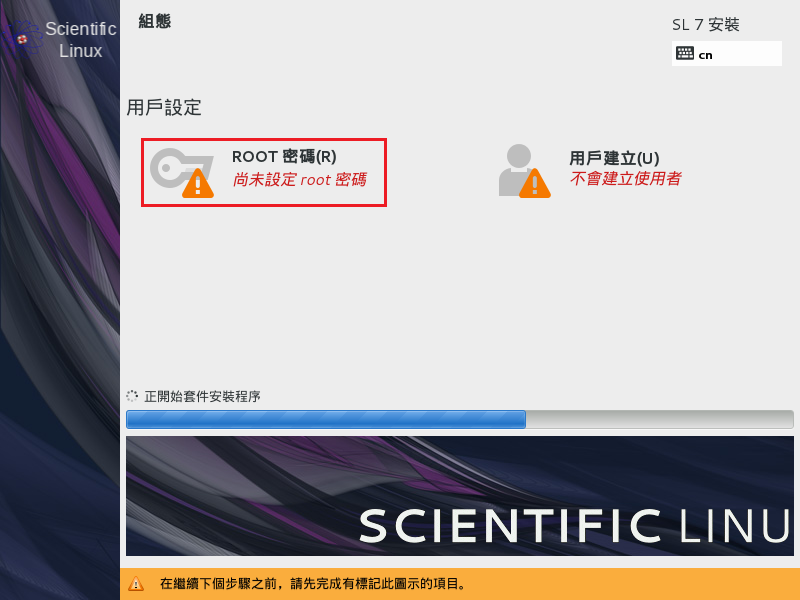
設定 root 的密碼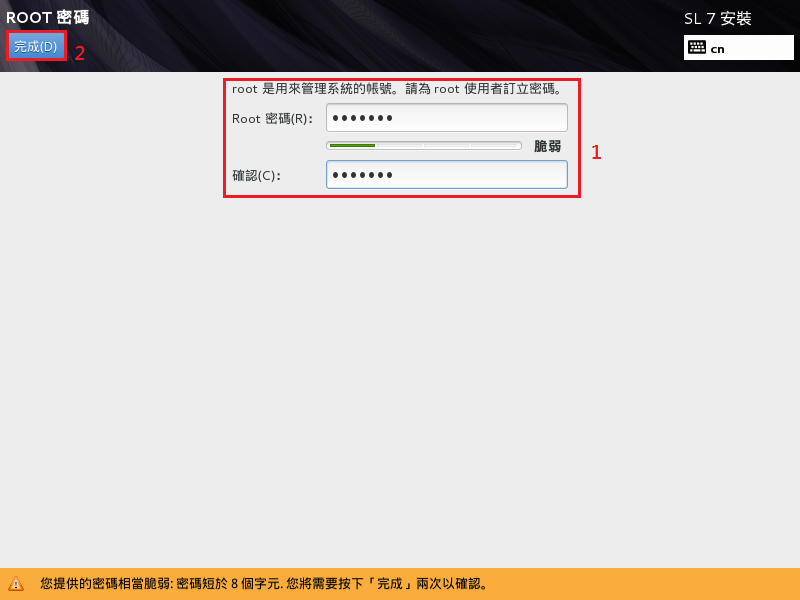
安裝中
安裝完成,選擇 重新開機(R)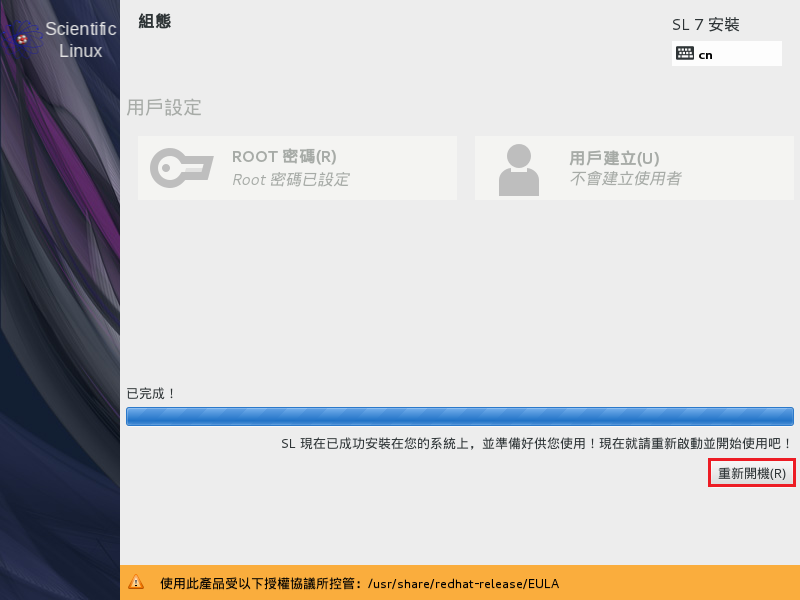
和之前的版本差不多,不過現在套件安裝的選項好像少很多,沒有像以前可以自訂,很多的部分都要在安裝後再做調整。

全新的繁體中文 WordPress 網站《宜蘭部落格教育平台 網站》
光碟開機畫面,選擇 Install SL 7
選擇安裝的語系[@more@]
設定要安裝的套件
依需求選擇
分割硬碟
硬碟分割
網路設定
開啟網路,使用 DHCP 自動取得 IP
選擇 開始安裝
設定 root 密碼
設定 root 的密碼
安裝中
安裝完成,選擇 重新開機(R)
和之前的版本差不多,不過現在套件安裝的選項好像少很多,沒有像以前可以自訂,很多的部分都要在安裝後再做調整。
下載網址:http://forum.lemaker.org/thread-796-4-1-4.html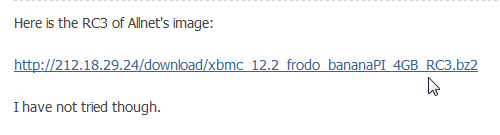
解壓縮後,檔案名稱要自行加上 .img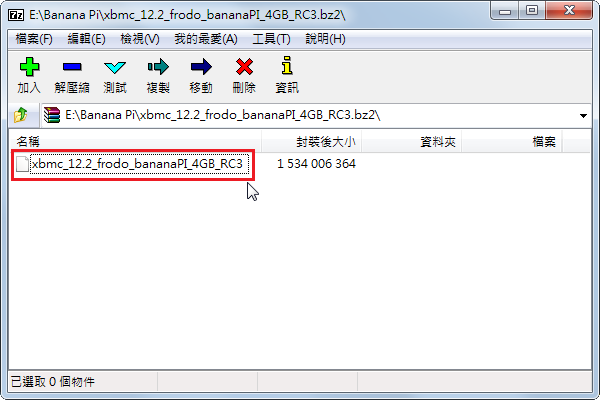 [@more@]從檔案名稱可以了解系統是 based on lubuntu3 / xbmc 12.02 rc2 / 4GB SD-Card.
開機完成後直接進入 XBMC,介面是英文的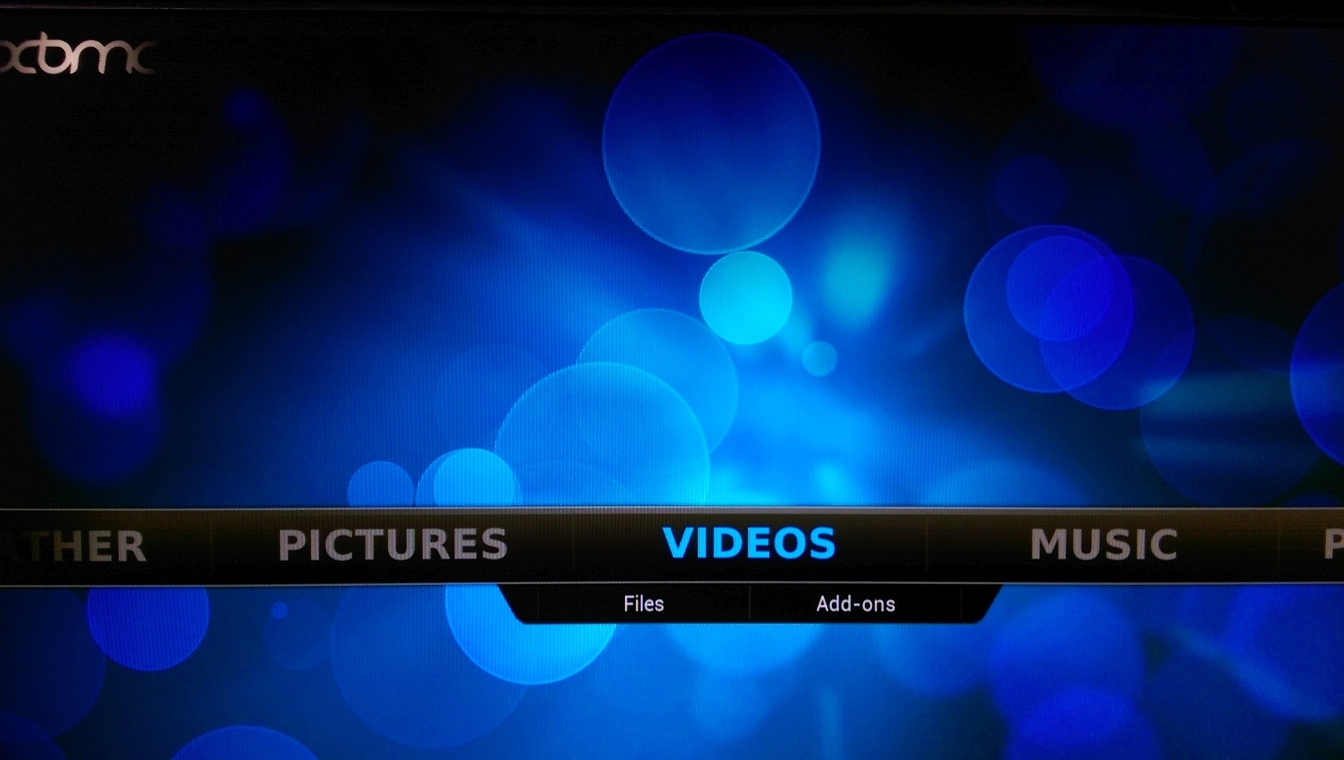
中文化
System / Settings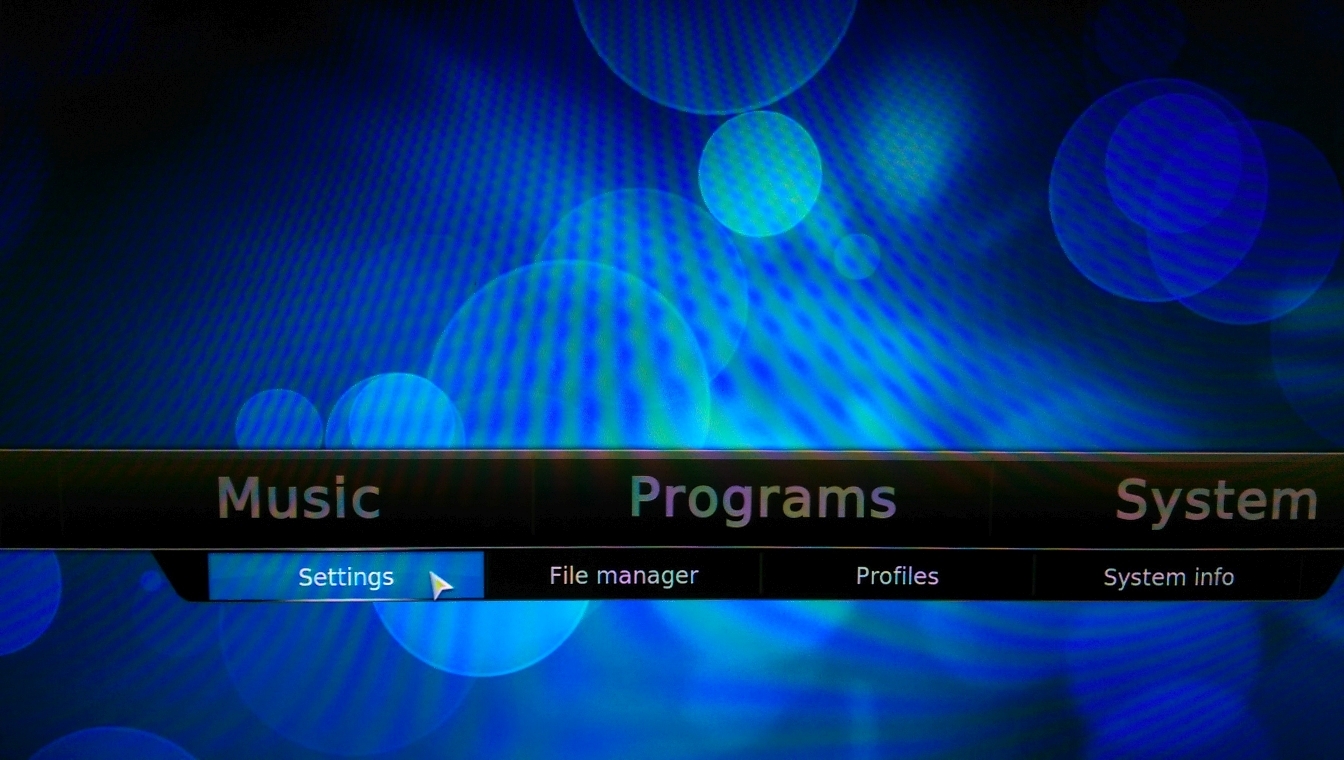
Appearance
更改 Skin / Fonts 從 Skin default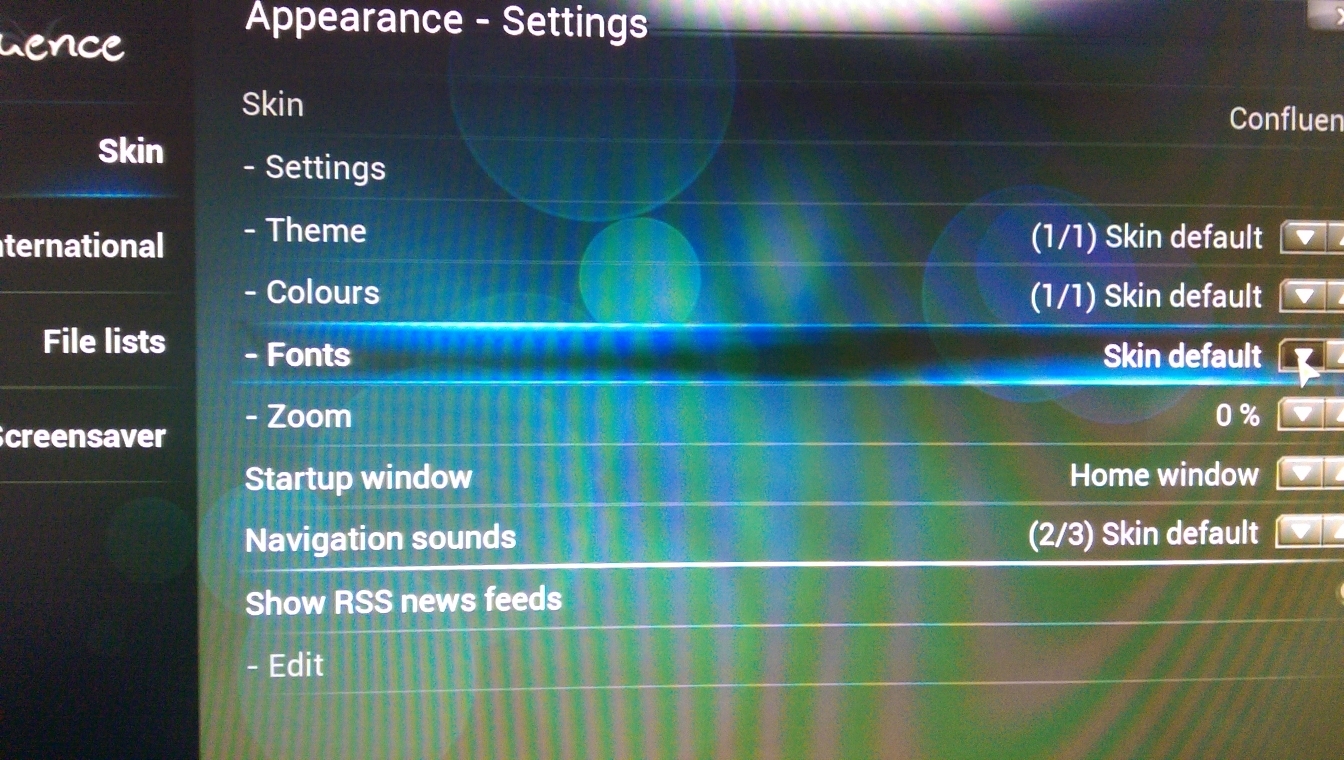
改成 Arial based
語言設定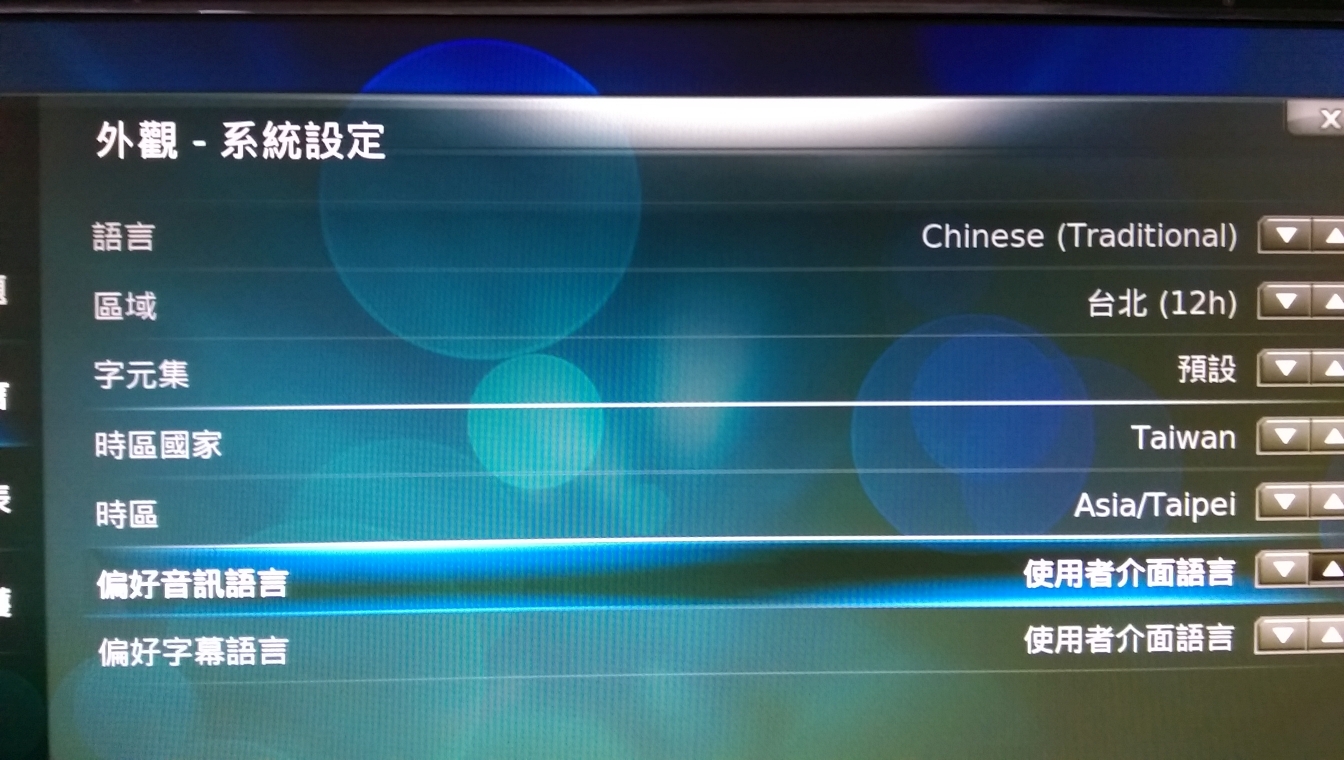
比較特別的是有 天氣 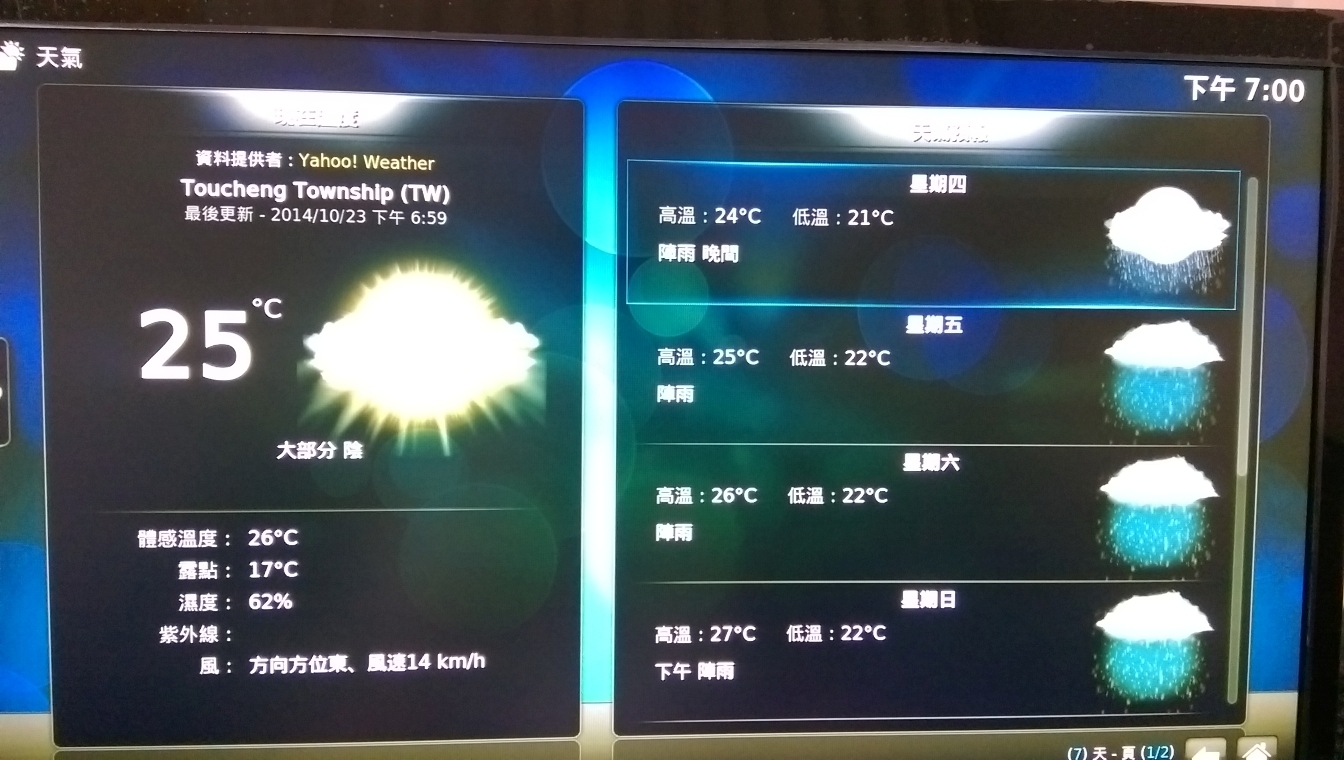
播放 720p 影片即會有稍微延遲的情形,1080p 則更明顯
Banana Pi 似乎不像 Raspberry Pi 有硬體解碼的樣子,所以即便只是 720p,也有些問題,1080p 問題更明顯,同樣的檔案,在 Raspberry Pi 播放時,流暢很多。這或許可以解釋為什麼官方網站上並沒有提供 XBMC 的 Image 檔。
另外,由於無法切換到 Console 介面,所以即便是使用超過 4G 的記憶卡,也無法擴充剩下的空間。
在 Web Server 的目錄中,通常會使用 index.html / index.php 等來當做預設打開的檔案,如果目錄中沒有這一類的檔案,就會無法瀏覽目錄中的檔案,這樣可以保護可能因設定不當而造成的資料外洩。
但有時候,目錄中的檔案為了方便使用者下載,所以需要將目錄列出來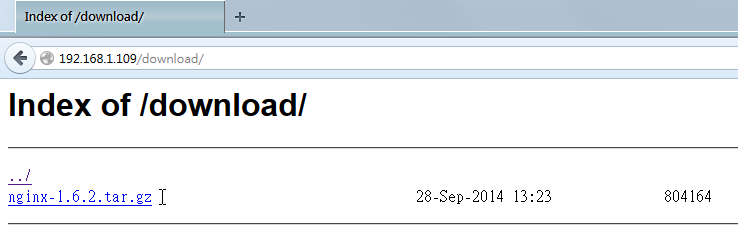 [@more@]在 Nginx Web Server 的設定方式
# vim /etc/nginx/nginx.conf
以 /usr/share/nginx/www/download 目錄為例
在 http { 段落中加入
location /download {
root /usr/share/nginx;
index index.html index.htm;
autoindex on;
}
重新啟動 Nginx Web Server
# /etc/init.d/nginx restart
下載網址:http://forum.lemaker.org/thread-2037-1-1-1.html
系統是 base on Lubuntu 14.04,解開的檔案有 14.7G,所以至少要使用 16G 的 SD 卡
開機之後先進入 Lubuntu,再切換到 XBMC
XBMC 英文介面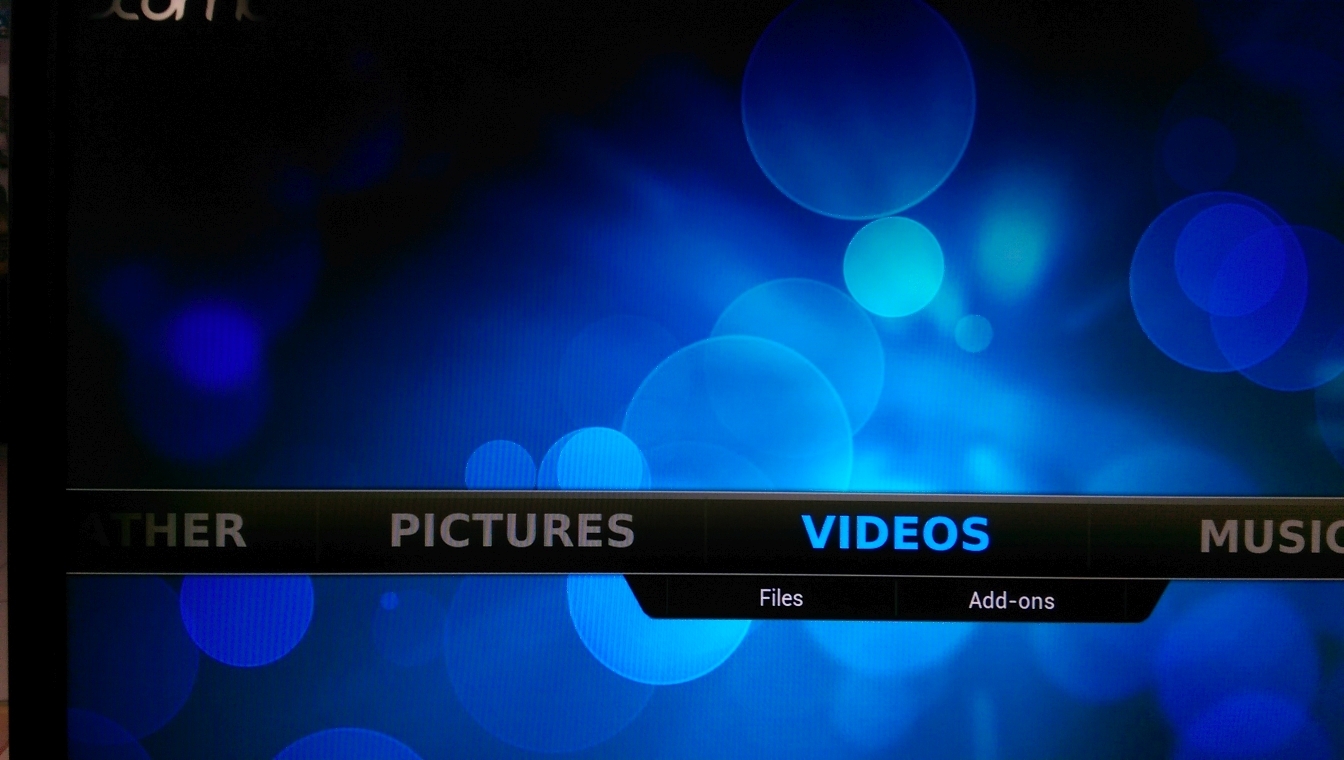 [@more@]
中文化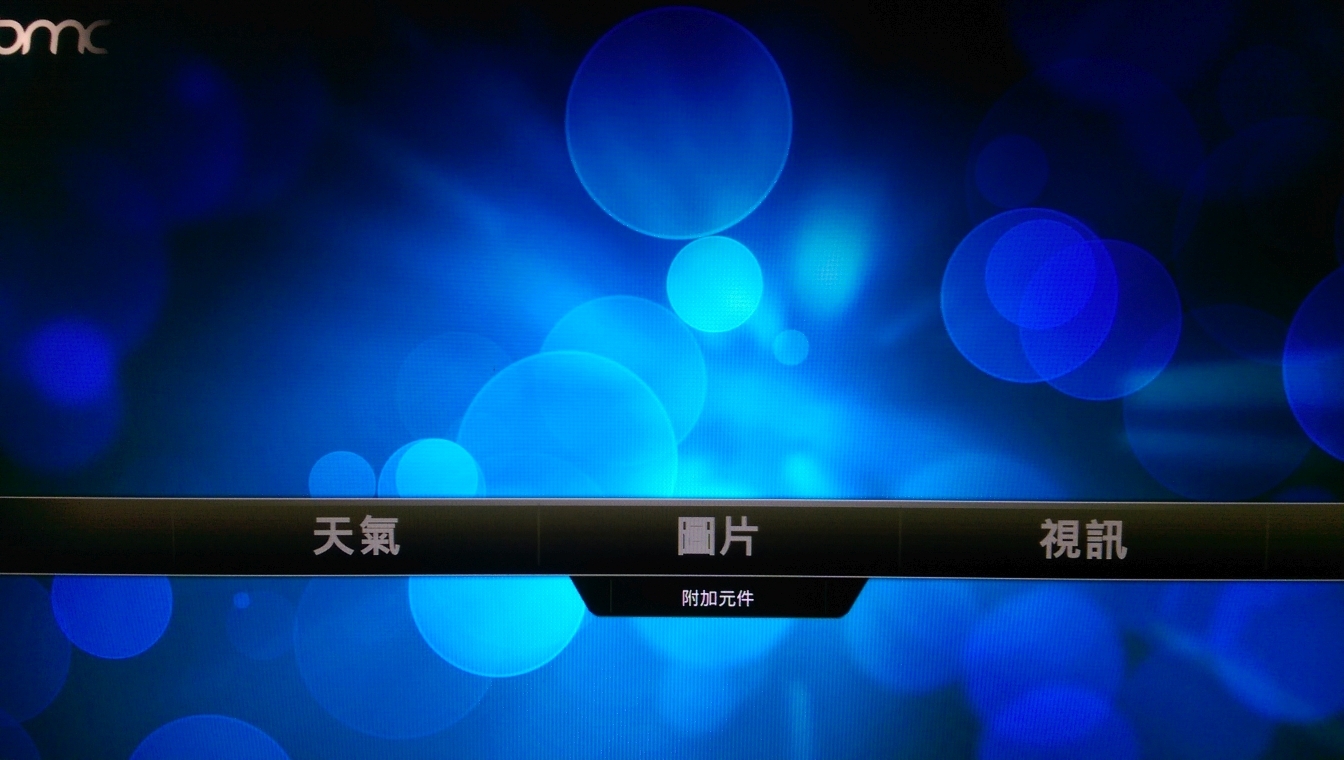
很詭異的是,播放影片時,竟然會切換回 Lubuntu,使用 mplayer2 播放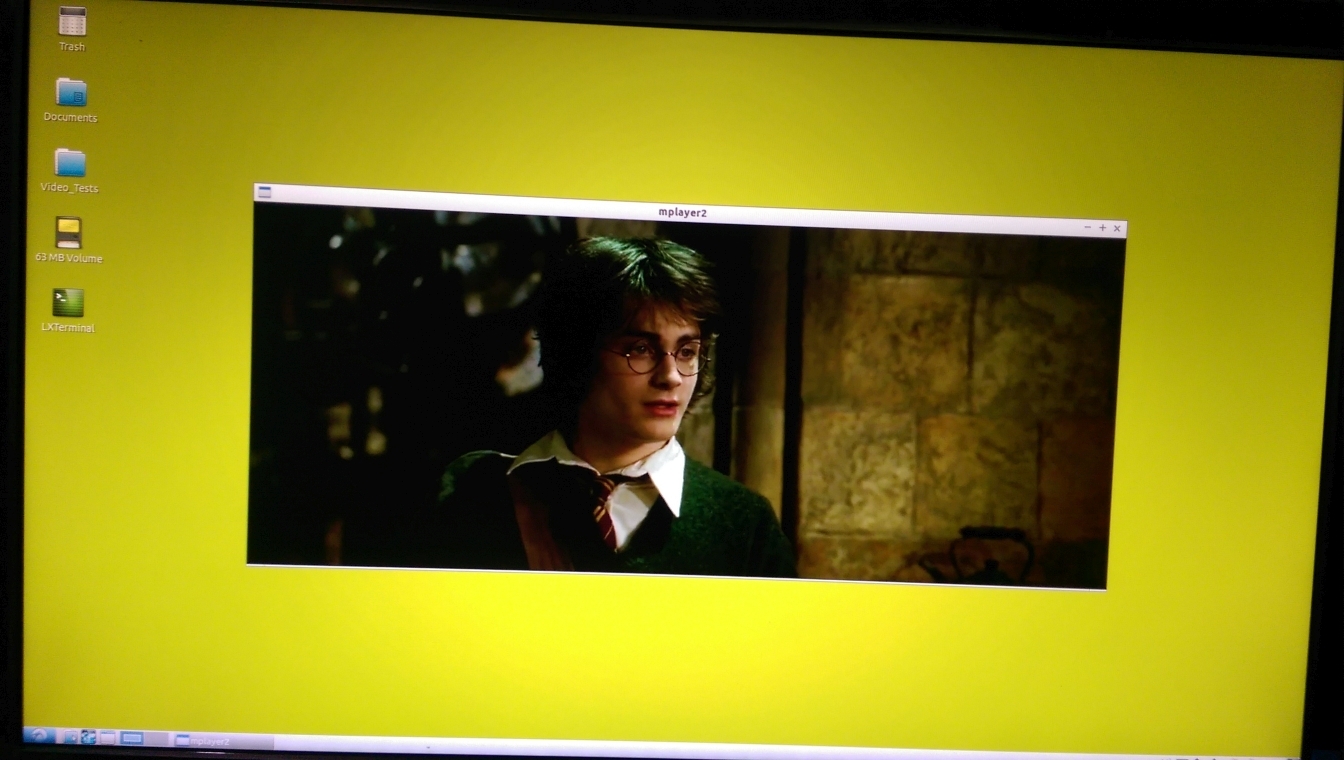
系統的 Video_Tests 目錄中的測試檔,難怪 Image 會那麼大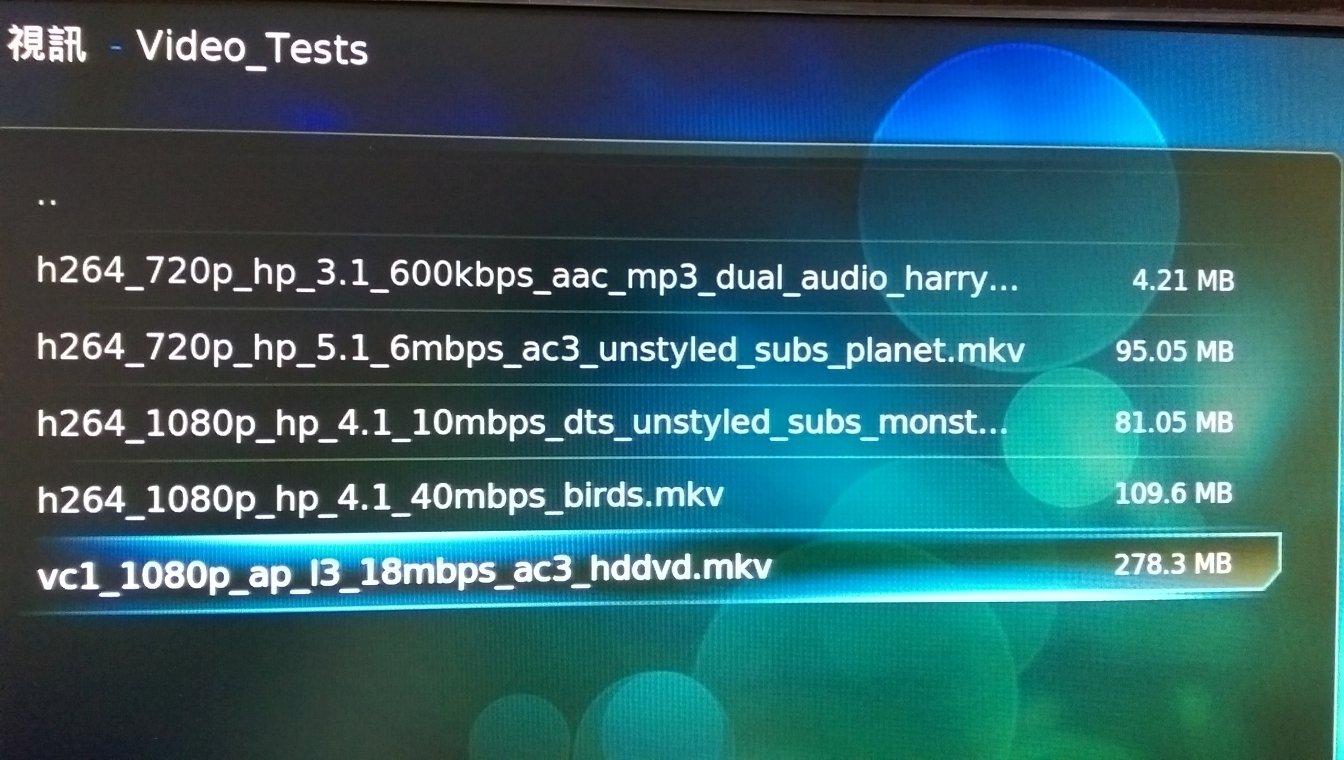
播 720p / 1080p 影片檔,竟然會直接切換回 Lubuntu ?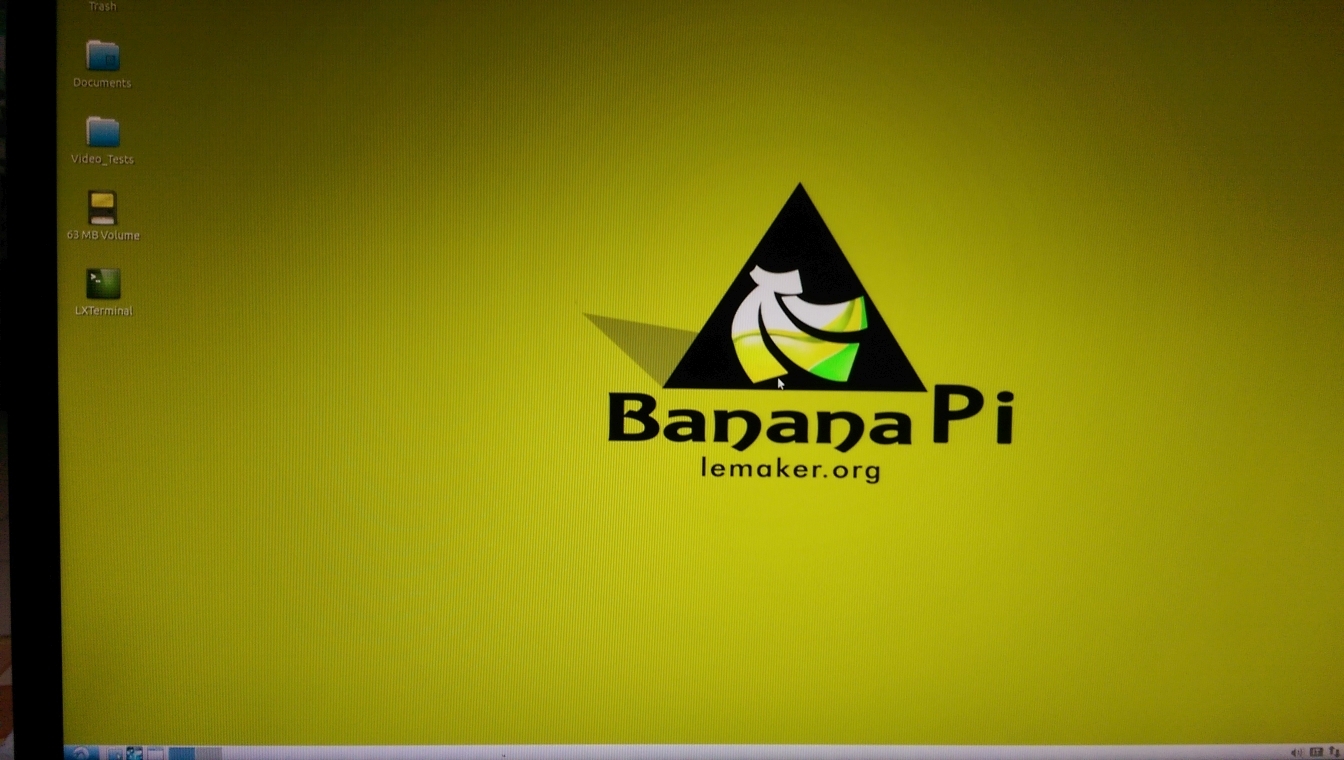
XBMC 是一套免費且 Open Source 開放源碼的軟體,支援多種作業系統平台,如:Windows / Linux / Mac / Raspberry Pi…,自己在 Raspberry Pi 使用過,可以流暢播放 1080p 的影片。
XBMC 官方網站:http://xbmc.org
目前 Stable 版本是 13.2 Gotham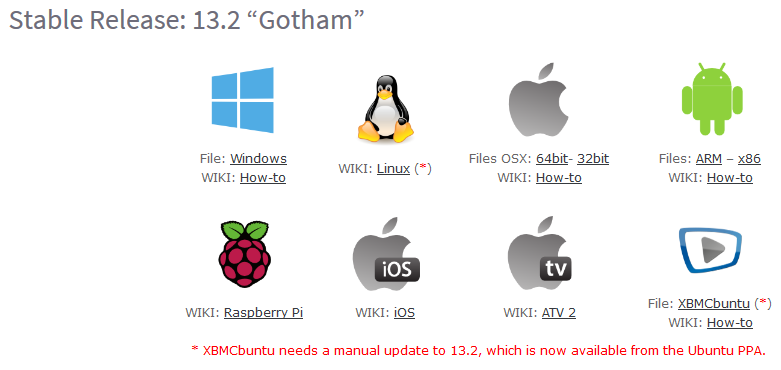
開發版本是 14.0 Helix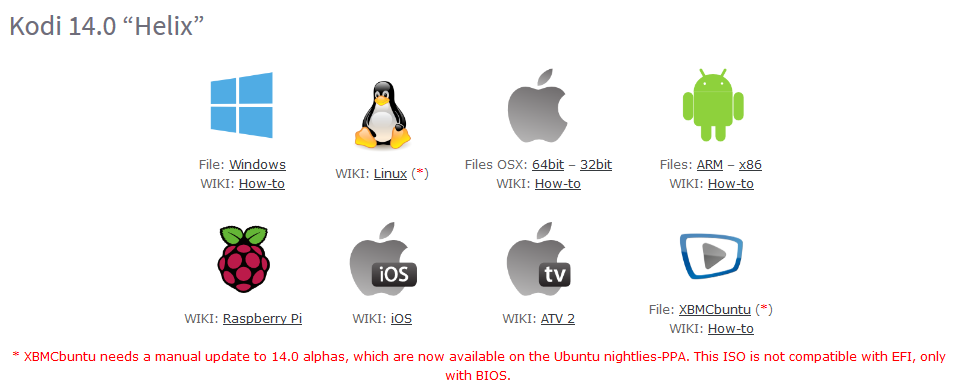 [@more@]
Banana Pi 本身的硬體效能比 Raspberry Pi 更加的好,所以按道理來說,在播放影片時應該會比 Raspberry Pi 更加流暢,可惜的是,目前在 Banana Pi 的下載網頁,仍然沒有 XBMC 的映像檔可以下載。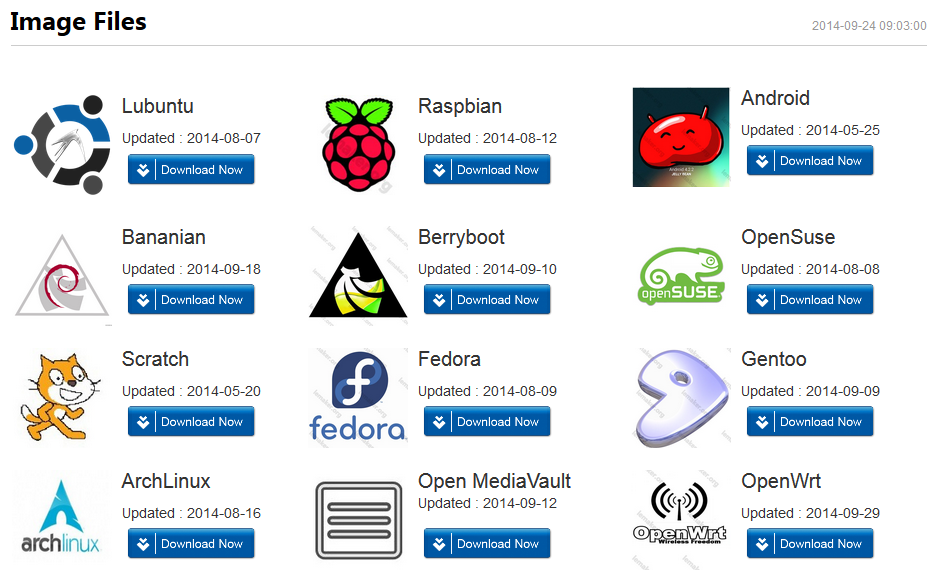
不過在 官方的論壇 中,已經有高手自己動手完成了,有興趣的人,可以自行下載下來用看看!
在第 4 頁的 34F
does the Banana PI support XBMC? – XBMC – Banana Pro | Banana Pi Forum – Powered by Discuz!
在第 1 頁的 1F
Lubuntu v3.1.x – XBMC added – XBMC – Banana Pro | Banana Pi Forum – Powered by Discuz!
用起來的感覺之前的版本差不多
光碟開機畫面,選擇 中文(繁體) [@more@]選擇 安裝 Ubuntu 伺服器(I)
選擇安裝時用的語系
選擇所在的地區國家


不偵測鍵盤型式
選擇 鍵盤型式


設定主機名稱
建立一個新的使用者,並設定密碼


是否要加密使用者的家目錄
設定時區

分割硬碟

安裝系統
沒有經過 Proxy
設定 apt
設定套件更新的方式
設定要安裝的服務
安裝系統中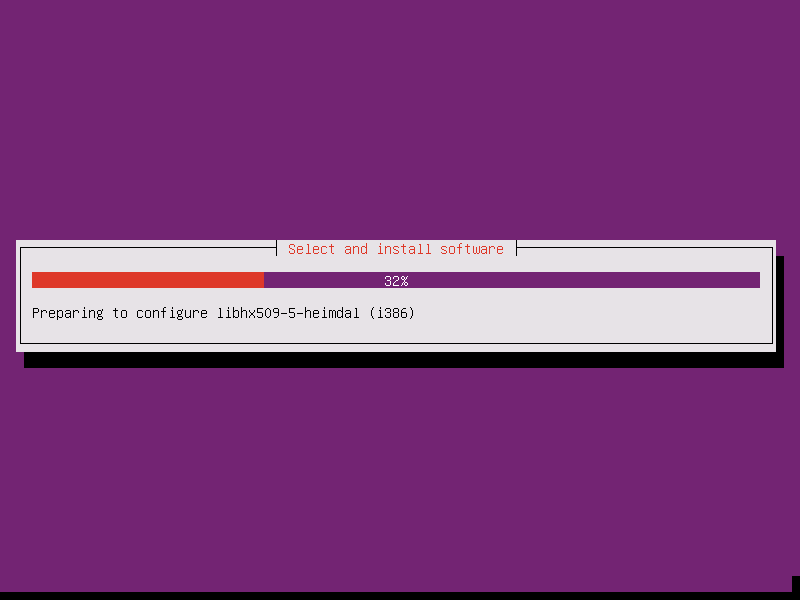
安裝 grub
終於完成安裝
這裡使用的是傳統介面
參考文章:
Ubuntu 12.04 LTS (Precise Pangolin) beta 1 快正式登場 [論壇 – Ubuntu安裝問題] | Ubuntu 正體中文站
在工作列的前面,按 Win 鍵+Alt+滑鼠右鍵,選擇 加入面板(A)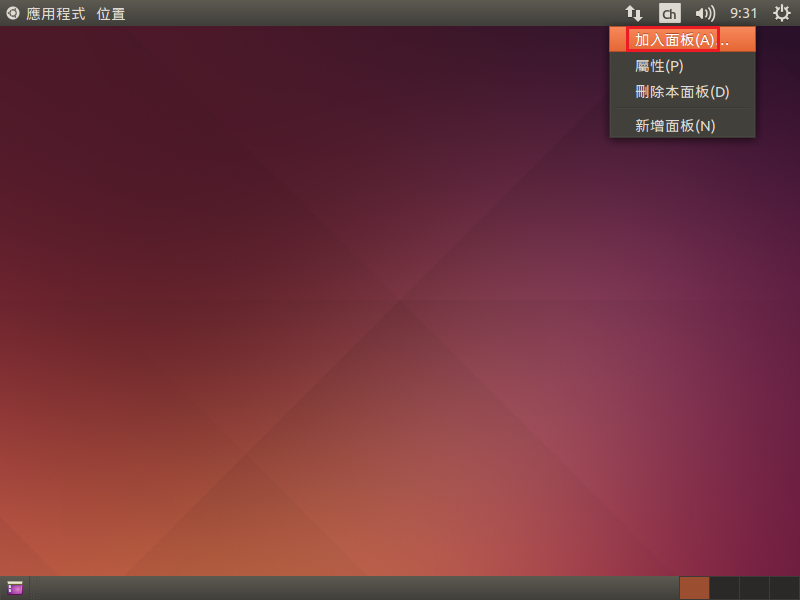 [@more@]選擇 程式狀態通知區,然後按 加入
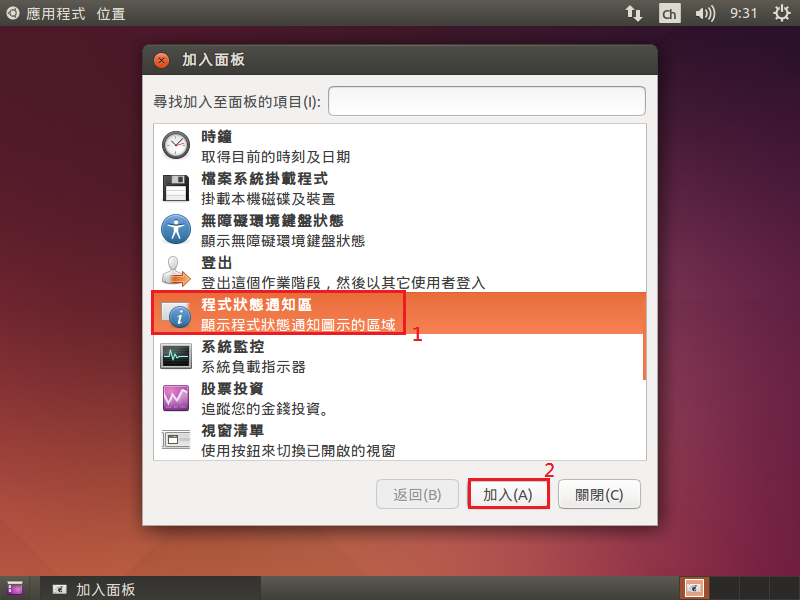
gcin 的圖示就會出現,但也會出現一個圖示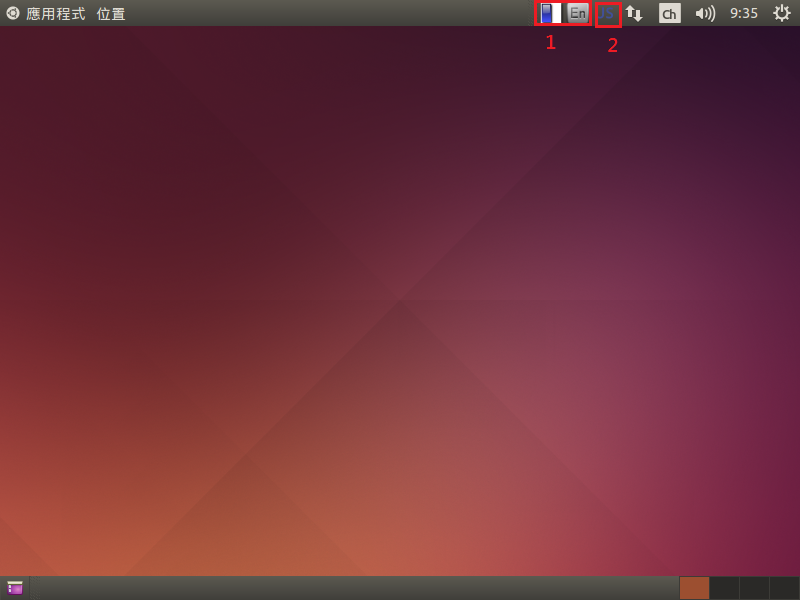
這個圖示是什麼呢?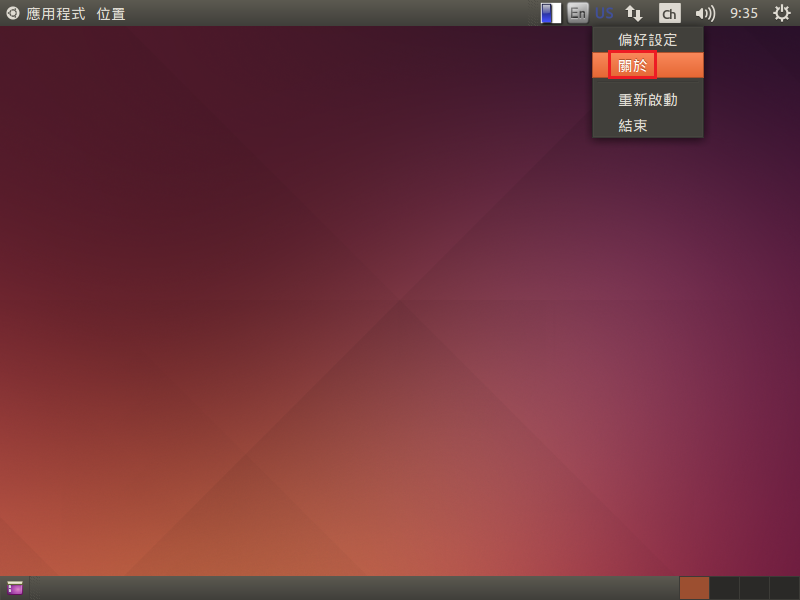
原來是 ibus,我已經把它移除了,怎麼還陰魂不散?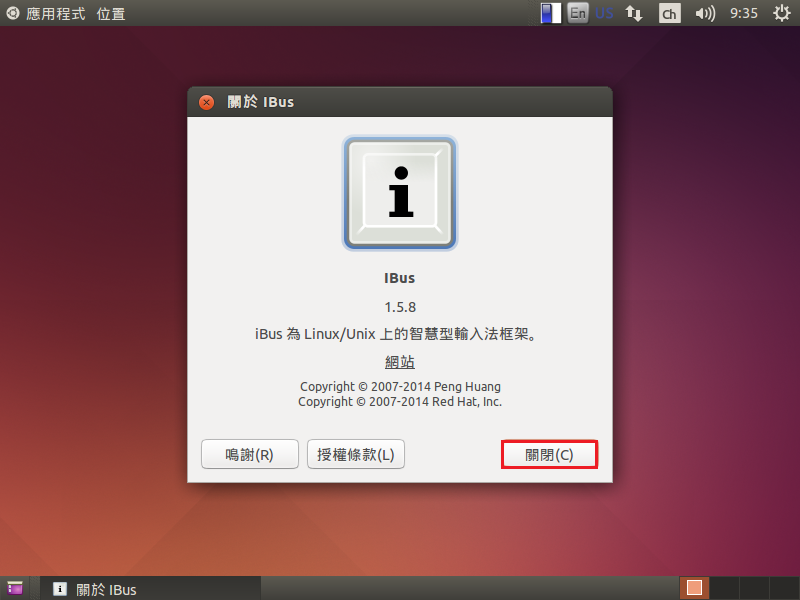
選擇 偏好設定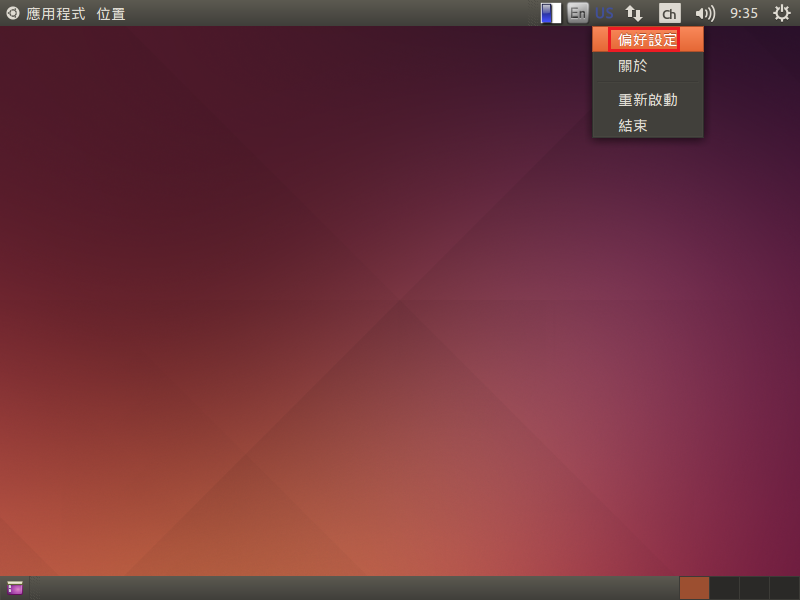
不要勾選 在系統匣顯示圖示,然後按 關閉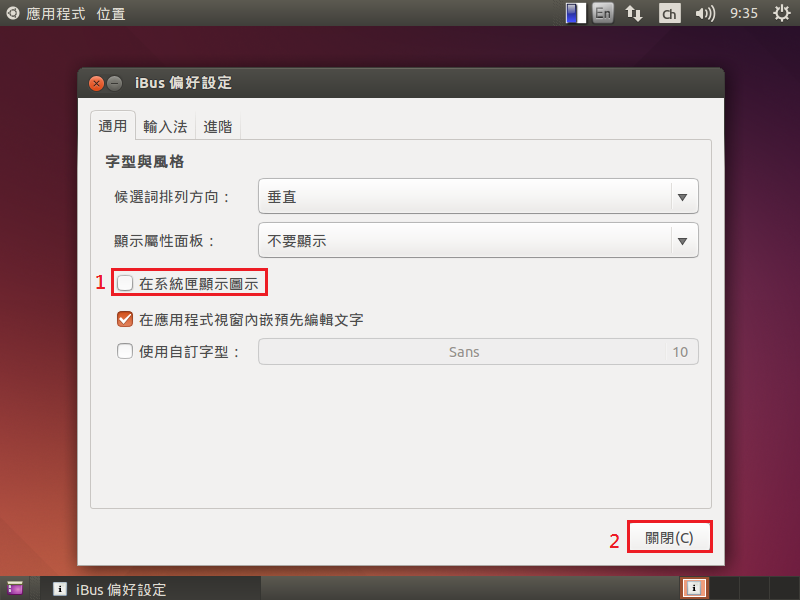
還有一個礙眼的,選擇 文字輸入設定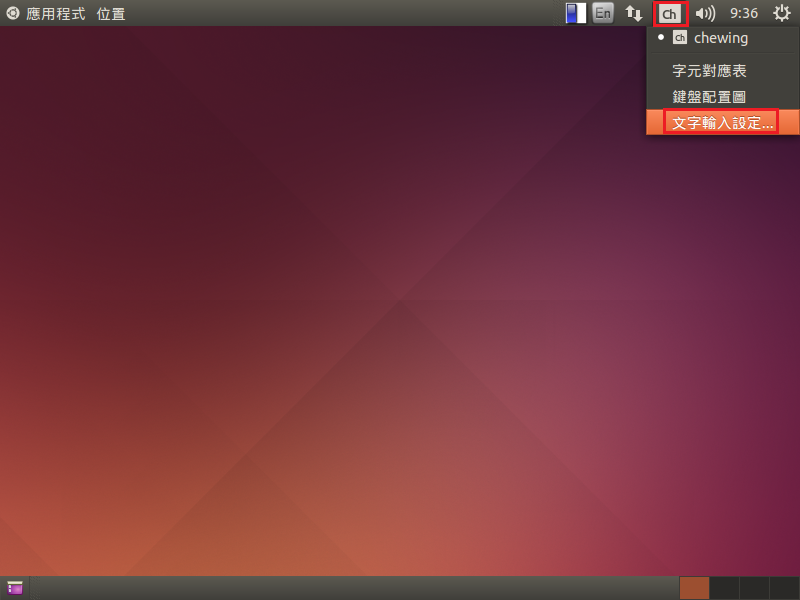
不要勾選 在選單列顯示目前輸入來源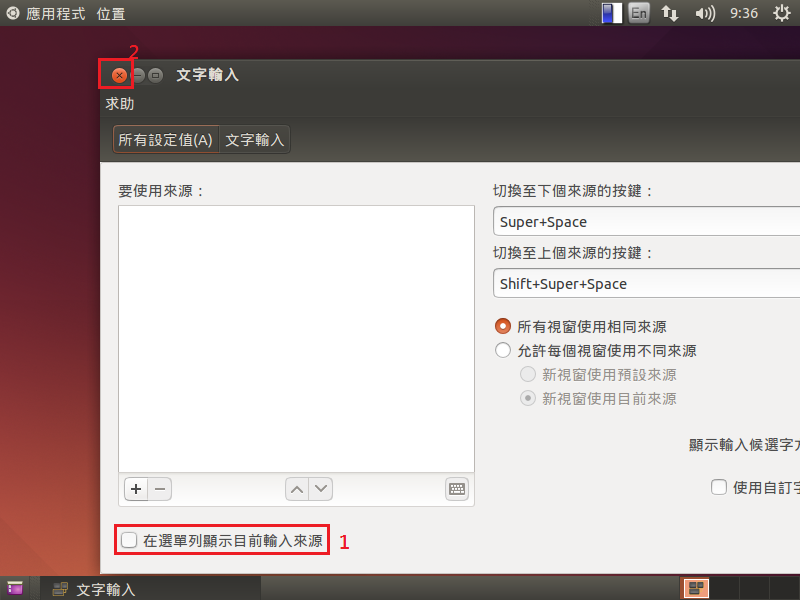
安裝傳統桌面環境
$ sudo apt-get install gnome-session-fallback
選擇 GNOME Flashback(Compiz) 和 GNOME Flashback(Metacity) 都可以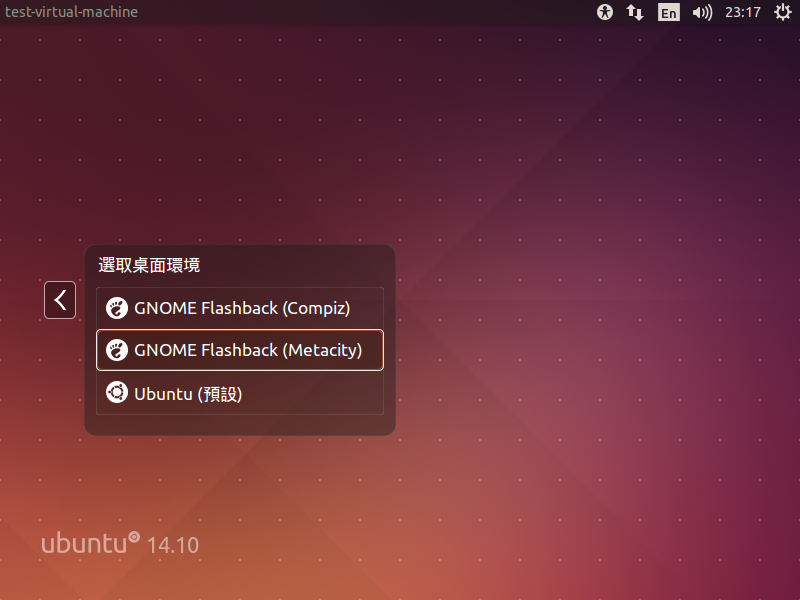
傳統桌面環境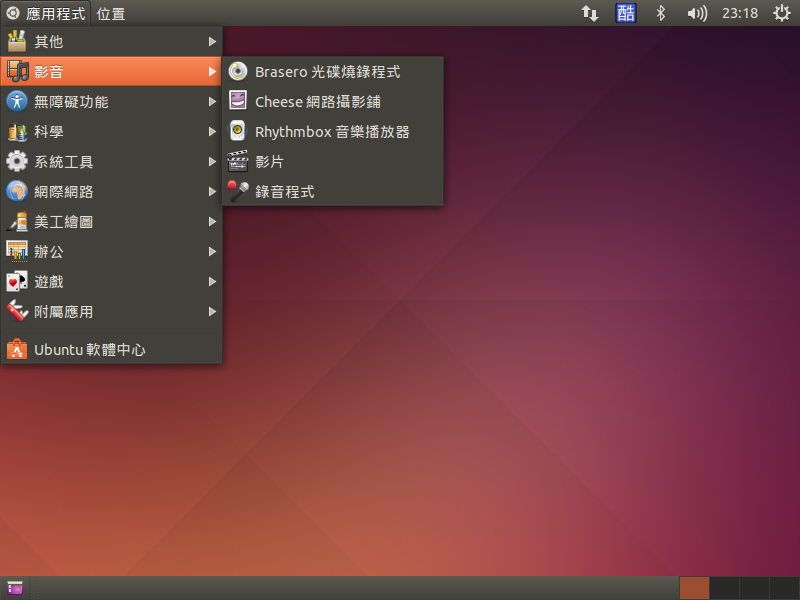 [@more@]安裝 ssh,方便遠端登入管理
$ sudo apt-get install ssh
移除 Brasero 光碟燒錄程式
$ sudo apt-get remove –purge brasero-cdrkit brasero-common
移除 Cheese 網路攝影機
$ sudo apt-get remove –purge cheese cheese-common libcheese-gtk23 libcheese7
移除 Thunderbird 郵件
$ sudo apt-get remove –purge thunderbird thunderbird-gnome-support thunderbird-locale-en thunderbird-locale-en-us thunderbird-locale-zh-hant thunderbird-locale-zh-tw
移除 Transmission
$ sudo apt-get remove –purge transmission-common transmission-gtk
移除 掃描易
$ sudo apt-get remove –purge simple-scan
移除遊戲
$ sudo apt-get remove –purge aisleriot gnome-mahjongg gnome-mines gnome-sudoku
移除 ibus
$ sudo apt-get remove –purge gir1.2-ibus-1.0 ibus ibus-chewing ibus-gtk3 ibus-pinyin ibus-table ibus-table-cangjie3 ibus-table-cangjie5 libibus-1.0-5 libchewing3 libchewing3-data
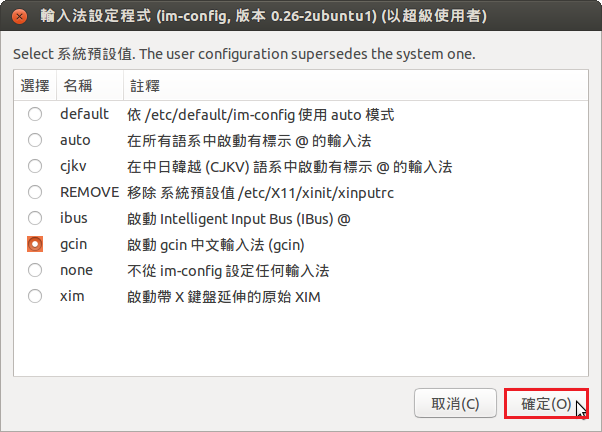
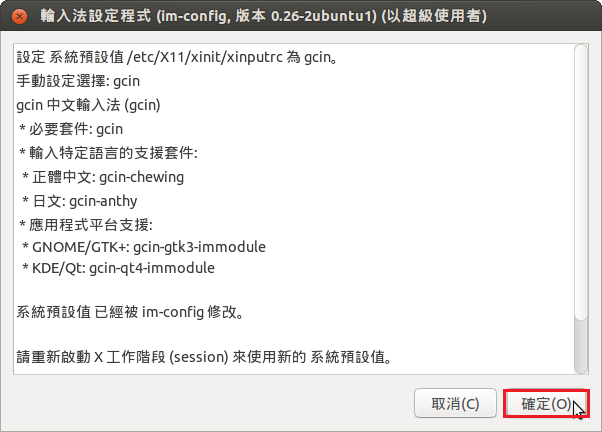
安裝 gcin
$ sudo apt-get install gcin
設定 gcin(這裡建議不要用 sudo 來操作)
$ sudo im-config
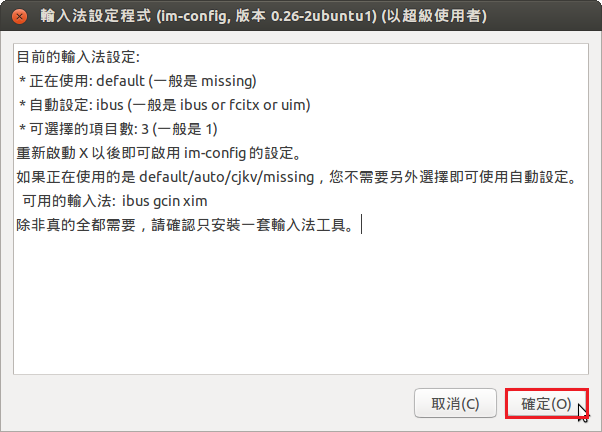
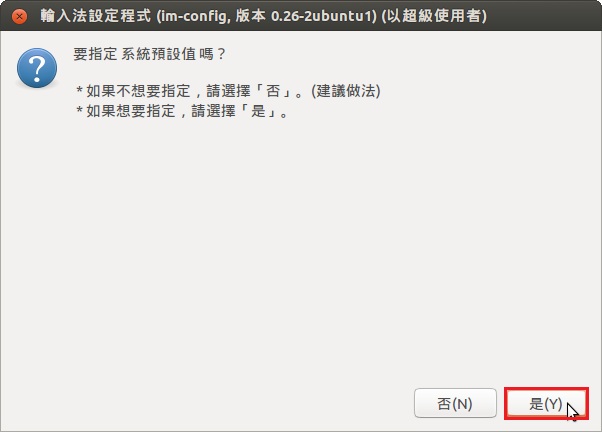
如果出現下面的錯誤訊息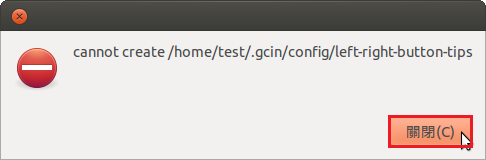
$ sudo chown -R test:test /home/test
安裝 Leafpad
$ sudo apt-get install leafpad
安裝 Chromium 瀏覽器
$ sudo apt-get install chromium-browser chromium-browser-l10n
中文輸入沒有問題,但還是沒有辦法出現 gcin 的圖示
安裝 Flash Player Plugin
$ sudo apt-get install pepperflashplugin-nonfree
或
$ sudo apt-get install flashplugin-installer
Firefox about:plugins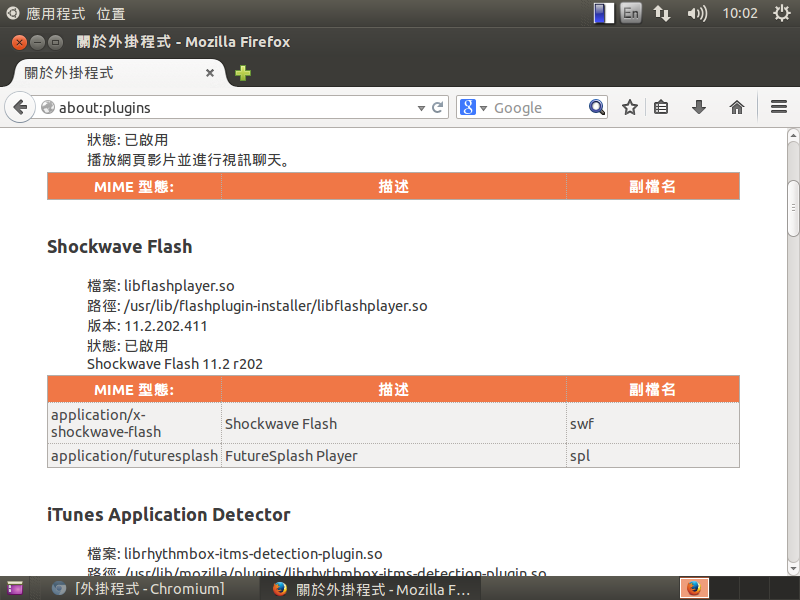
Chromium chrome://plugins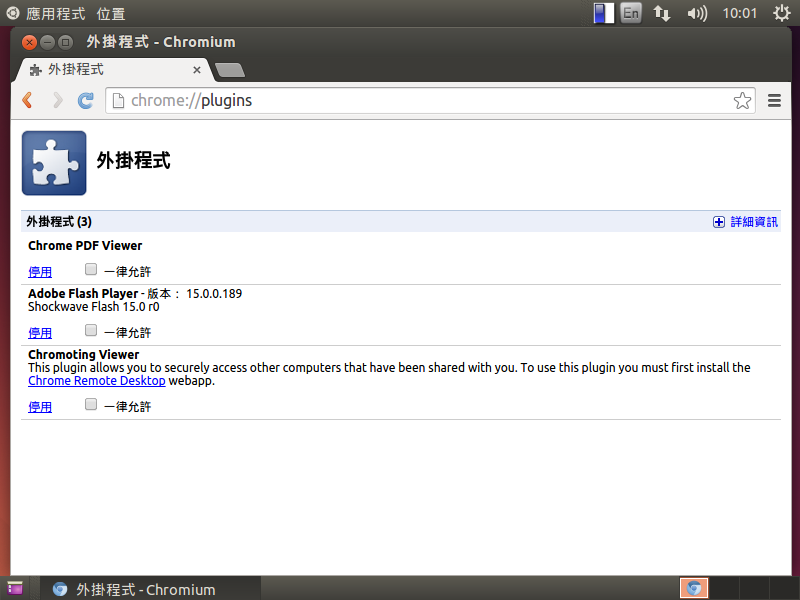
清除用不到的套件
$ sudo apt-get autoremove
瀏覽網頁如果出現錯誤,會顯示一些提示資訊
提示過多的訊息,可能會被攻擊者所利用[@more@]隱藏 Nginx 版本資訊
加入 server_tokens off;
# vim /etc/nginx/nginx.conf
server {
listen 80;
server_name localhost;
server_tokens off;
重新啟動 Nginx Web Server
# /etc/init.d/nginx restart
已經隱藏版本,但還是會顯示 nginx
也可以利用 curl 來取得相關資訊
設定前
# curl -IL 192.168.1.109
HTTP/1.1 200 OK
Server: nginx/1.6.2
Date: Sun, 28 Sep 2014 13:30:44 GMT
Content-Type: text/html
Connection: keep-alive
X-Powered-By: PHP/5.4.4-14+deb7u14
設定後
# curl -IL 192.168.1.109
HTTP/1.1 200 OK
Server: nginx
Date: Sun, 28 Sep 2014 13:30:20 GMT
Content-Type: text/html
Connection: keep-alive
X-Powered-By: PHP/5.4.4-14+deb7u14
這一個部分 Apache Web Server 就可以完全隱藏,不會顯示 Web Sever 的名稱。
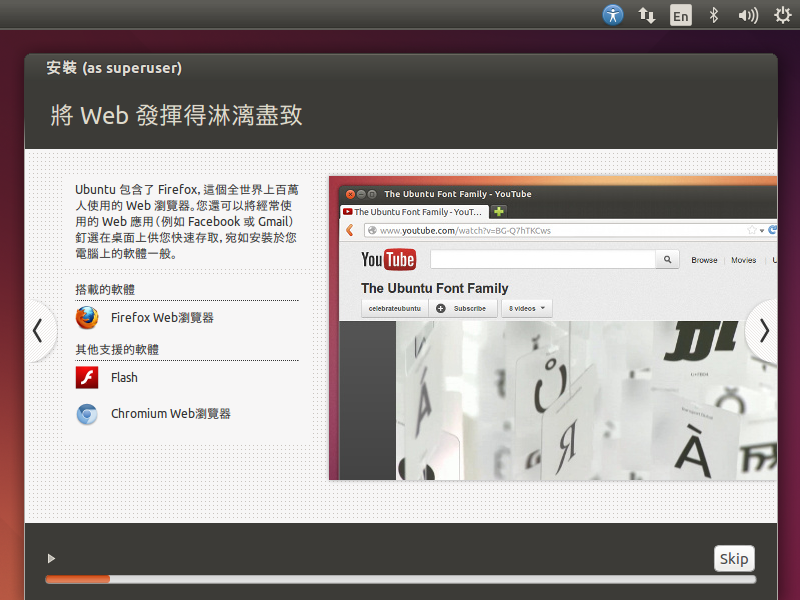
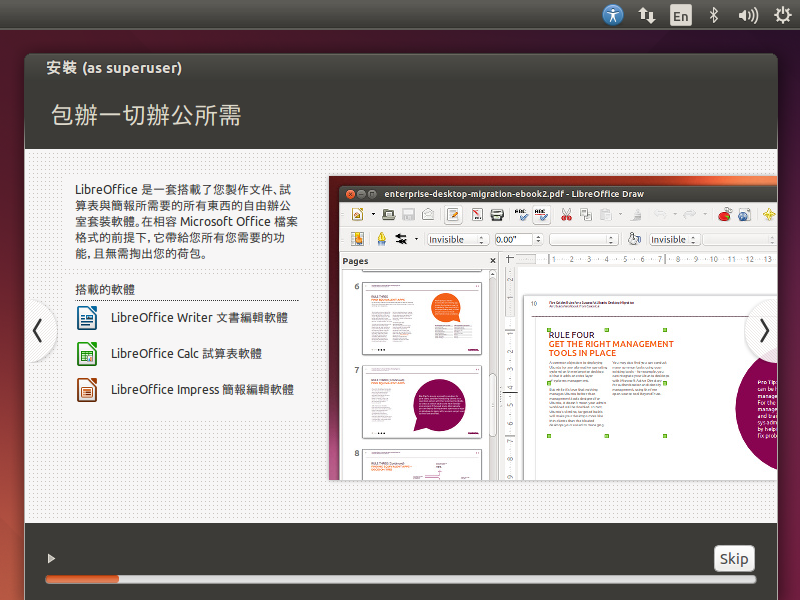
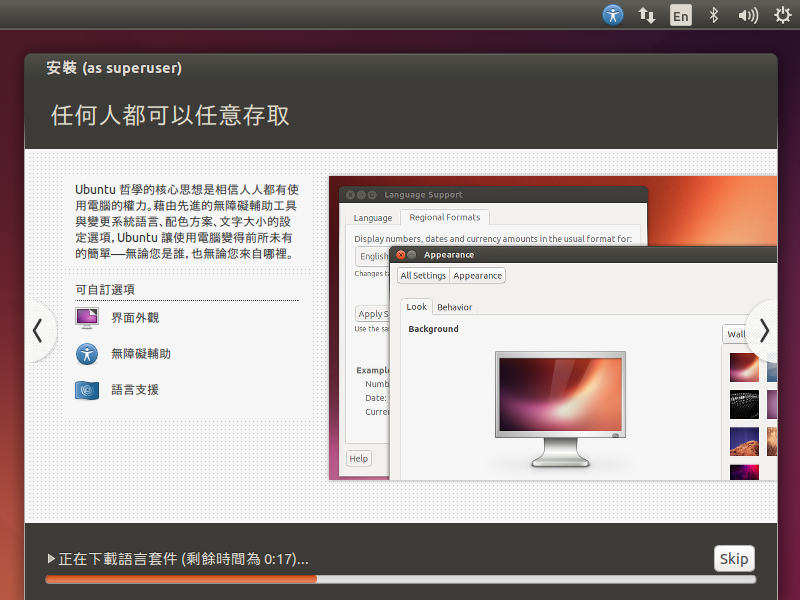
光碟開機畫面
可以選擇 Try Ubuntu 試用 Ubuntu 或 Install Ubuntu 安裝 Ubuntu [@more@]改成中文(繁體)語系
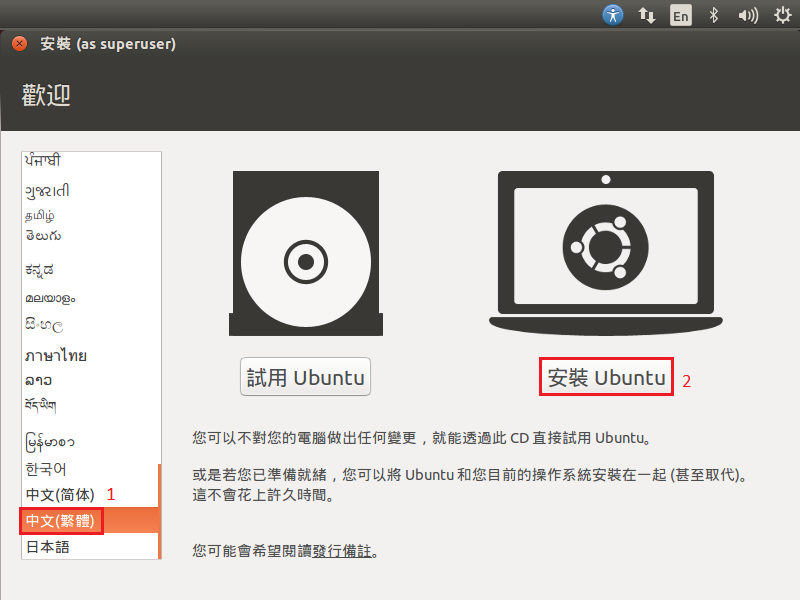
勾選 當安裝時下載更新 及 安裝這個第三方軟體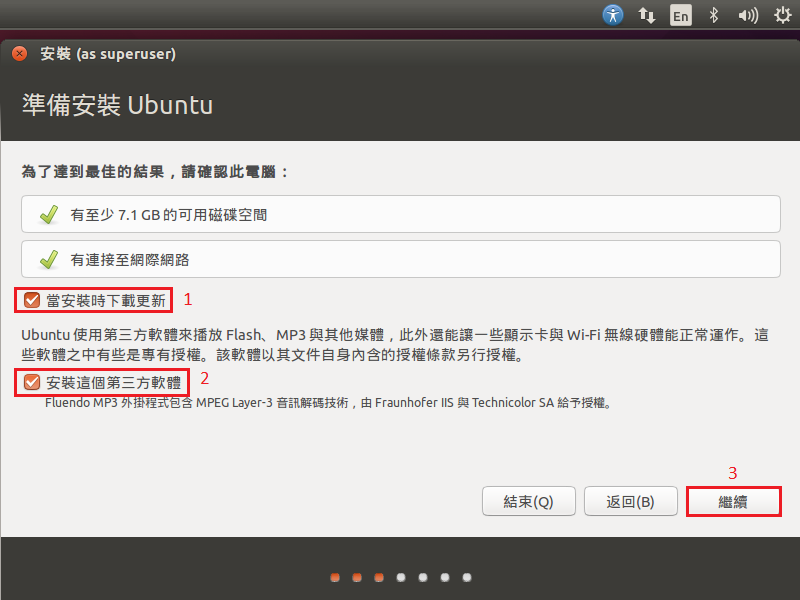
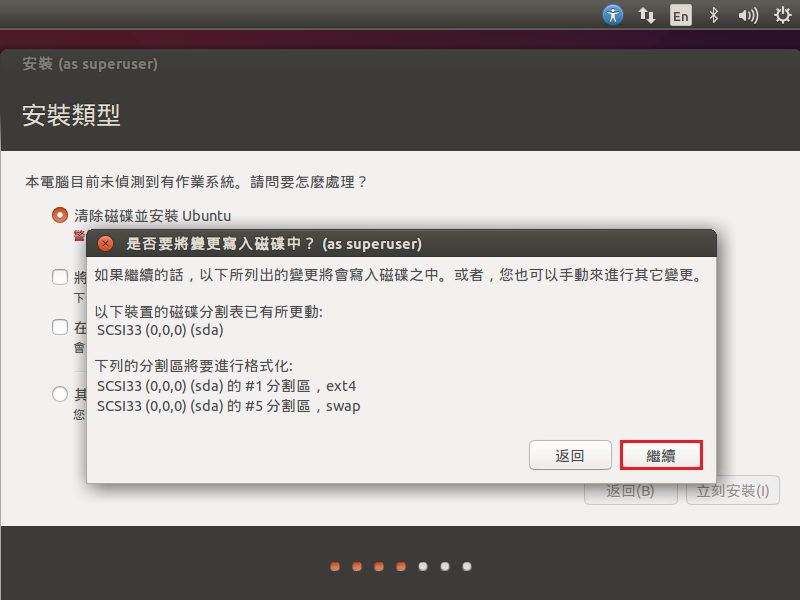
硬碟分割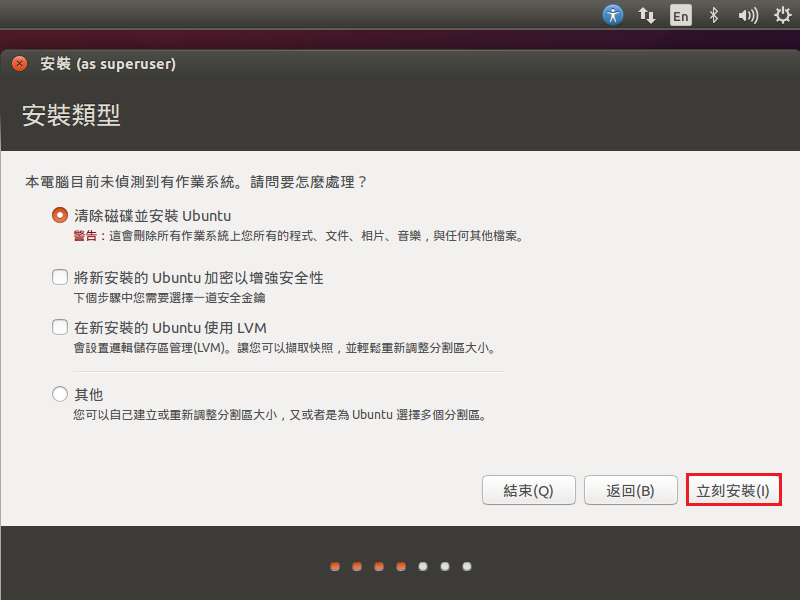
時區選擇
鍵盤選擇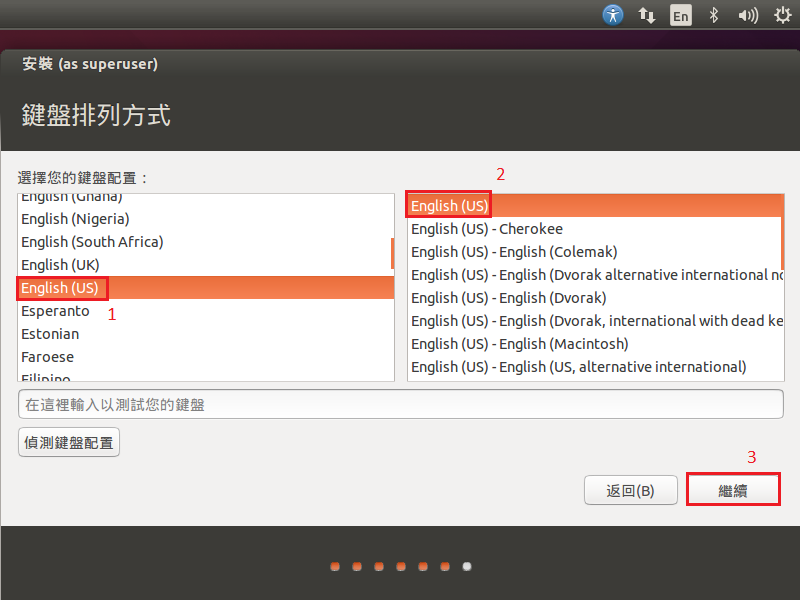
新增使用者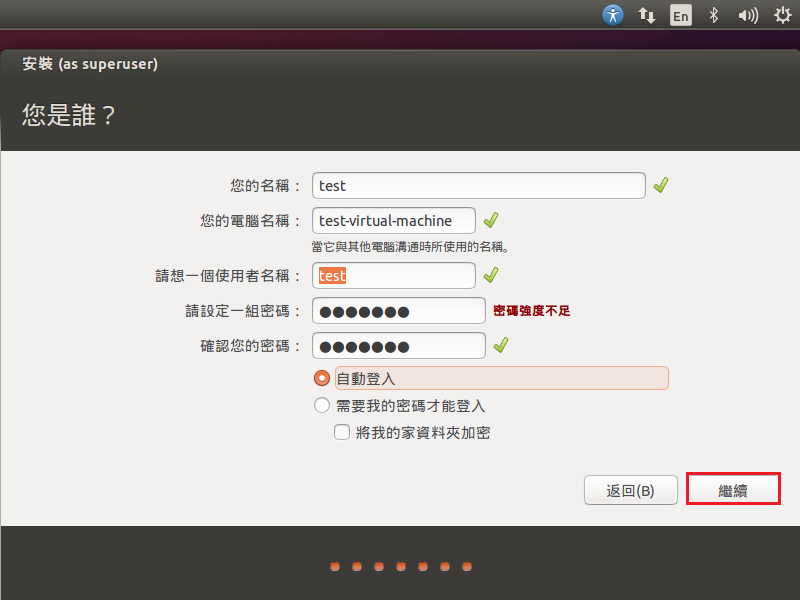
安裝過程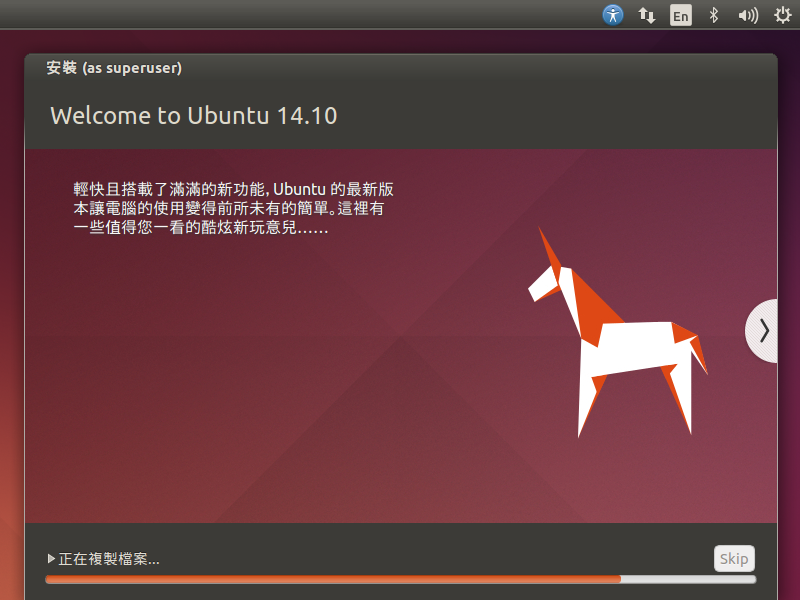
終於安裝完成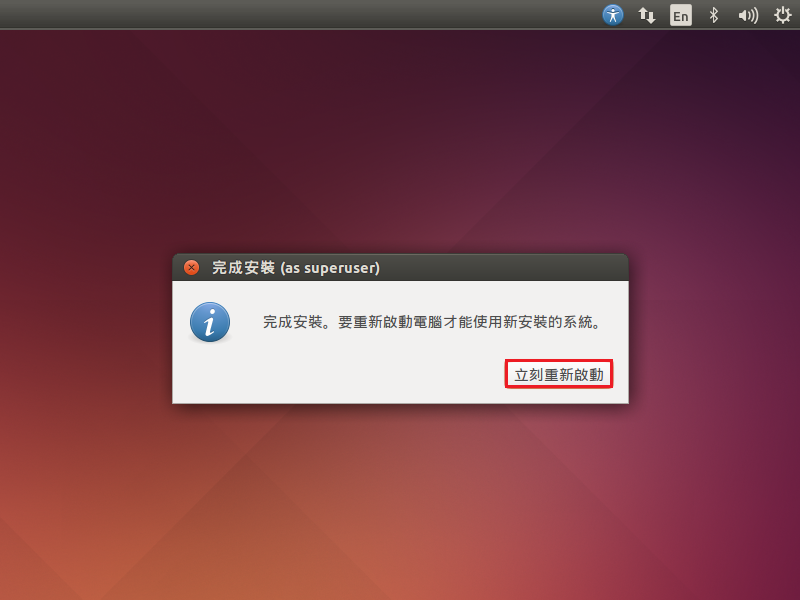
開機中
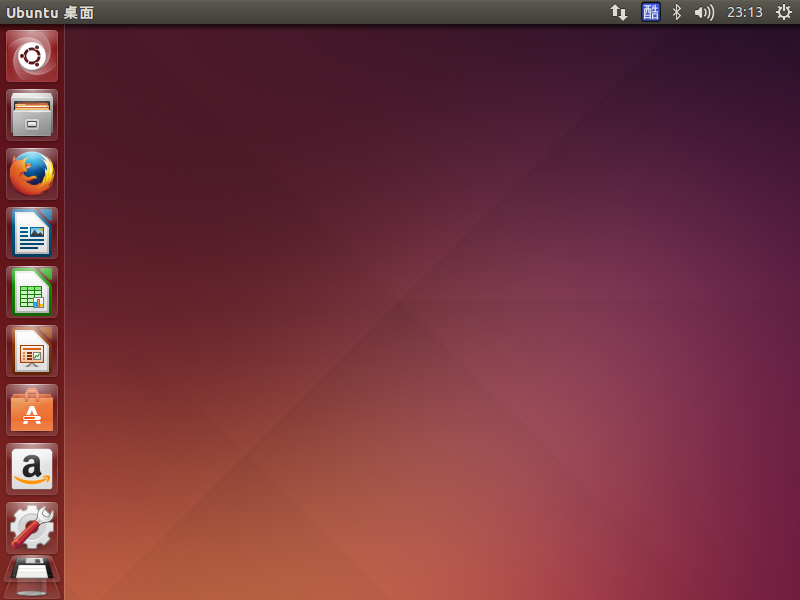
還是使用 Unity 桌面環境