pacman 指令

pacman 是 ArchLinux 用來管理套件的工具,相當於 RedHat / CentOS 的 yum / rpm 及 Debian / Ubuntu 的 apt-* / dpkg。
參考網站:pacman (正體中文) – ArchWiki
更新套件庫
# pacman -Syy
Debian / Ubuntu
# apt-get update
RedHat / CentOS
# yum update

更新已安裝的套件
# pacman -Syu
# pacman -S –refresh –sysupgrade
# pacman -S -y -u
Debian / Ubuntu
# apt-get upgrade
# apt-get dist-upgrade
RedHat / CentOS
# yum update[@more@]

尋找套件
# pacman -Ss ncftp
# pacman -S –search ncftp
extra/ncftp 3.2.5-4
    A set of free application programs implementing FTP
Debian / Ubuntu
# apt-cache search ncftp
RedHat / CentOS
# yum search ncftp

安裝套件
# pacman -S 套件名稱
Debian / Ubuntu
# apt-get install 套件名稱
# dpkg -i 套件檔案名稱
RedHat / CentOS
# yum install 套件名稱
# rpm -ivh 套件檔案名稱

查看套件群組包含的套件
# pacman -Sg gnome
# pacman -S –group gnome
gnome baobab
gnome empathy
gnome eog
gnome epiphany
gnome evince
gnome gdm
gnome gnome-backgrounds
gnome gnome-calculator
gnome gnome-contacts
gnome gnome-control-center
gnome gnome-desktop
gnome gnome-dictionary
gnome gnome-disk-utility
gnome gnome-font-viewer
gnome gnome-icon-theme
gnome gnome-icon-theme-extras
gnome gnome-icon-theme-symbolic
gnome gnome-keyring
gnome gnome-screenshot
gnome gnome-session
gnome gnome-settings-daemon
gnome gnome-shell
gnome gnome-shell-extensions
gnome gnome-system-log
gnome gnome-system-monitor
gnome gnome-terminal
gnome gnome-themes-standard
gnome gnome-user-docs
gnome gnome-user-share
gnome grilo-plugins
gnome gucharmap
gnome mousetweaks
gnome mutter
gnome nautilus
gnome sushi
gnome totem
gnome tracker
gnome vino
gnome xdg-user-dirs-gtk
gnome yelp
RedHat / CentOS
# yum groupinfo “PHP Support”
Loaded plugins: downloadonly, fastestmirror
Setting up Group Process
Loading mirror speeds from cached hostfile

Group: PHP Support
 Description: PHP web application framework.
 Mandatory Packages:
   php
 Default Packages:
   php-gd
   php-pdo
   php-pear
   php-xml
 Optional Packages:
   php-ldap
   php-mysql
   php-odbc
   php-pecl-apc
   php-pecl-memcache
   php-pgsql
   php-soap
   php-xmlrpc

移除套件
# pacman -Rc
# pacman -R –cascade   remove packages and all packages that depend on them
# pacman -Rd
# pacman -R –nodeps  skip dependency version checks (-dd to skip all checks)
# pacman -Ru
# pacman -R –unneeded  remove unneeded packages

# pacman -R 套件名稱
Debian / Ubuntu
# apt-get remove 套件名稱
# dpkg -r 套件名稱
RedHat / CentOS
# yum remove 套件名稱
# rpm -e 套件名稱

移除套件及其相依性套件
# pacman -R –recursive 套件名稱
# pacman -Rs 套件名稱

移除套件但不移除相依性的套件
# pacman -Rdd 套件名稱

移除套件也一併刪除設定檔
# pacman -Rn 套件名稱
# pacman -R –nosave 套件名稱
Debian / Ubuntu
# apt-get remove –purge 套件名稱
# dpkg -P 套件名稱

查詢已安裝的套件資訊
# pacman -Q –info dnsutils
# pacman -Qi dnsutils
Name           : dnsutils
Version        : 9.9.2.P2-2
Description    : DNS utilities: dig host nslookup
Architecture   : armv6h
URL            : http://www.isc.org/software/bind/
Licenses       : custom:ISC
Groups         : None
Provides       : None
Depends On     : openssl  krb5  idnkit  dnssec-anchors
Optional Deps  : None
Required By    : None
Optional For   : None
Conflicts With : None
Replaces       : bind-tools  host
Installed Size : 1857.00 KiB
Packager       : Arch Linux ARM Build System <builder+xu4@archlinuxarm.org>
Build Date     : Wed Jul 2 11:59:28 2014
Install Date   : Mon Sep 29 00:11:31 2014
Install Reason : Explicitly installed
Install Script : No
Validated By   : SHA256 Sum
RedHat / CentOS
# rpm -qi 套件名稱

套件安裝位置
# pacman -Q –list dnsutils
# pacman -Ql dnsutils
dnsutils /usr/
dnsutils /usr/bin/
dnsutils /usr/bin/dig
dnsutils /usr/bin/host
dnsutils /usr/bin/nslookup
dnsutils /usr/share/
dnsutils /usr/share/licenses/
dnsutils /usr/share/licenses/dnsutils/
dnsutils /usr/share/licenses/dnsutils/LICENSE
dnsutils /usr/share/man/
dnsutils /usr/share/man/man1/
dnsutils /usr/share/man/man1/dig.1.gz
dnsutils /usr/share/man/man1/host.1.gz
dnsutils /usr/share/man/man1/nslookup.1.gz
Debian / Ubuntu
# dpkg -L 套件名稱
RedHat / CentOS
# rpm -ql 套件名稱
# repoquery –verbose -l 套件名稱

列出系統中已安裝的套件
# pacman -Q –search
# pacman -Qs
# pacman -Qs | grep local | awk -F’/’ ‘{print $2}’
Debian / Ubuntu
# dpkg -l
# dpkg -l | grep ^ii | awk ‘{print $2}’
RedHat / CentOS
# rpm -qa

查詢系統有無安裝特定的套件
# pacman -Qs vim
# pacman -Qs vim | grep local | awk -F’/’ ‘{print $2}’
vim 7.4.473-1
vim-runtime 7.4.473-1
# pacman -Qs vim | grep local | awk -F’/’ ‘{print $2}’ | awk ‘{print $1}’
vim
vim-runtime
Debian / Ubuntu
# dpkg -l | grep vim
RedHat / CentOS
# rpm -qa | grep vim

查詢未安裝的套件資訊
# pacman -Si ncftp
Repository     : extra
Name           : ncftp
Version        : 3.2.5-4
Description    : A set of free application programs implementing FTP
Architecture   : armv6h
URL            : http://www.ncftp.com/
Licenses       : custom
Groups         : None
Provides       : None
Depends On     : ncurses
Optional Deps  : None
Conflicts With : None
Replaces       : None
Download Size  : 198.77 KiB
Installed Size : 997.00 KiB
Packager       : Arch Linux ARM Build System <builder+xu4@archlinuxarm.org>
Build Date     : Fri Mar 7 21:14:08 2014
Validated By   : MD5 Sum  SHA256 Sum  Signature
RedHat / CentOS
# rpm -qpi ncftp

查詢檔案是屬於哪一個套件
# pacman -Q –owns /etc/vimrc
# pacman -Qo /etc/vimrc
/etc/vimrc is owned by vim-runtime 7.4.459-1
RedHat / CentOS
# rpm -qf /etc/vimrc
Debian / Ubuntu
# dpkg-query -S /etc/vimrc

列出系統中用不到的套件
# pacman -Qdt
libgssglue 0.4-2

移除安裝或更新套件時下載的安裝檔
清除 /var/lib/pacman/var/cache/pacman/pkg 目錄
# pacman -Scc

Cache directory: /var/cache/pacman/pkg/
:: Do you want to remove ALL files from cache? [y/N] y
removing all files from cache…

Database directory: /var/lib/pacman/
:: Do you want to remove unused repositories? [Y/n] y
removing unused sync repositories…
Debian / Ubuntu
# apt-get clean all
# apt-get autoclean
RedHat / CentOS
# yum clean all

pacman 版本資訊
# pacman -V

 .–.                  Pacman v4.1.2 – libalpm v8.0.2
/ _.-‘ .-.  .-.  .-.   Copyright (C) 2006-2013 Pacman Development Team
  ‘-. ‘-‘  ‘-‘  ‘-‘   Copyright (C) 2002-2006 Judd Vinet
 ‘–‘
                       This program may be freely redistributed under
                       the terms of the GNU General Public License.

Raspberry Pi 測試 – ArchLinux Server 篇

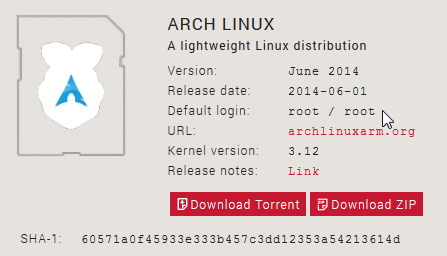
測試的主角
下載網頁:http://www.raspberrypi.org/downloads/

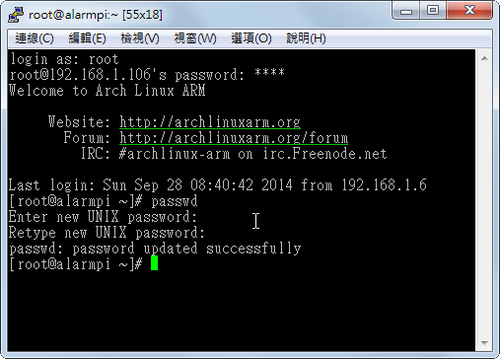
開機登入,預設帳號密碼:root / root

請更改密碼
# passwd
Enter new UNIX password:
Retype new UNIX password:
passwd: password updated successfully[@more@]底下文章參考:
ArchWiki
Nginx + PHP-FPM + MariaDB on Arch Linux for Raspberry PIs
homecomputerlab » NginX + PHP + MariaDB + WordPress on ArchLinux on a Raspberry Pi

設定時區
# date
Sun Sep 28 09:13:30 MDT 2014
# ls -l /etc/localtime
lrwxrwxrwx 1 root root 34 Aug 13  2013 /etc/localtime -> /usr/share/zoneinfo/America/Denver

刪除舊有設定
# rm -rf /etc/localtime

連結到 Asis/Taipei
# ln -s /usr/share/zoneinfo/Asia/Taipei /etc/localtime

# timedatectl set-timezone Asia/Taipei
# date
Sun Sep 28 23:16:19 CST 2014

更換成台灣的 Server
# sed -i ‘s/^Server/#Server/’ /etc/pacman.d/mirrorlist
# sed -i ’49s/# Server/Server/g’ /etc/pacman.d/mirrorlist

更新套件庫
# pacman -Syy
:: Synchronizing package databases…
 core                       159.0 KiB  2.72M/s 00:00 [############################] 100%
 extra                        2.2 MiB  4.66M/s 00:00 [############################] 100%
 community                    2.4 MiB  5.17M/s 00:00 [############################] 100%
 alarm                       29.0 KiB  4.72M/s 00:00 [############################] 100%
 aur                         61.7 KiB  2.87M/s 00:00 [############################] 100%

設定中文化環境,加入 en_US.UTF-8 和 zh-TW.UTF-8
# sed -i ‘s/#en_US.UTF-8/en_US.UTF-8/’ /etc/locale.gen
# sed -i ‘s/#zh_TW.UTF-8/zh_TW.UTF-8/’ /etc/locale.gen

產生 locale.gen 內指定的語系
locale-gen

設定預設語系
# echo ‘LANG=”en_US.UTF-8″‘ > /etc/locale.conf

檢視設定
# grep -v ^# /etc/locale.gen
en_US.UTF-8 UTF-8
zh_TW.UTF-8 UTF-8

安裝 vim 及 mlocate / dnsutils 套件
# pacman -S vim mlocate dnsutils

安裝 Nginx Web Server
# pacman -S nginx

啟動 Nginx Web Server
# systemctl start nginx

安裝的 Nginx Web Server 版本
# /usr/bin/nginx -v
nginx version: nginx/1.6.1

設定開機時啟動
# systemctl enable nginx
ln -s ‘/usr/lib/systemd/system/nginx.service’ ‘/etc/systemd/system/multi-user.target.wants/nginx.service’

取消開機時啟動
# systemctl disable nginx
rm ‘/etc/systemd/system/multi-user.target.wants/nginx.service’

設定 Nginx Web Server
備份設定檔
# mv /etc/nginx/nginx.conf /etc/nginx/nginx.conf.$(date +%F_%T)

建立 Nginx Web Server 設定檔
# vim /etc/nginx/nginx.conf
#user http;
worker_processes 1;

#error_log logs/error.log;
#error_log logs/error.log notice;
#error_log logs/error.log info;

#pid logs/nginx.pid;

events {
  worker_connections 2048;
}

http {
  include mime.types;
  default_type application/octet-stream;

#log_format main ‘$remote_addr – $remote_user [$time_local] “$request” ‘
# ‘$status $body_bytes_sent “$http_referer” ‘
# ‘”$http_user_agent” “$http_x_forwarded_for”‘;

#access_log logs/access.log main;

  sendfile on;

  keepalive_timeout 60;

  gzip on;
  gzip_comp_level 1;

  server {

    listen 80;
    server_name localhost;

    location ~ .php {
      root /srv/http;
      fastcgi_pass unix:/var/run/php-fpm/php-fpm.sock;
      fastcgi_index index.php;
      fastcgi_param SCRIPT_FILENAME $document_root$fastcgi_script_name;
      include fastcgi_params;
    }

    location / {
      root /srv/http;
      index index.php index.html index.htm home.php home.html home.htm;
    }
  }

}

重新啟動 Nginx Web Server
# systemctl restart nginx

安裝 PHP 和 PHP-FPM
# pacman -S php php-gd php-geoip php-pear php-cgi php-mcrypt php-odbc php-fpm

啟動 PHP-FPM
# systemctl start php-fpm

設定開機時啟動 PHP-FPM
# systemctl enable php-fpm
ln -s ‘/usr/lib/systemd/system/php-fpm.service’ ‘/etc/systemd/system/multi-user.target.wants/php-fpm.service’

設定 PHP 和 PHP-FPM
備份設定檔
# cp /etc/php/php.ini /etc/php/php.ini.$(date +%F)

修改 /etc/php/php.ini 設定檔
# sed -i ‘s/;extension=mysqli.so/extension=mysqli.so/’ /etc/php/php.ini
# sed -i ‘s/;extension=mysql.so/extension=mysql.so/’ /etc/php/php.ini
# sed -i ‘s/;extension=mcrypt.so/extension=mcrypt.so/’ /etc/php/php.ini
# sed -i ‘s/;mysqli.allow_local_infile = On/mysqli.allow_local_infile = On/’ /etc/php/php.ini
# sed -i ‘s|;date.timezone =|date.timezone = Asia/Taipei|’ /etc/php/php.ini

重新啟動 PHP-FPM
# systemctl restart php-fpm

安裝 mariadb SQL Server
# pacman -S mysql
:: There are 2 providers available for mysql:
:: Repository extra
   1) mariadb
:: Repository community
   2) percona-server

Enter a number (default=1): 1

啟動 mariadb SQL Server
# systemctl start mysqld

設定開機時啟動 mariadb SQL Server
# systemctl enable mysqld
ln -s ‘/usr/lib/systemd/system/mysqld.service’ ‘/etc/systemd/system/multi-user.target.wants/mysqld.service’

設定 mariadb SQL Server
備份設定檔
# mv /etc/mysql/my.cnf /etc/mysql/my.cnf.$(date +%F)

建立設定檔
# vim /etc/mysql/my.cnf
[mysqld]
default-storage-engine = myisam
key_buffer = 1M
query_cache_size = 1M
query_cache_limit = 128k
max_connections=25
thread_cache=1
skip-innodb
query_cache_min_res_unit=0
tmp_table_size = 1M
max_heap_table_size = 1M
table_cache=256
concurrent_insert=2
max_allowed_packet = 1M
sort_buffer_size = 64K
read_buffer_size = 256K
read_rnd_buffer_size = 256K
net_buffer_length = 2K
thread_stack = 64K

重新啟動 mariadb SQL Server
# systemctl restart mysqld

安裝後設定
# /usr/bin/mysql_secure_installation

測試 PHP 功能
# cat /srv/http/index.php
<?php
phpinfo();
?>

Banana Pi 測試 – 解決 LeMedia ssh 連線會停很久的問題

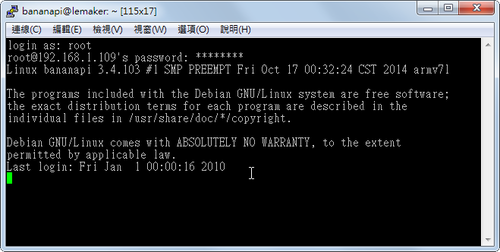
使用 ssh 連線時,會停很久,一直無法登入
[@more@]本來以為是時間不對所造成的,後來發現時間修正了依然是如此
解決方式:
1. 先使用 Ctrl+C 中斷連線
2. 將 /root 目錄下的 .profile 中的 xbmc 移除或加上 #
# cat /root/.profile
# ~/.profile: executed by Bourne-compatible login shells.

if [ “$BASH” ]; then
  if [ -f ~/.bashrc ]; then
    . ~/.bashrc
  fi
fi

#xbmc

mesg n

3. 將 xbmc 加入到 /etc/rc.local 之中
# cat /etc/rc.local
#!/bin/sh -e
#
# rc.local
#
# This script is executed at the end of each multiuser runlevel.
# Make sure that the script will “exit 0” on success or any other
# value on error.
#
# In order to enable or disable this script just change the execution
# bits.
#
# By default this script does nothing.

xbmc
exit 0

XBMC Skin

常見的 XBMC Skin

用久了難免有些厭倦,但在 XBMC 中的 Skin 似乎不是每一種在中文下都可以正常顯示,稍不留意,畫面上就會出現一堆方塊字[@more@]底下是我試過幾種可以在中文下正常顯示的 XBMC Skin,大概有 9 種

Amber

Back Row

Cirrus Extended

Confluence

Hybrid

Quartz

Rapier

SiO2

Transparency!

Banana Pi 測試 – LeMedia

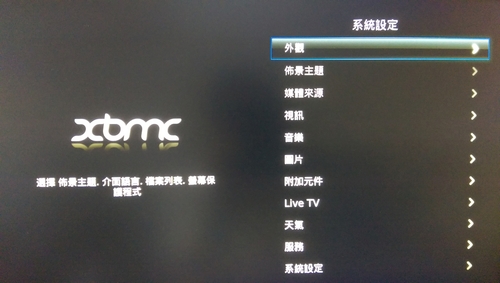
開機進入 XBMC 畫面,可以看的出來是 13.1 Gotham 版
[@more@]介面是英文的

經過設定之後就能更換成中文介面

不過發現時間是錯的,竟然是在 2019 年

時間錯誤會造成成 ssh 很難登入,停很久(後來發現不是因為這個問題)

既然在圖形介面中無法修改,改用文字介面
# dpkg-reconfigure tzdata
# ntpdate -s time.stdtime.gov.tw

時間正常了!

不過在看影片的部分,直接透過網路上的芳鄰來觀看影片
720p 會有一點點停頓,聲音及影像無法完全配合

1080p 則情況更為明顯

所以有一點點小失望,也許系統還沒有經過最佳化,超頻?
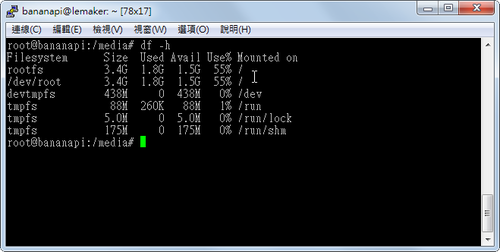
另外發現,它的系統也不會自動依據記憶卡的大小,自動來擴展分割區
所以我的 16G 記憶卡,只用到 4G,剩下的部分還要自己手動去分割

後記:
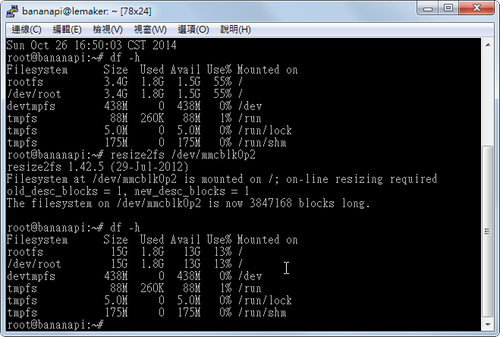
已經依照下面的文章,擴展了分割區
頭城國小資訊組 | Banana Pi 測試 – Lubuntu 篇 – 擴展 root 分割區

Ubuntu 14.10 Family

Ubuntu 版本

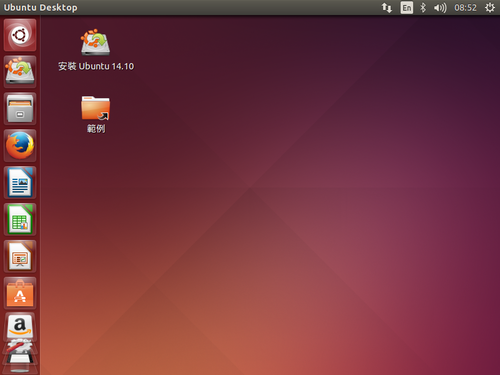
Ubuntu 14.10
下載位址:http://releases.ubuntu.com/14.10/


[@more@]
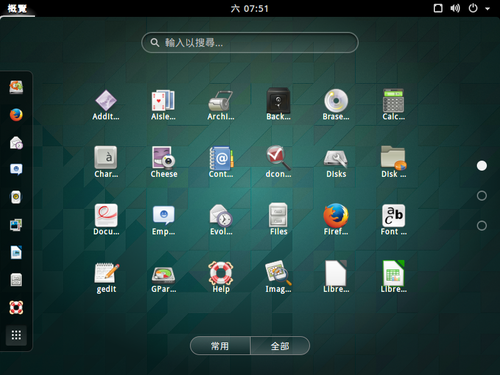
Ubuntu GNOME 14.10
下載位址:http://cdimage.ubuntu.com/ubuntu-gnome/releases/14.10/release/

Kubuntu 14.10
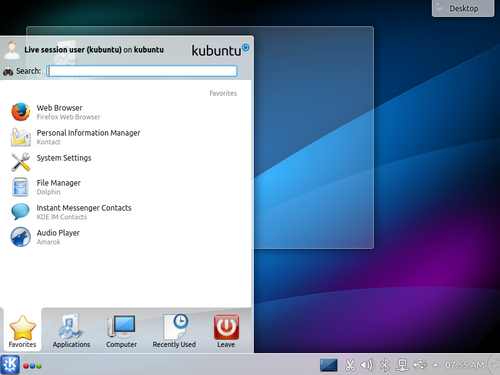
下載位址:http://cdimage.ubuntu.com/kubuntu/releases/14.10/release/

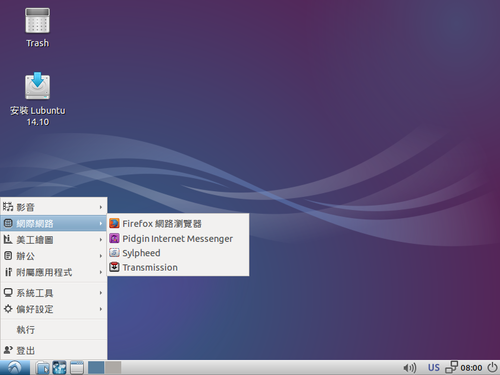
Lubuntu 14.10 LXDE
下載位址:http://cdimage.ubuntu.com/lubuntu/releases/14.10/release/

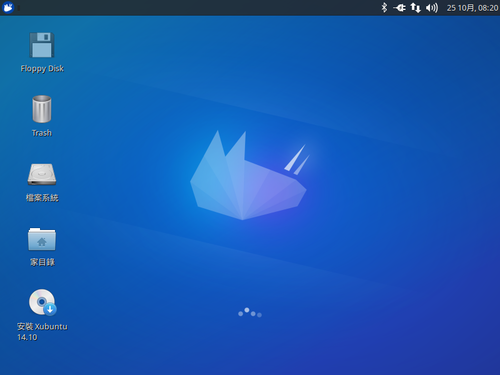
Xubuntu 14.10 XFCE
下載位址:http://cdimage.ubuntu.com/xubuntu/releases/14.10/release/

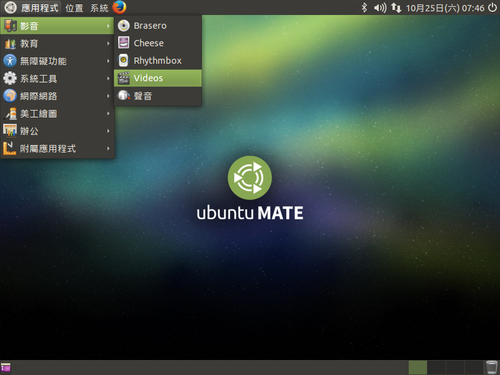
Ubuntu MATE 14.10
下載網址:https://ubuntu-mate.org/download/
                  http://pub.mate-desktop.org/iso/ubuntu-mate/release

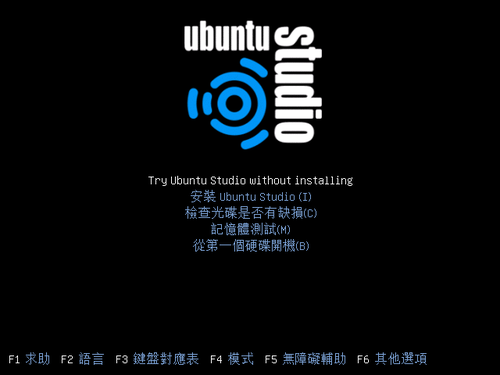
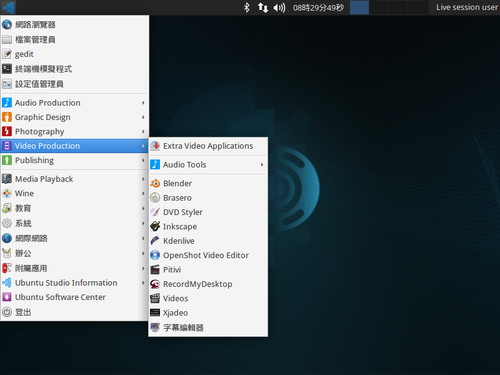
Ubuntu Studio 14.10
下載位址:https://ubuntustudio.org/download/

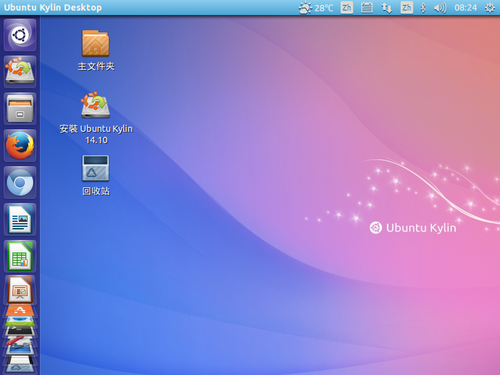
Ubuntu Kylin 14.10 for China
下載位址:http://www.ubuntukylin.com/downloads/

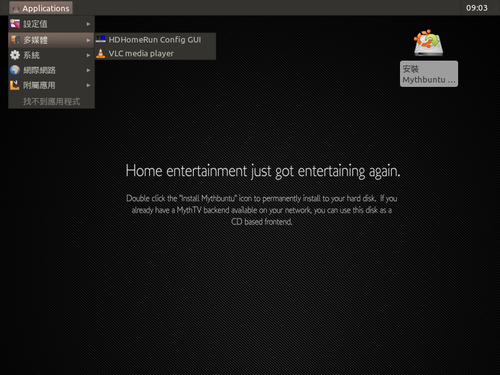
Mythbuntu 14.10 目前還沒有14.10 Rlease 的版本
下載位址:http://cdimage.ubuntu.com/mythbuntu/releases/
底下是 Daily Build 版本

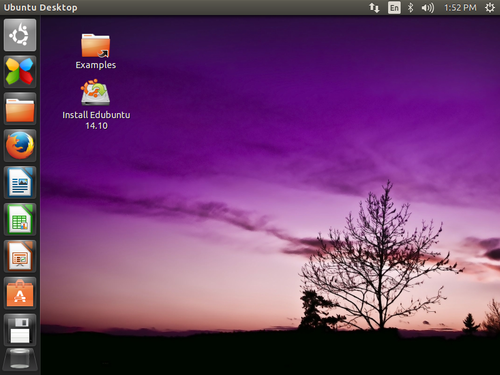
Edubuntu 14.10  目前還沒有14.10 Rlease 的版本
下載位址:http://cdimage.ubuntu.com/edubuntu/releases/
底下是 Daily Build 版本

心得:
1. 會想真正安裝到硬碟使用的版本:Ubuntu MATE / Ubuntu Studio
2. Ubuntu Kylin 的開機動畫很炫
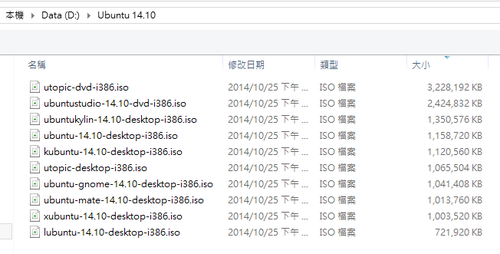
3. ISO 檔大小,以 x86 平台
    Edubuntu > Ubuntu Studio > Ubuntu Kylin > Ubuntu > Kubuntu > Mythbuntu > Ubuntu GNOME > Ubuntu MATE > Xubuntu > Lubuntu

Nginx Web Server – 使用帳號及密碼來保護目錄

在 Nginx Web Server 要利用帳號及密碼來保護目錄的安全
安裝 apache2-utils 套件
# apt-get install apache2-utils

建立帳號及密碼檔
# /usr/bin/htpasswd -c /usr/share/nginx/.htpasswd admin
New password:
Re-type new password:
Adding password for user admin

檢視密碼檔 admin/12345
# cat /usr/share/nginx/.htpasswd
admin:$apr1$jQjpLKJr$HgsSAhdBqfdN9l4IWkdjs.
[@more@]建立測試目錄
# mkdir /usr/share/nginx/www/security

建立測試檔案
# cat /usr/share/nginx/www/security/index.html
<h1>辛苦了,什麼東西都沒有!</h1>

修改 /etc/nginx/nginx.conf 設定檔
# vim /etc/nginx/nginx.conf
location /security {
                root /usr/share/nginx/www;
                index index.php index.html index.htm;
                auth_basic “Restricted”;
                auth_basic_user_file /usr/share/nginx/.htpasswd;
                location ~ ^/security/(.+.php)$ {
                     try_files $uri =404;
                     fastcgi_pass unix:/var/run/php5-fpm.sock;
                     fastcgi_index index.php;
                     fastcgi_param SCRIPT_FILENAME /usr/share/nginx/www/$fastcgi_script_name;
                     include fastcgi_params;
                   }
        }

重新啟動 Nginx Web Server
# /etc/init.d/nginx restart
Restarting nginx: nginx.

瀏覽設定的目錄
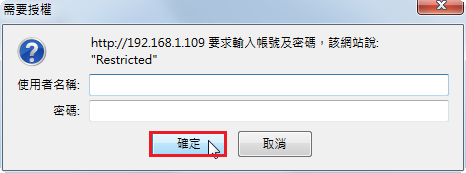
需要輸入帳號及密碼

輸入錯誤

輸入正確

客製化 Scientific Linux 7

試安裝好 Scientific Linux 7,順便把 Scientific Linux 7 的客製化光碟完成,主要是簡化安裝的步驟,不用挑選要安裝的套件,只要三個步驟即可!
取消倒數,要選擇 Install SL 7 才會開始安裝
[@more@]

第一步驟:分割硬碟

第二步驟:設定網路

第三步驟:設定 root 密碼

共有 641 個套件

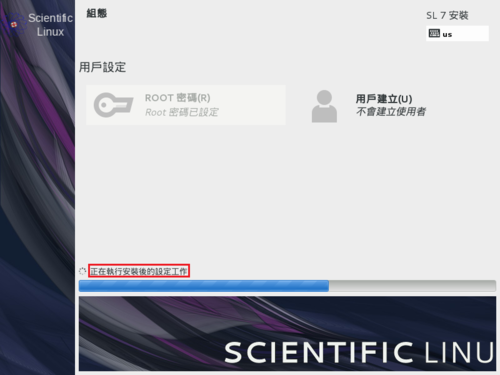
執行安裝後的設定工作,這個部分會比較慢,因為有做一些設定

安裝完成

這個版本的特點:
1. 套件更新到 2014-10-24
2. 套件更新 Server 改至頭城國小 ftp://140.111.74.109/Linux/Scientific/
3. 預設啟動 LAMP ( Scientific Linux + Apache + MariaDB + PHP)
4. Apache Web Server 增加一些安全性上的設定
    ServerTokens Prod
    ServerSignature Off
5. MariaDB 根據 MariaDB Server 調整 做設定
6. PHP 部分的設定,僅列出部份的修改
    時區改成 Asia/Taipei
    upload_max_filesize = 200M
    post_max_size = 200
7. 每天早上 6 點向 time.stdtime.gov.tw 對時