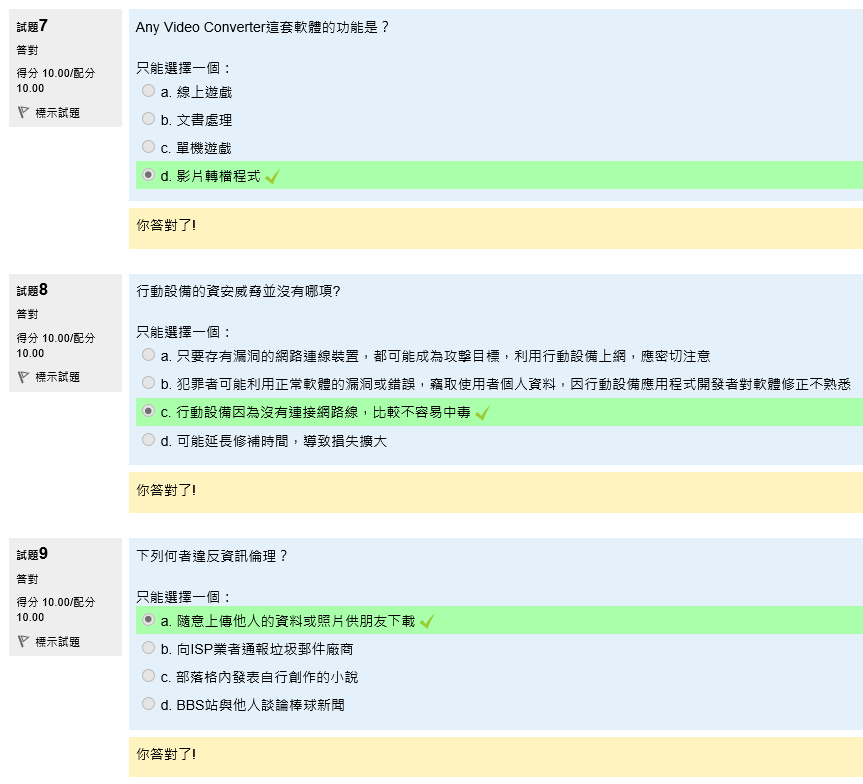
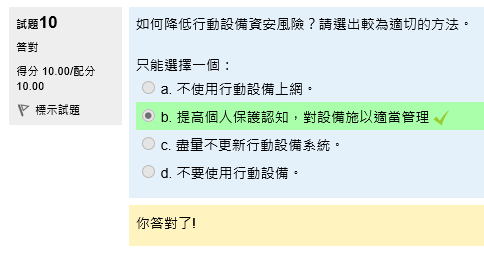
一年一度惱人的 “宜蘭縣國中小學教職員工資訊安全線上課程” 又來了,不過今年的課程還算不錯,有下面的課程
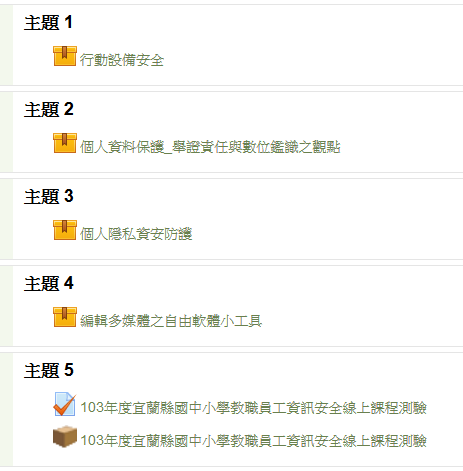
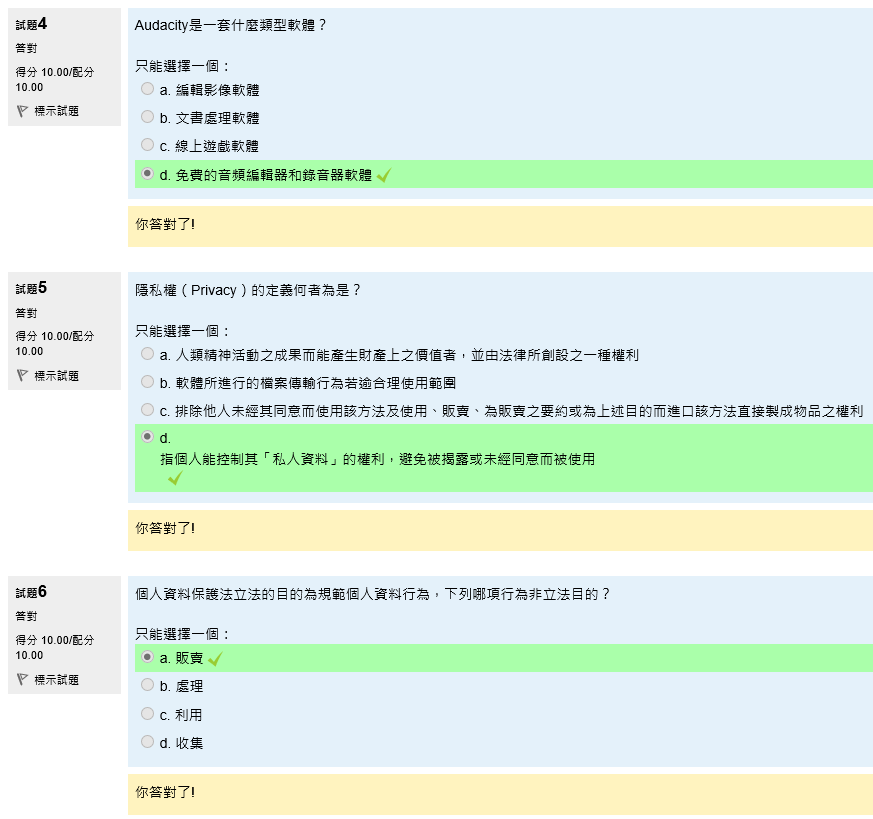
今天早上花了一段時間,好不容易才點完,晚上把最後的測驗做了一下,題目沒有想像中的難。
[@more@]我的考試題目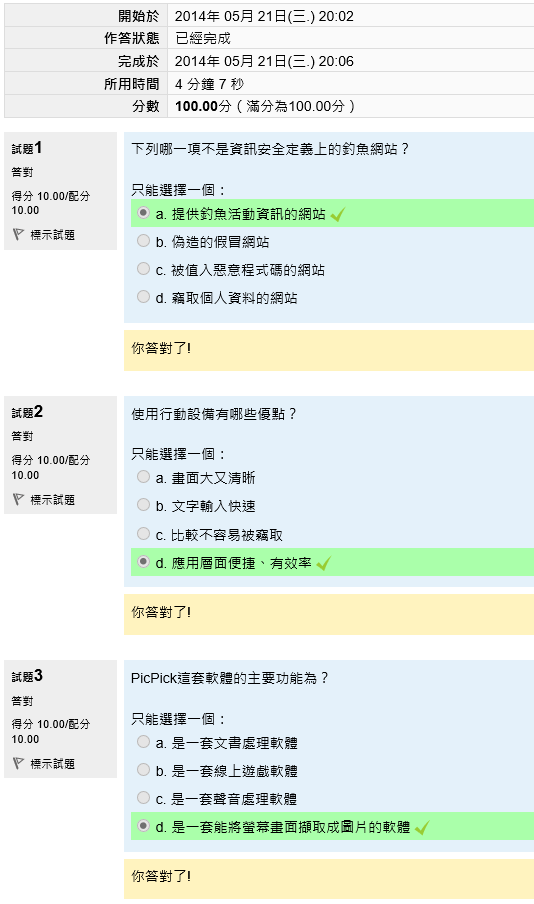

全新的繁體中文 WordPress 網站《宜蘭部落格教育平台 網站》
一年一度惱人的 “宜蘭縣國中小學教職員工資訊安全線上課程” 又來了,不過今年的課程還算不錯,有下面的課程
今天早上花了一段時間,好不容易才點完,晚上把最後的測驗做了一下,題目沒有想像中的難。
[@more@]我的考試題目
因為整合 Windows 光碟時,常常需要安裝一些常用的軟體,所以就要找這常用軟體的自動安裝參數,所謂的自動安裝參數,就是指在軟體安裝時,不用與使用者做任何互動,也就是使用者不用做任何設定,而自動把軟體依照預設的設定安裝完成。
不過,個人覺得這些自動安裝參數雖然可以把軟體安裝起來,但並無法完全針對軟體的內容做更進一步的設定,比如:安裝 OpenOffice.org 時,我只要用到 Writer / Calc / Impress 其餘的不要,但自動安裝就會把其他的一股腦都安裝起來。
底下是一些個人常用的軟體的自動安裝參數,有些是在網路上搜尋來的,有些是 try 來的。[@more@]Firefox
http://moztw.org/
Firefox-full-latest.exe /S
VirusTotal
https://www.virustotal.com/en/documentation/desktop-applications/virustotal-uploader
vtuploader2.2.exe /S
Flash Player
http://get.adobe.com/tw/flashplayer/
install_flash_player.exe /install
install_flash_player_ax.exe /install
Oracle Java
http://www.java.com/zh_TW/
jre-7u55-windows-x64.exe /s /v”/qn IEXPLORER=1 REBOOT=Suppress JAVAUPDATE=0″
WinRar
http://www.rar.com.tw/download.html
winrar-x64-501tc.exe /s
Easy 7-Zip
http://www.e7z.org/
easy7zip_x64.exe /sp- /silent /norestart
7-Zip
http://www.developershome.com/7-zip/
7z920-x64.msi /qn
7z920.exe /S
Bandzip
https://www.bandisoft.com/bandizip/tw/
BANDIZIP-SETUP.EXE /S
ClassicShell
http://www.classicshell.net/translations/
ClassicShellSetup_4_1_0-zhTW.exe /qn
Adblock Plus for IE
https://adblockplus.org/zh_TW/internet-explorer
adblockplusie-1.1.exe /passive /quiet /norestart
Adobe PDF Reader
https://get.adobe.com/tw/reader/
AdbeRdr11000_zh_TW.exe /sPB /rps
AdbeRdrUpd11006.msp /quiet /norestart
Microsoft Silverlight
https://www.microsoft.com/taiwan/msdn/silverlightnet/getstarted/default.aspx
Silverlight_x64.exe /q
PotPlayer
http://potplayer.daum.net/?lang=zh_TW
PotPlayerSetup64.exe /S
Google Picasa
http://picasa.google.com.tw/intl/zh-TW/
picasa39-setup.exe /S
LibreOffice
https://zh-tw.libreoffice.org/
LibreOffice_4.2.4_Win_x86.msi /qn
LibreOffice_4.2.4_Win_x86_helppack_zh-TW.msi /qn
Apache OpenOffice
http://openoffice.apache.org/downloads.html
Apache_OpenOffice_4.1.0_Win_x86_install_zh-TW.exe /S
MPC-HC
http://mpc-hc.org/
MPC-HC.1.7.5.x64.exe /sp- /verysilent
Notepad++
http://notepad-plus-plus.org/
npp.6.6.2.Installer.exe /S
PSPad
http://www.pspad.com/en/
pspad457inst_en.exe /sp- /verysilent
Fastesttube
http://kwizzu.com/
fastesttube_2.2.1.10.exe /S
PhotoCap
http://www.photocap.com.tw/forum/index.php
PhotoCap600_CH_BIG5.exe /s
查看 wim 檔資訊
Dism /Get-WimInfo /WimFile:g:install.wim
imagex /info g:install.wim
以讀寫模式掛載 wim 檔
dism /Mount-Image /ImageFile:g:install.wim /index:1 /MountDir:g:WIM
imagex /mountrw g:install.wim 1 g:WIM
以唯讀方式掛載 wim 檔
dism /Mount-WIM /ReadOnly /ImageFile:g:install.wim /index:1 /MountDir:g:WIM
imagex /mount g:install.wim 1 g:WIM
將變更的資訊回存到 wim 檔
dism /Unmount-Wim /MountDir:g:WIM /commit
imagex /unmount g:WIM /commit
[@more@]刪除 wim 檔中的映像檔
dism /Delete-Image /ImageFile:install.wim /Index:1
imagex /delete install.wim 1
不將變更的資訊回存到 wim 檔
dism /Unmount-Wim /MountDir:g:WIM /discard
imagex /unmount g:WIM
將 wim 檔分割
dism /Split-Image /ImageFile:g:install.wim /SWMFile:g:split.swm /FileSize:640
imagex /split g:install.wim g:split.swm 640
將磁碟機備份成 wim 檔
dism /Capture-Image /ImageFile:ginstall.wim /CaptureDir:C: /Name:”Windows 8.1 Enterprise” /Compress:maximum
imagex /compress maximum /capture c: g:install.wim “Windows 8.1 Enterprise”
由 wim 檔還原到磁碟機
dism /Apply-Image /ImageFile:g:install.wim /Index:1 /ApplyDir:C:
dism /Apply-Image /ImageFile:g:split.swm /SWMFile:g:split*.swm /Index:1 /ApplyDir:C:
imagex /apply g:install.wim 1 c:
將 wim 檔匯出
dism /Export-Image /SourceImageFile:g:install.wim /SourceIndex:1 /DestinationImageFile:g:install2.wim /Compress:max
imagex /export /compress maximum g:install.wim 1 g:install2.wim
設定 wim 檔相關資訊
imagex /info g:install.wim 1 “Windows 8.1 企業版 x64” “Windows 8.1 Update 1 企業版 x64”
開啟系統功能
dism /Image:g:WIM /enable-feature /featurename:NetFX3 /All /Source:.Imagex64sourcessxs /LimitAccess
整合修正檔
dism /Image:WIM /Add-Package /PackagePath:.Updatex64Windows8.1-KB2919442-x64.msu
dism /Image:WIM /Add-Package /PackagePath:”Updatex64_1″
清除沒有正常卸載的 WIM 紀錄
dism /Cleanup-Wim
imagex /Cleanup
光碟開機畫面
選擇安裝語系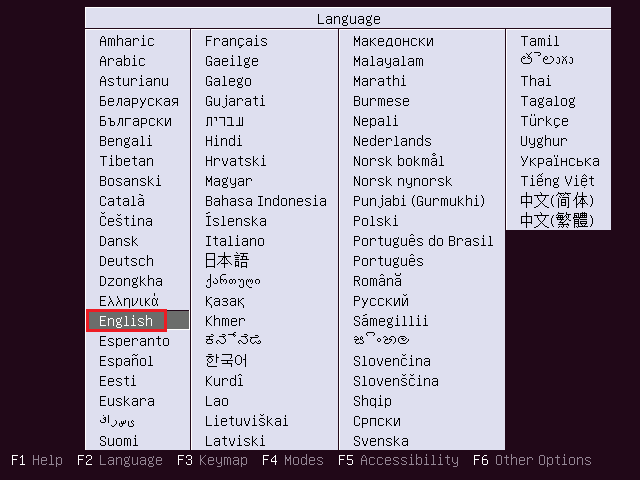
[@more@]選擇 Install Ubuntu Server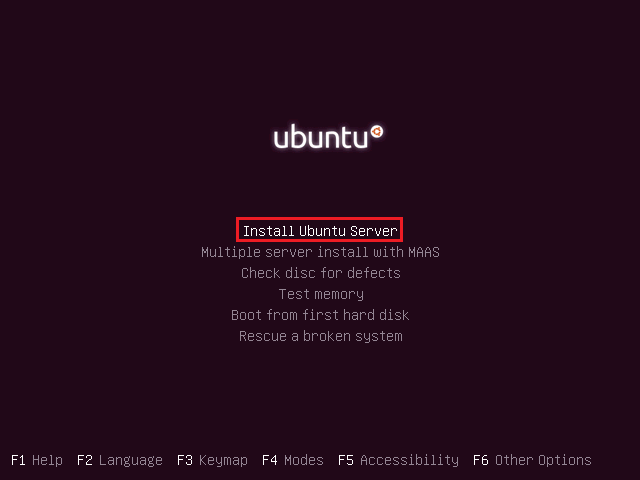
選擇 English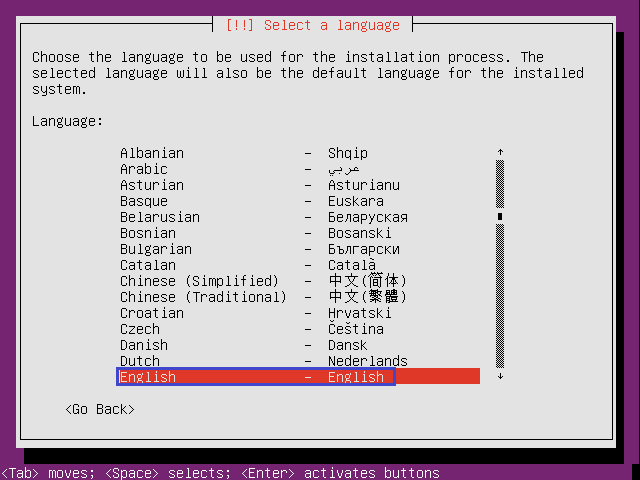
選擇 Other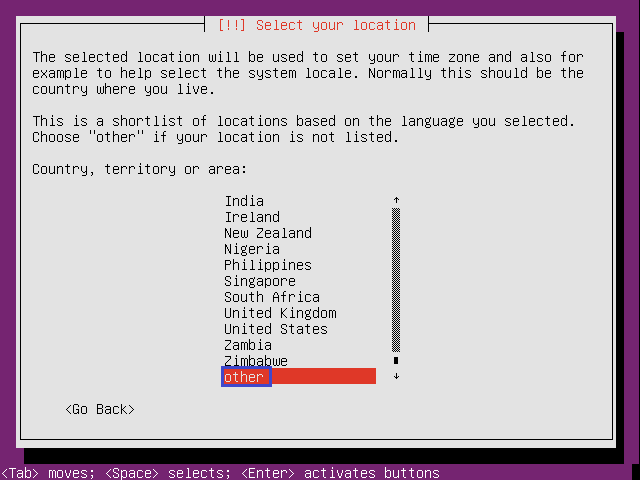
選擇 Asia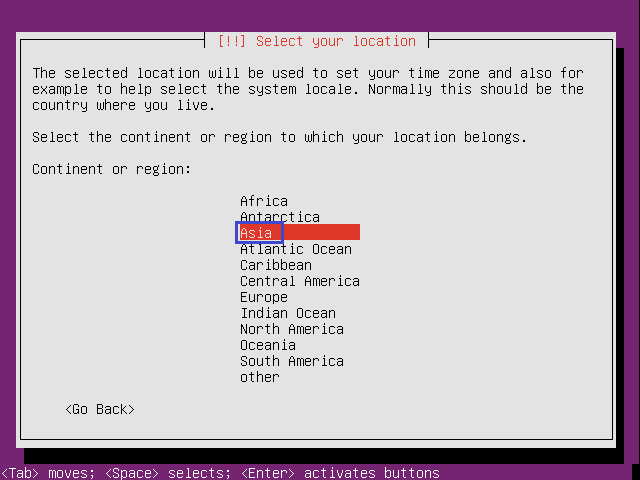
選擇 Taiwan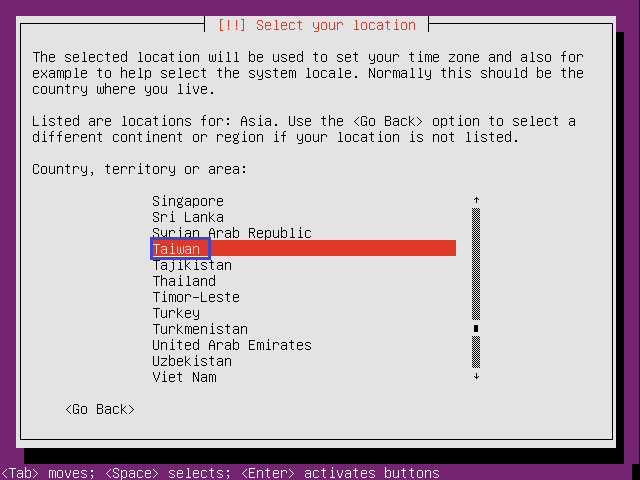
選擇 United States – en_US.UTF-8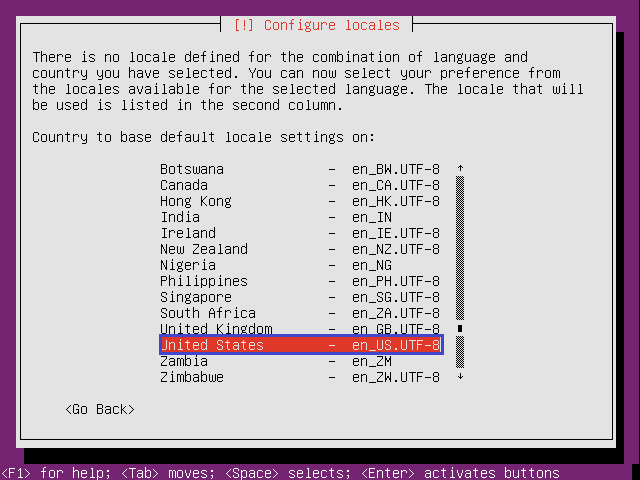
不偵測鍵盤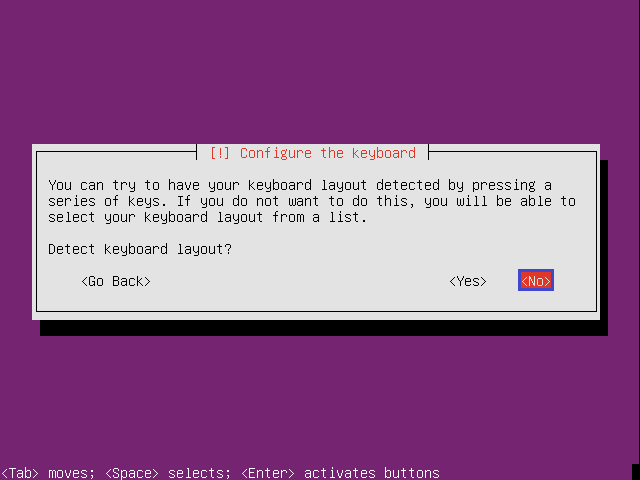
選擇 English (US)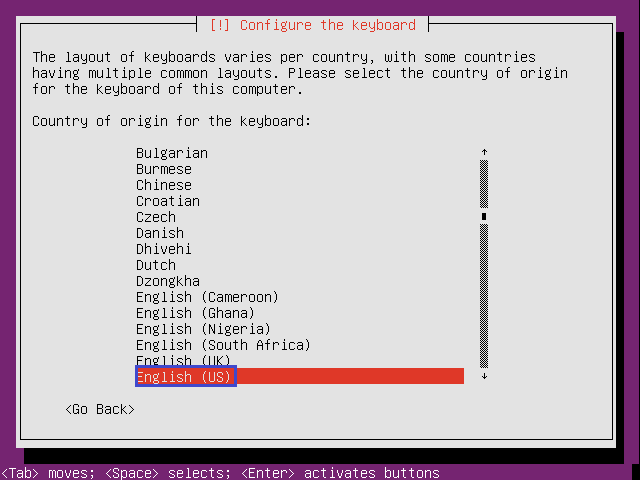
選擇 English (US)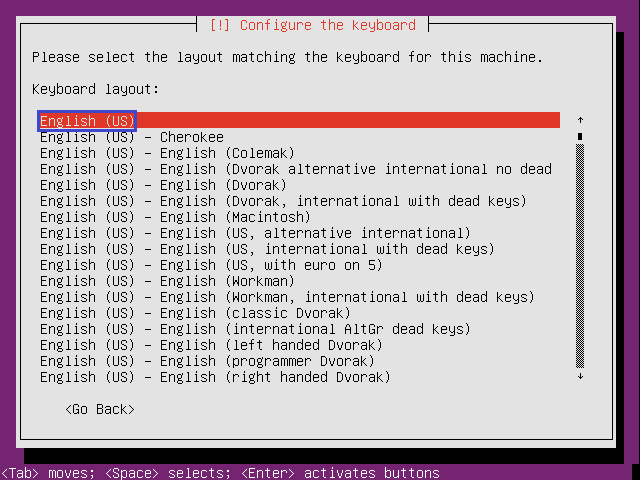
載入附加元件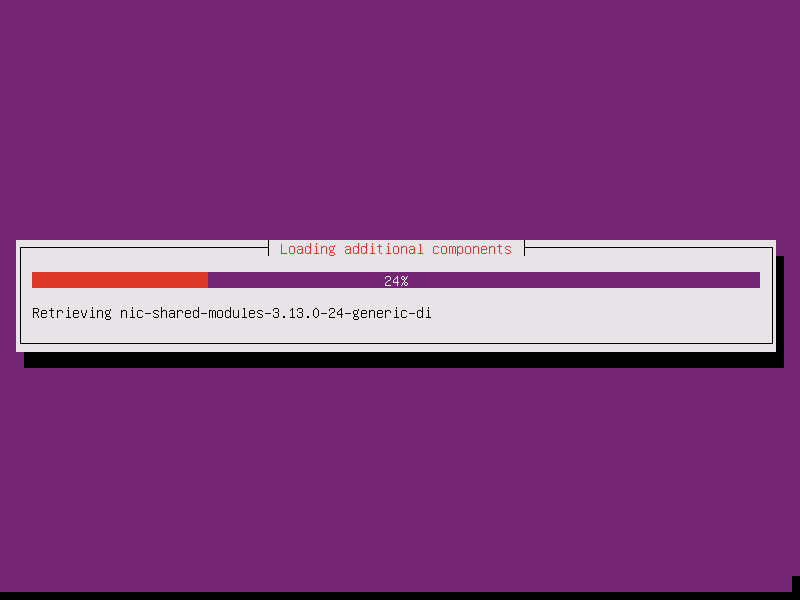
設定網路
設定主機名稱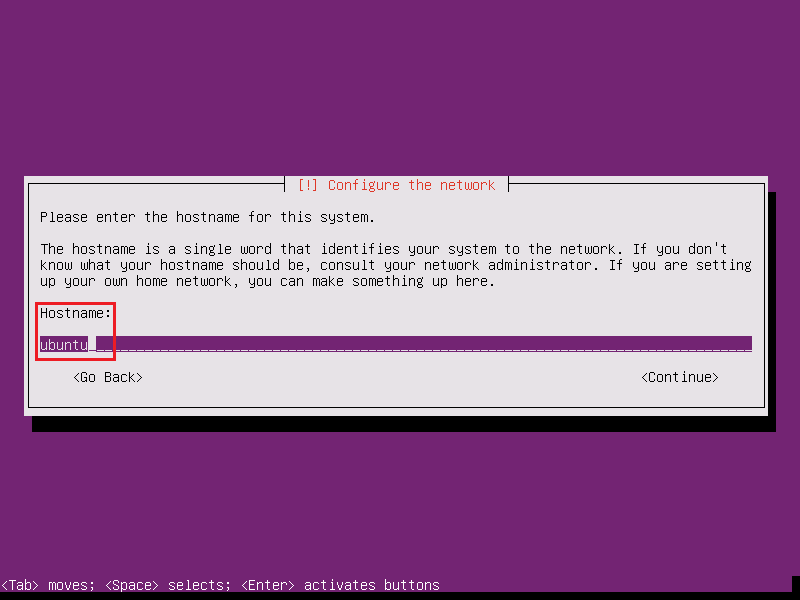
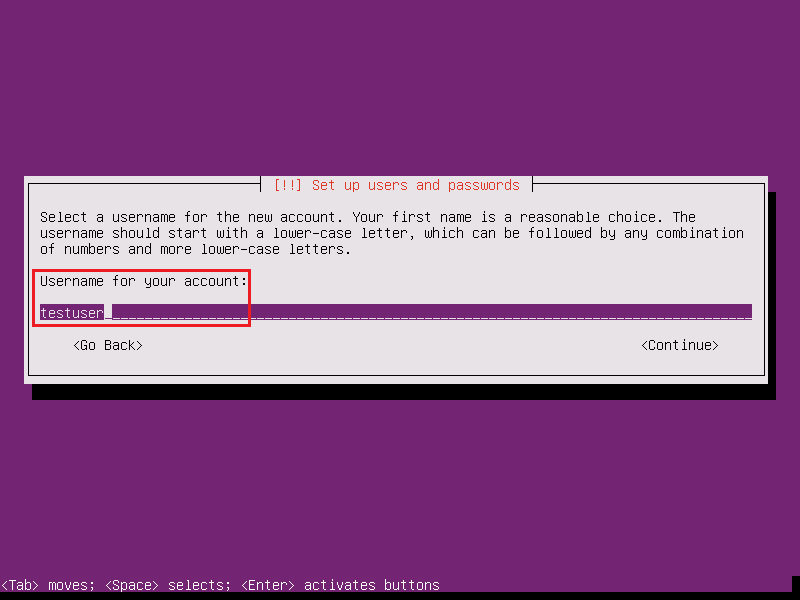
建立使用者和密碼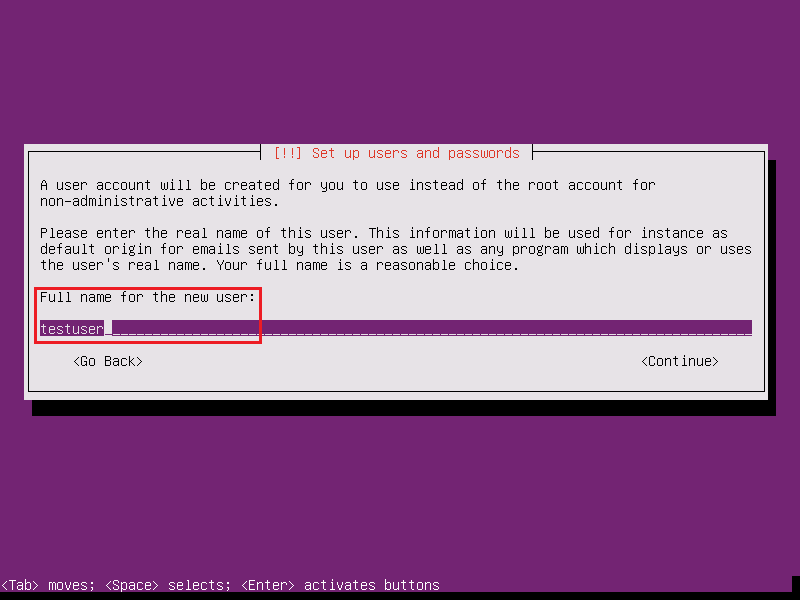
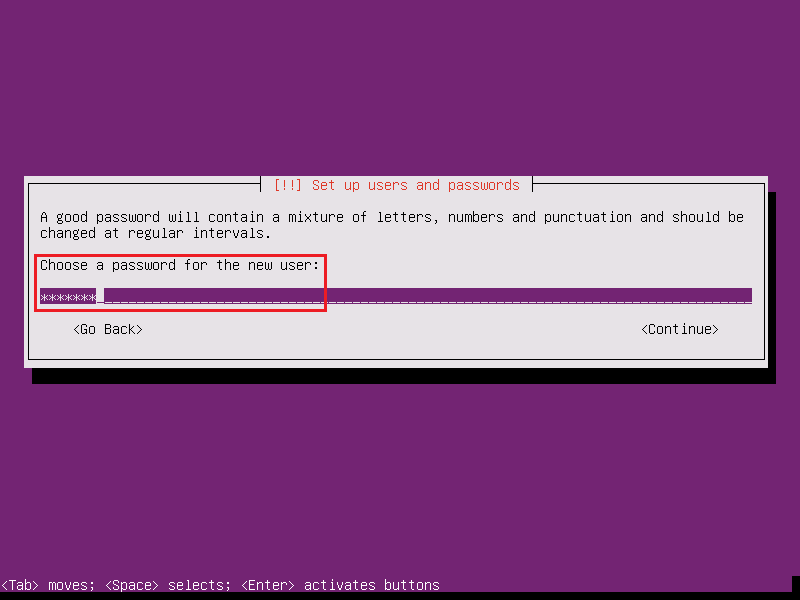
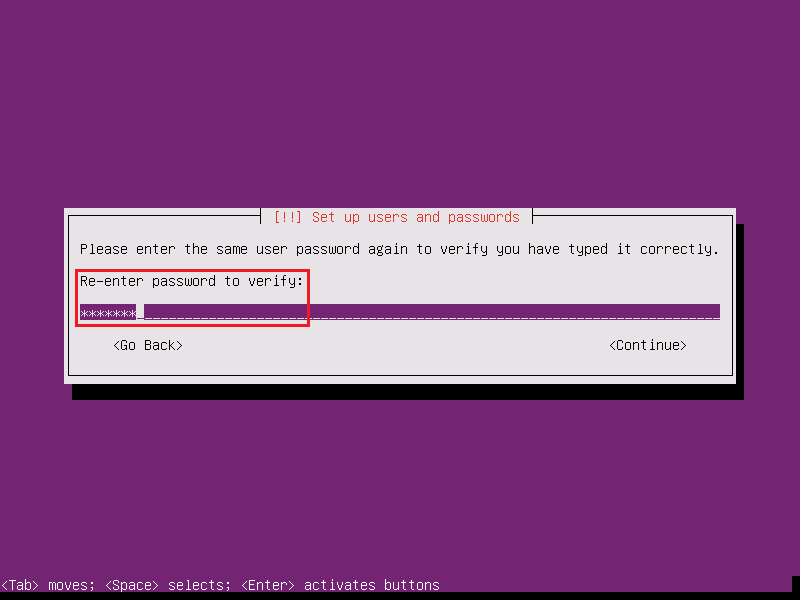
因為設定的密碼過於簡單,所以出現警告訊息
設定時區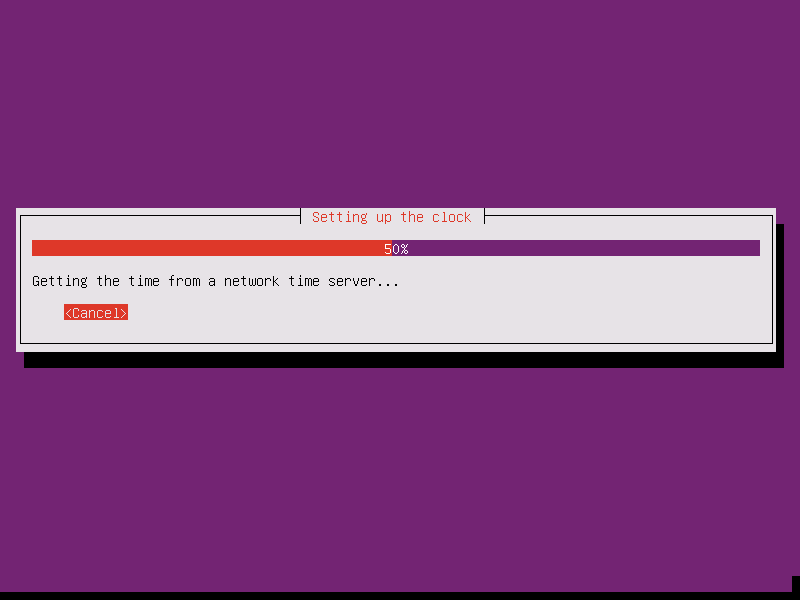
時區 Asia/Taipei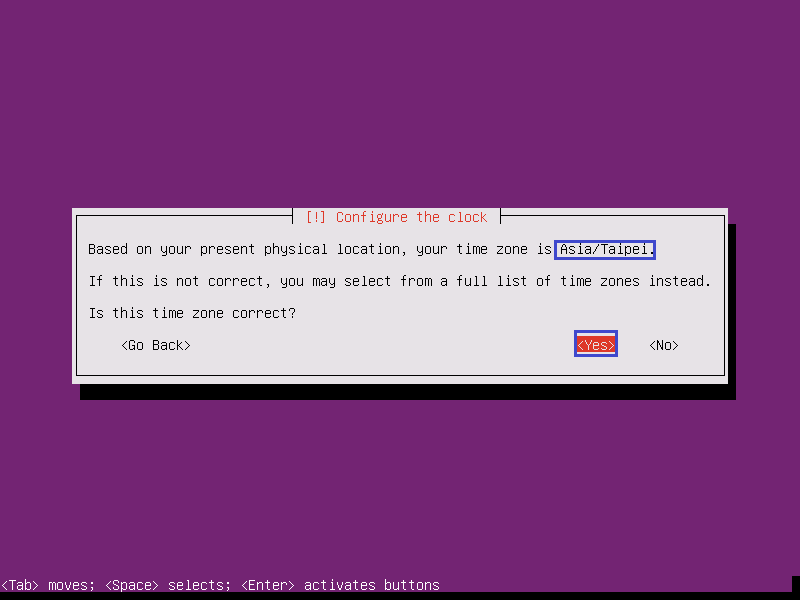
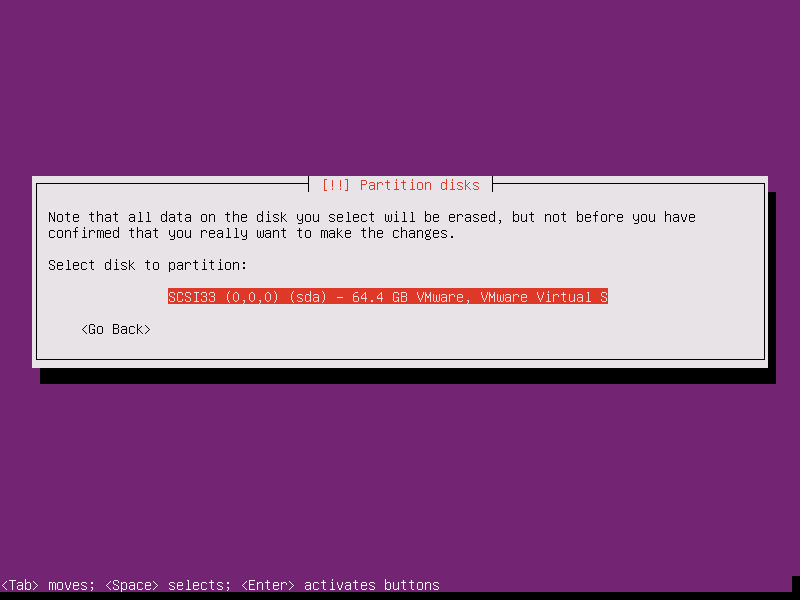
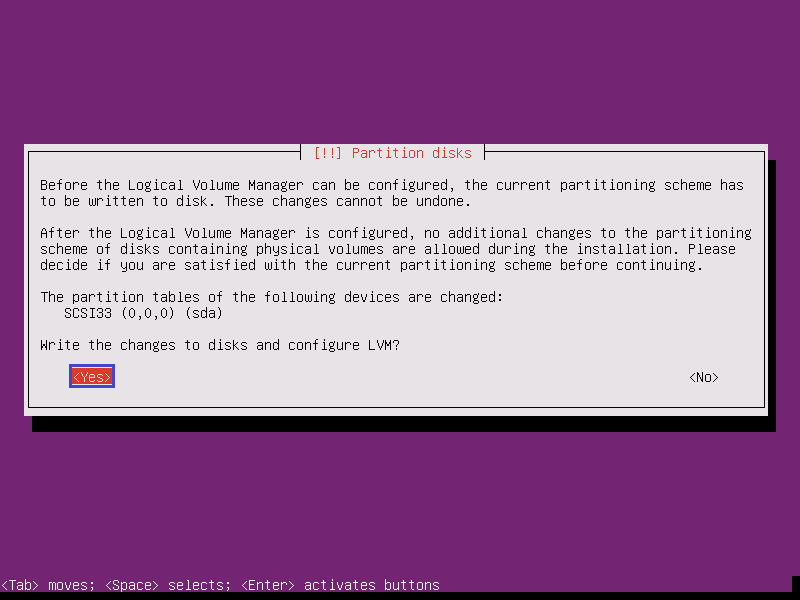
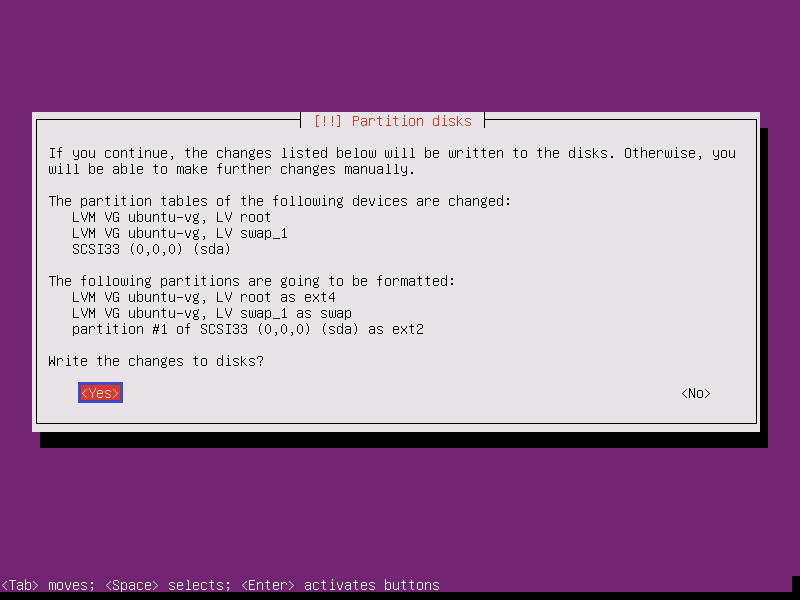
硬碟分割

安裝基本系統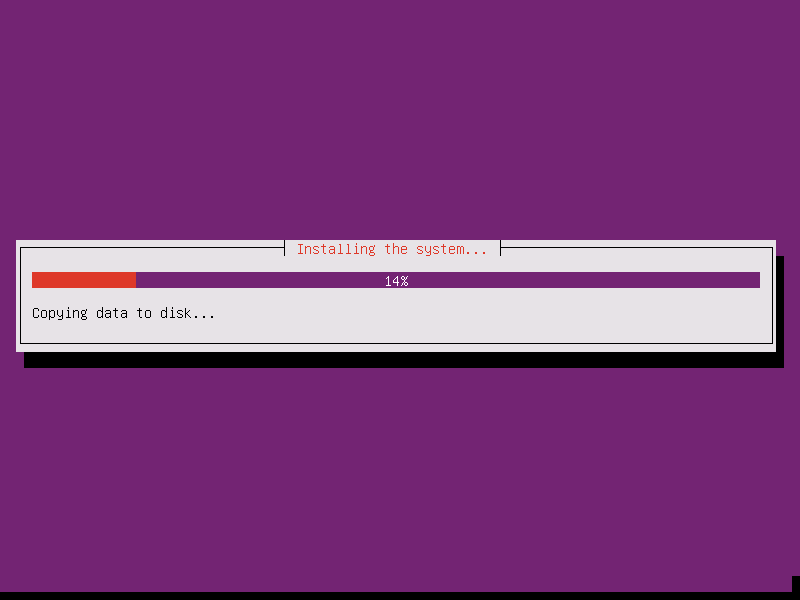
設定 HTTP Proxy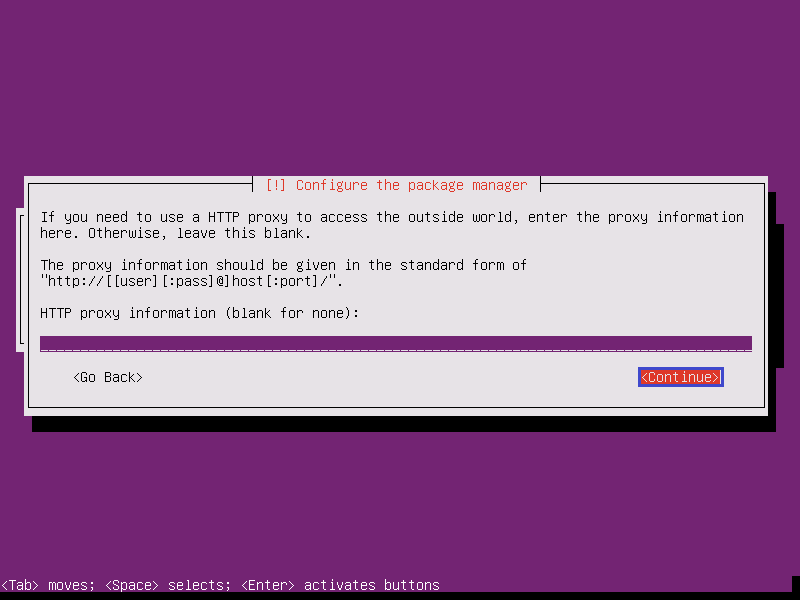
如果可以連上網路,會連線到網路下載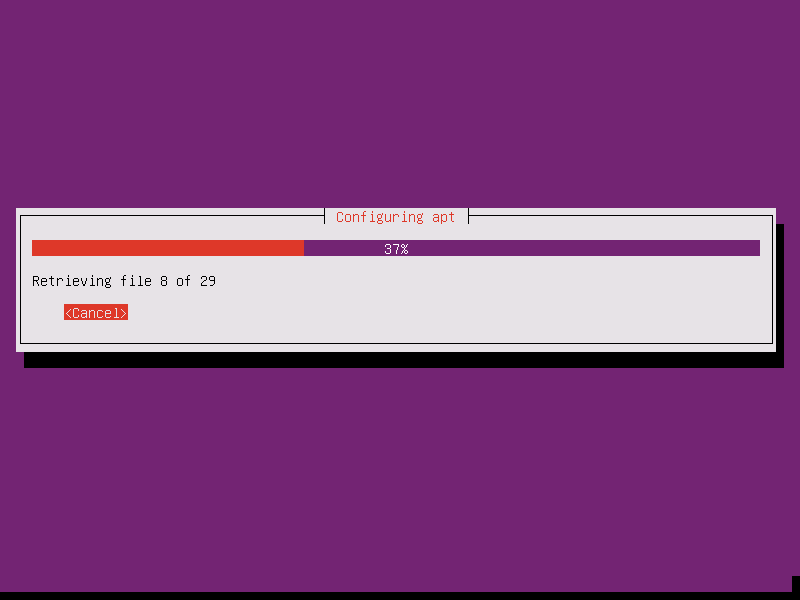
設定 MySQL 密碼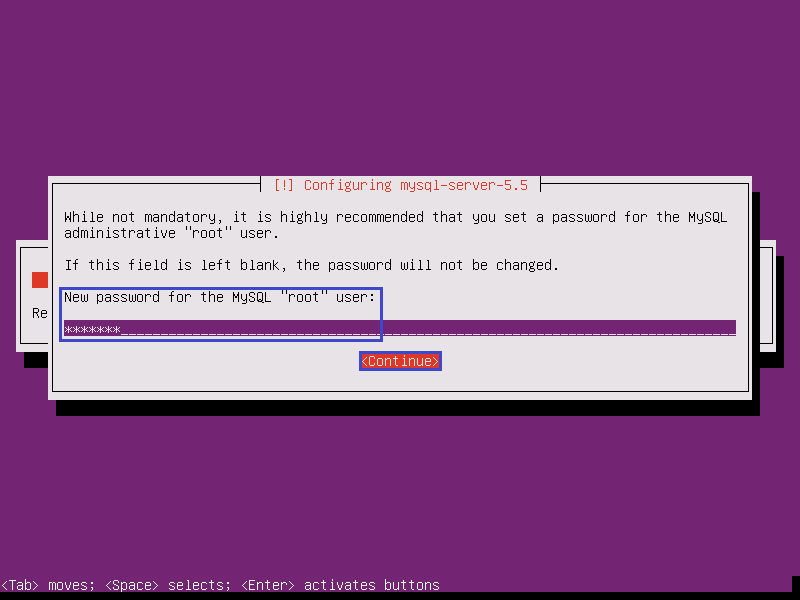
再次輸入 MySQL Server 密碼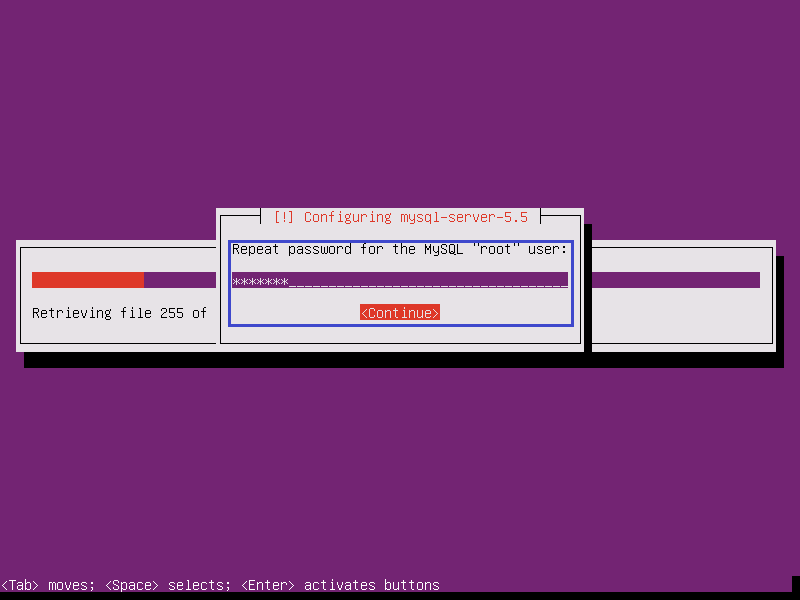
安裝 GRUB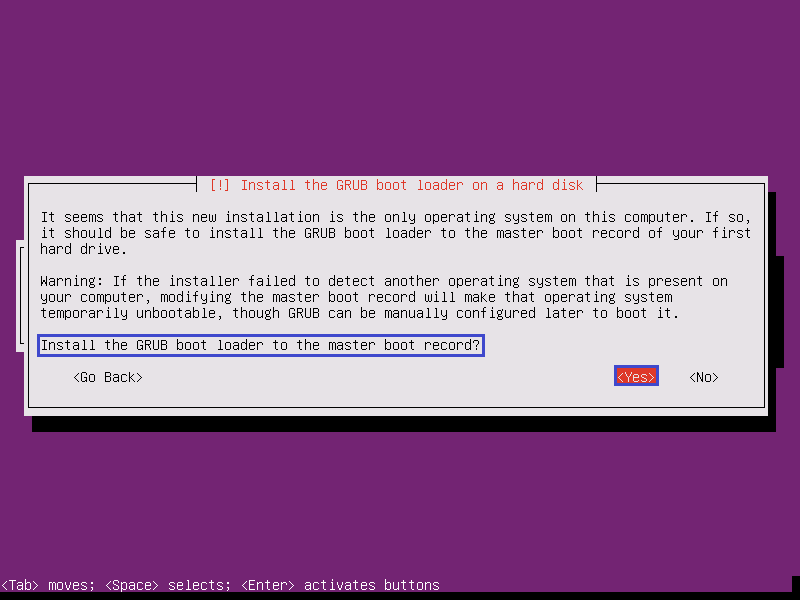
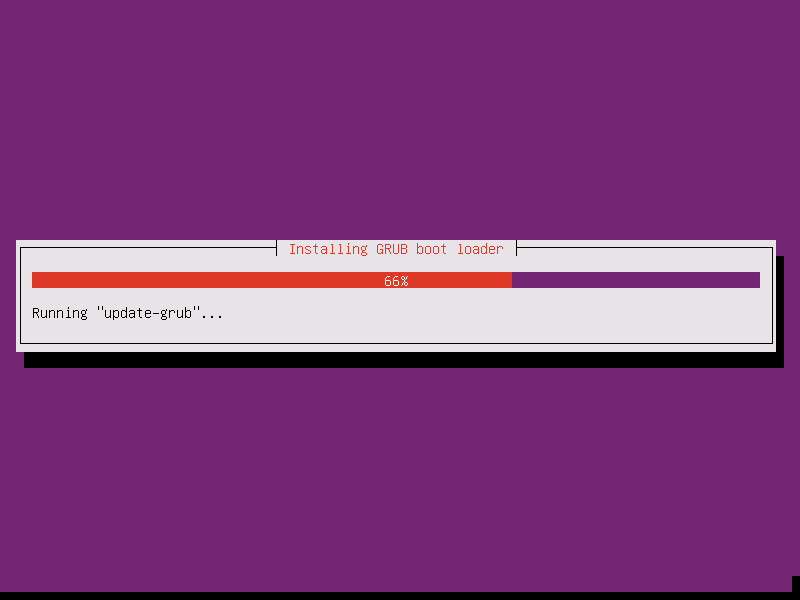
安裝完畢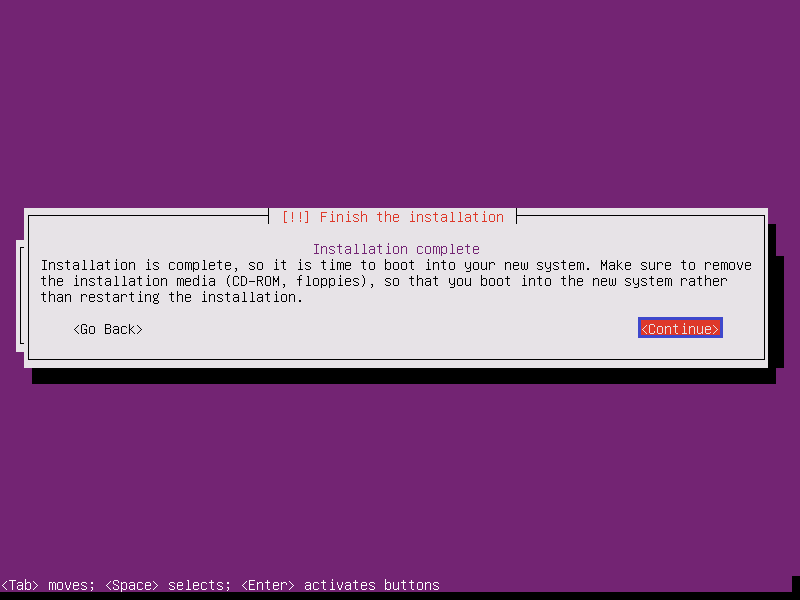
安裝完成的開機畫面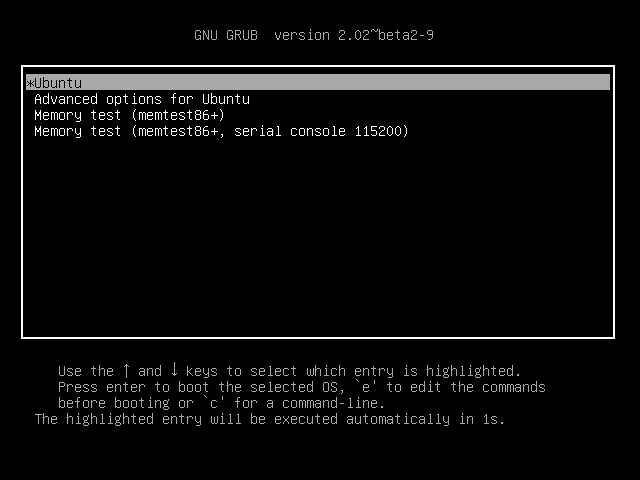
登入後畫面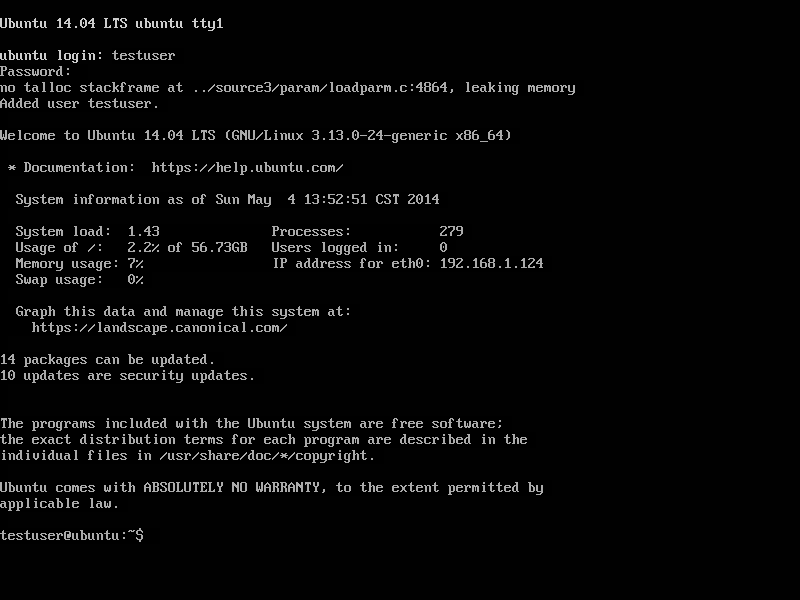
寫這一篇的原因是有人問我,因為從開始研究 Windows 7 整合時就已經是 SP1 了,所以對 Windows 7 整合 SP1 一直沒有深入的研究。在網路上找尋相關的資料,發現都是以 RT Se7en Lite 來整合,但個人印象中,RT Se7en Lite 似乎會把原本光碟的目錄及內容弄亂,所以在整合時,一直都不使用 RT Se7en Lite。
在網路上找到了這二篇的文章,動手實作了一下,底下以 Windows 7 Enterprise x86 為例:
Manually Slipstream SP1 Into Windows 7 Installer DVD « FAQforge
Slipstream Windows 7 + Service Pack 1 – Super User
[@more@]1. 先用虛擬光碟軟體,將 ISO 檔掛載起來,並將 ISO 檔內容複製到 d:Win7 目錄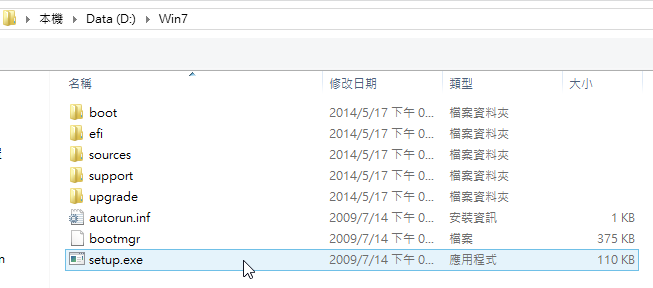
2. 下載 Windows 7 SP1
x86 版本:按 這裡
x64 版本:按 這裡
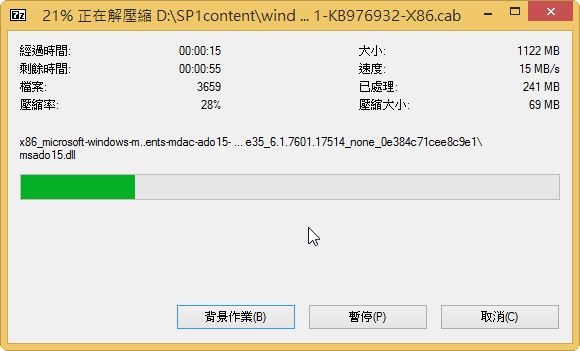
3. 將 SP1 解壓縮
windows6.1-KB976932-X86.exe /X:d:SP1content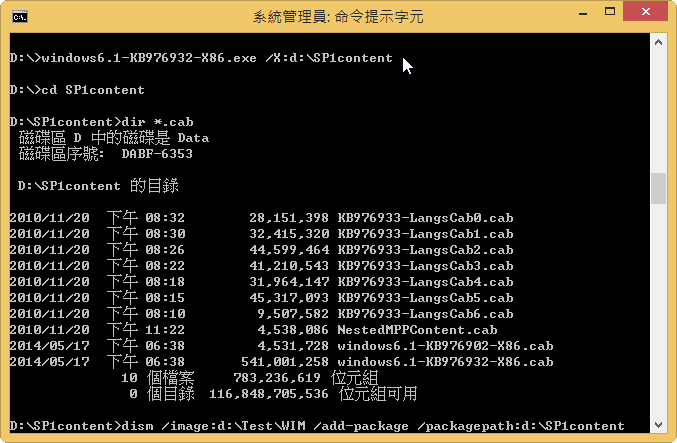
4. 切換到 SP1content 目錄,使用 7-zip 將 windows6.1-KB976932-X86.cab 解開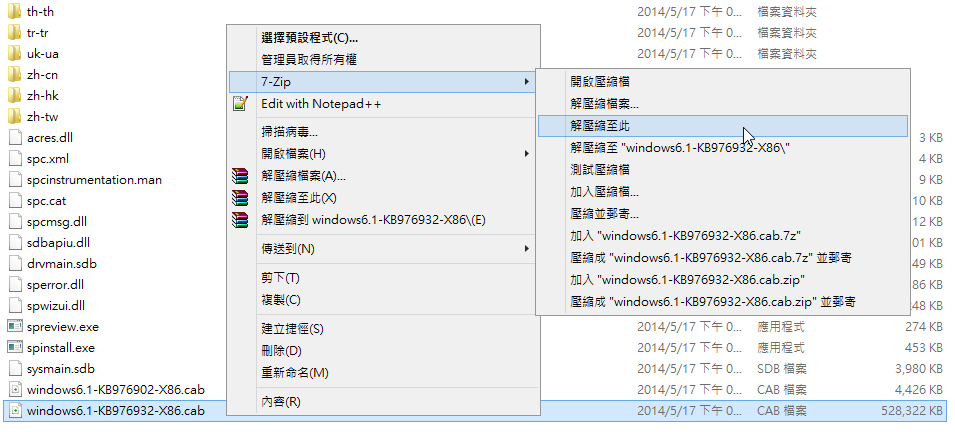
5. 解開 NestedMPPContent.cab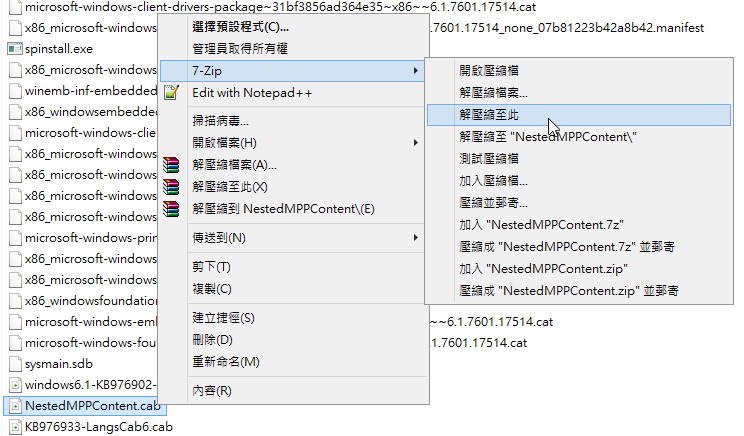
6. 修改 update.ses 把 OfflineInstall 段落中的 Absent 改成 Installed
<Tasks operationMode=”OfflineInstall”>
<Phase>
<package id=”Windows7SP1-KB976933~31bf3856ad364e35~x86~~6.1.1.17514″ targetState=”Installed“/>
</Phase>
</Tasks>
7. 修改 update.mum 和 Windows7SP1-KB976933~31bf3856ad364e35~x86~~6.1.1.17514.mum,把
allowedOffline=”false” 改成 allowedOffline=”true“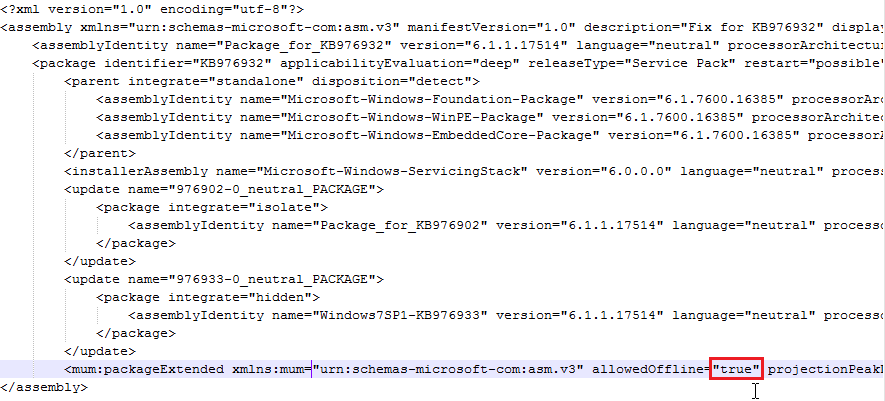
8. 解壓縮 KB976933-LangsCab0.cab 到 KB976933-LangsCab6.cab,如果解開時遇到有檔案重複,請選擇全部覆蓋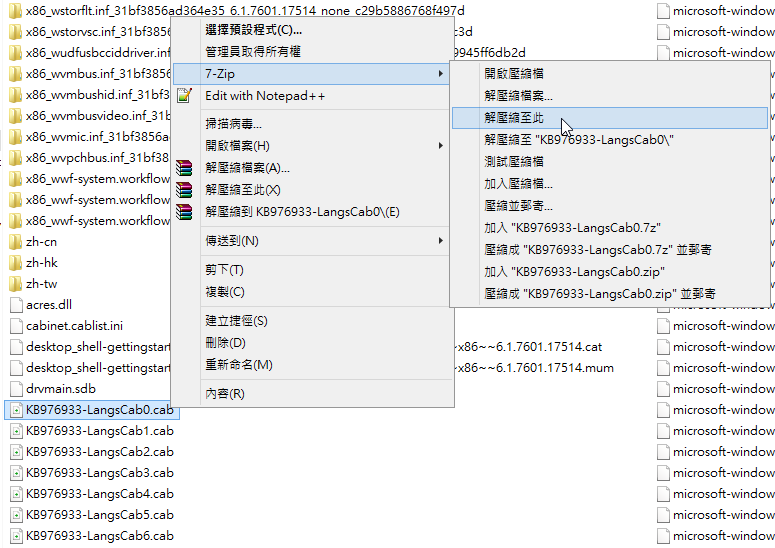
9. 掛載install.wim
dism /mount-wim /wimfile:d:Win7sourcesinstall.wim /index:1 /mountdir:d:TestWIM
10. 進行整合
dism /image:d:TestWIM /add-package /packagepath:d:SP1content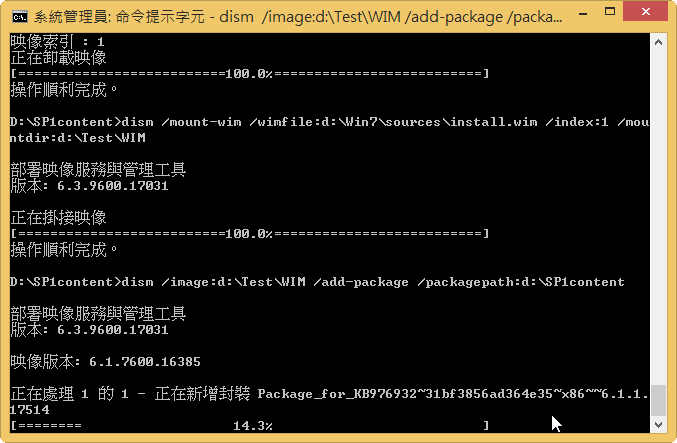
11. 完成整合
dism /Unmount-Wim /MountDir:d:TestWIM /Commit
12. 更改 install.wim 資訊
imagex /info d:Win7sourcesinstall.wim 1 “Windows 7 企業版 SP1 x86” “Windows 7 企業版 IE8 SP1 x86”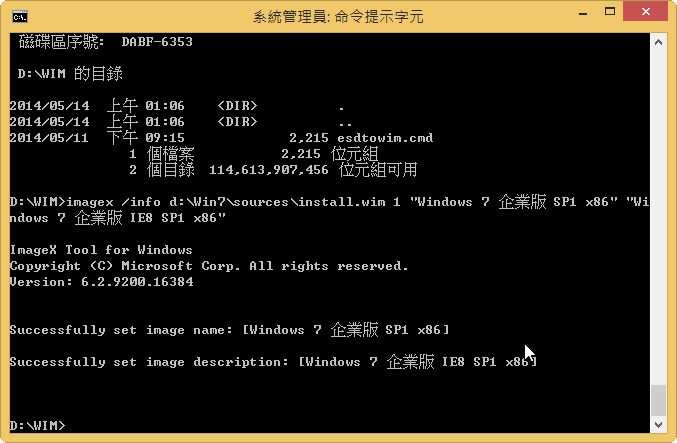
13. 完成 ISO 檔
cdimage -l”GRMCENXVOL_TW_DVD” -t11/22/2010,04:28:10 -u2 -h -bd:Win7bootetfsboot.com -o -m “d:Win7” “tw_windows_7_Ent_IE8_Update_with_sp1_x86_dvd_20140517.iso”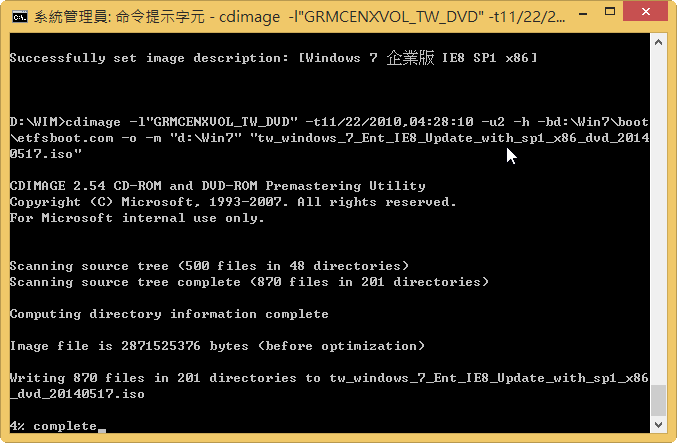
14. 進行安裝來驗證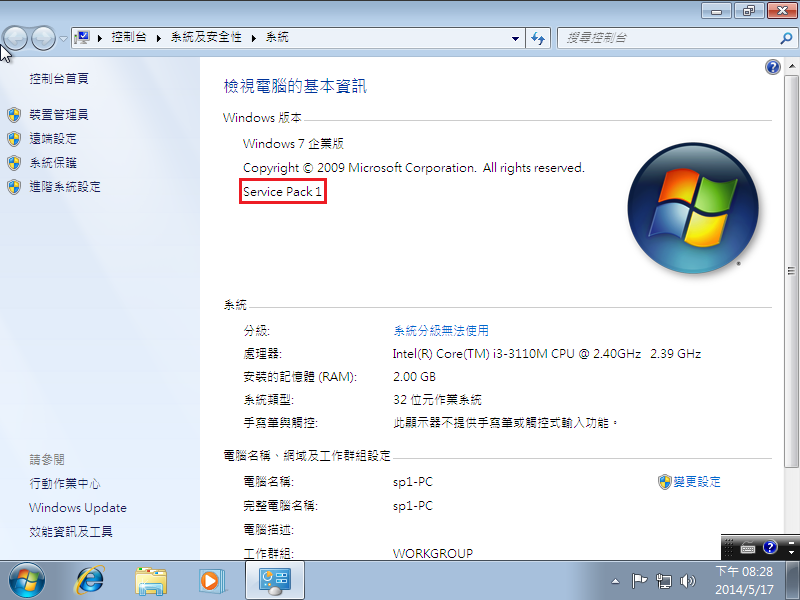
升級到 10.9.3
更新項目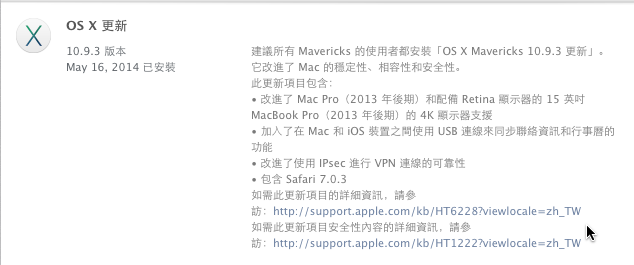
完成更新
對於 Linux Server 自己比較習慣使用的是 CentOS,因為它的支援期長,小版本之間的升級使用 yum update 就可以無痛升級,但 Ubuntu 14.04 Server 是所謂的 LTS 版本,支援期有到 5 年,再加上有時會遇到一些要用的套件,在 CentOS 上要自己重新編譯來安裝,但在 Ubuntu 上則是有已經打包好的套件,可以使用 apt-get 指令來安裝,所以有的 Server 就改裝了 Ubuntu Server。
[@more@]在 grub4dos 中的設定
title – 安裝 Ubuntu 14.04 Server-amd64n 安裝 Ubuntu 14.04 Server-amd64
find –set-root /GRUB/ISO/Linux/ubuntu-14.04-server-amd64.iso
map /GRUB/ISO/Linux/ubuntu-14.04-server-amd64.iso (0xff) || map –mem /GRUB/ISO/Linux/ubuntu-14.04-server-amd64.iso (0xff)
map –hook
root (0xff)
kernel /install/vmlinuz file=/cdrom/preseed/ubuntu-server.seed boot=install noprompt only-ubiquity iso-scan/filename=/GRUB/ISO/Linux/ubuntu-14.04-server-amd64.iso quiet splash —
initrd /install/initrd.gz
不知道為什麼一直出現找不到光碟的訊息,在網路上找了很久,好像沒有找到可以解決的方法,所以目前就改用卡碟機來安裝 Ubuntu Server 了!
在這個有找到一個網頁,有說到可以按 Alt+F2,但我測試了一下子,還是沒有成功,也不想把整個光碟檔案複製出來,只想用 ISO 碟來安裝。
選擇 English
選擇 Other
選擇 Asia
選擇 Taiwan
選擇 United States – en_US.UTF-8
不偵測鍵盤
選擇 English (US)
選擇 English (US)
出現光碟機無法掛載的錯誤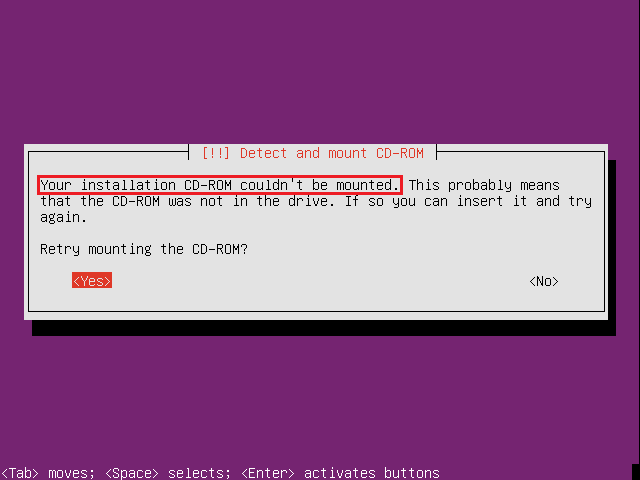
一連二天 5/14~5/15,接著參加教育部數位機會中心東區交流會,這次在臺東娜路彎大酒店舉行。
[@more@]下午安排的參訪活動
參觀金色豐收館
伯朗大道 & 金城武樹
因為許老師的緣故,有幸參加 5/14 在花蓮明恥國小舉行的國中小行動學習推動計畫東區交流會。
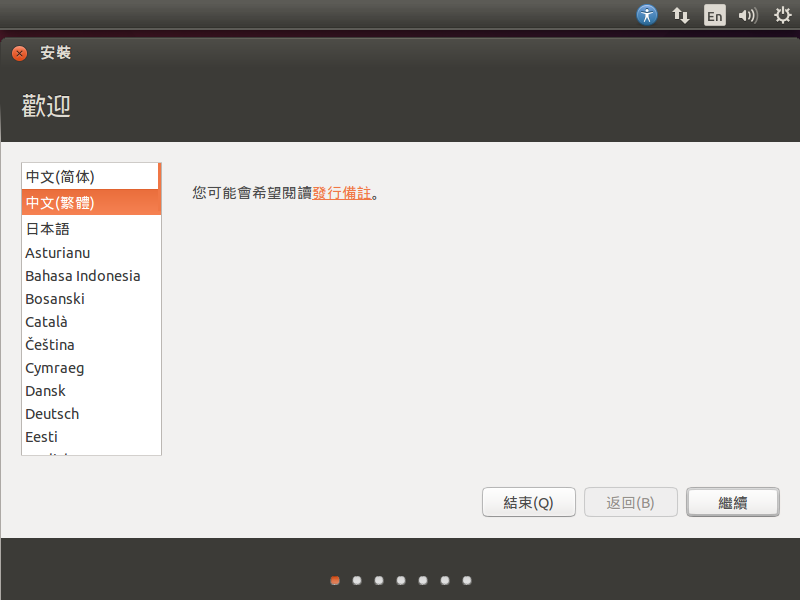
因為工作的關係,常常會測試不同的作業系統,以前是燒成光碟直接安裝,後來改用虛擬機器並使用 ISO 檔安裝測試,再來是使用 USB 隨身碟,將 ISO 檔植入隨身碟安裝,目前自己常會用的方式就是使用隨身硬碟並搭配 grub4dos 來安裝不同的作業系統,包括:Windows 7 / 8.1 / Ubuntu….,如果無法用隨身硬碟加 grub4dos 的,則改用卡碟機來處理。
選擇要安裝 Linux 作業系統

[@more@]grub4dos 設定
title – 安裝 Ubuntu 14.04 Desktop-amd64n 安裝 Ubuntu 14.04 Desktop-amd64
find –set-root /GRUB/ISO/Linux/ubuntu-13.04-desktop-amd64.iso
map /GRUB/ISO/Linux/ubuntu-14.04-desktop-amd64.iso (0xff) || map –mem /GRUB/ISO/Linux/ubuntu-14.04-desktop-amd64.iso (0xff)
map –hook
root (0xff)
kernel /casper/vmlinuz.efi file=/cdrom/preseed/ubuntu.seed boot=casper locale=zh_TW noprompt only-ubiquity iso-scan/filename=/GRUB/ISO/Linux/ubuntu-14.04-desktop-amd64.iso quiet splash —
initrd=/casper/initrd.lz
ISO 檔是放在 GRUB/ISO/Linux 的目錄下
選擇要安裝的 Linux 版本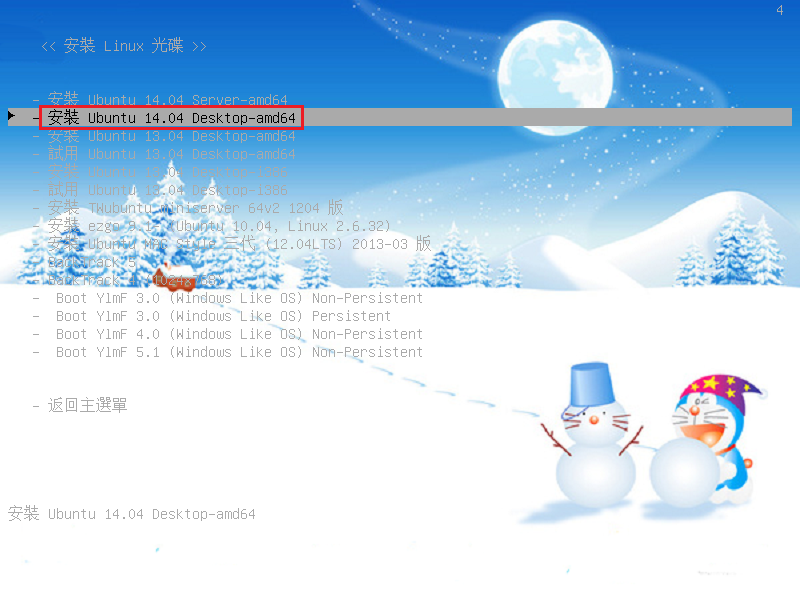
光碟開機畫面
安裝畫面