透過 PXE Server 安裝 Ubuntu 13.10 Server

# mkdir /mnt/{Ubuntu-12.04.3-amd64,Ubuntu-12.04.3-i386,Ubuntu-13.10-amd64,Ubuntu-13.10-i386}
# mount -o loop /var/ftp/pub/ubuntu-13.10-server-amd64.iso /mnt/Ubuntu-13.10-amd64
# mount -o loop /var/ftp/pub/ubuntu-13.10-server-i386.iso /mnt/Ubuntu-13.10-i386

# mkdir -p /var/lib/tftpboot/Ubuntu/{1310,1204}/{amd64,i386}

# cp /mnt/Ubuntu-13.10-amd64/install/netboot/ubuntu-installer/amd64/linux /var/lib/tftpboot/images/Ubuntu/1310/amd64
# cp /mnt/Ubuntu-13.10-amd64/install/netboot/ubuntu-installer/amd64/initrd.gz /var/lib/tftpboot/images/Ubuntu/1310/amd64

# vim /var/lib/tftpboot/pxelinux.cfg/Ubuntu_Server
LABEL Install Ubuntu 13.10 Server amd64
        MENU LABEL Install Ubuntu 13.10 Server amd64
        kernel images/Ubuntu/1310/amd64/linux
        append initrd=images/Ubuntu/13.10/amd64/initrd.gz ramdisk_size=65535 vga=normal url=http://192.168.1.6/us1310-amd64/preseed.cfg

# mkdir /var/www/html/us1310-amd64
# vim /var/www/html/us1310-amd64/preseed.cfg
# Components to use for loading installer components (options).
d-i mirror/udeb/components multiselect main
# Apt Setup
d-i apt-setup/restricted boolean false
d-i apt-setup/universe boolean false
d-i apt-setup/backports boolean false
d-i apt-setup/non-free boolean false
d-i apt-setup/contrib boolean false
# Don’t want to use a network mirror
d-i apt-setup/use_mirror boolean false
d-i apt-setup/services-select multiselect none
d-i apt-setup/security-updates boolean false
d-i apt-setup/another boolean false
# Soultion for could not find any live images
d-i live-installer/net-image string

http://192.168.1.6/Ubuntu-13.10-amd64/install/filesystem.squashfs

# mount –bind /mnt/Ubuntu-13.10-amd64 /var/www/html/Ubuntu-13.10-amd64

透過 PXE Server 使用 Samba 和 Clonezilla 自動備份及還原

主要是在 PXE Server 的功能表,使用 Samba 和 Clonezilla 做自動的備份及還原,另外因為要做到自動化,所以 Samba Server 是設定成不用密碼就可以使用,但在防火牆上要限定連線來源。

修改 PXE Server 功能表,因為執行的時候會覆蓋原有的備份檔和把 Windows 系統磁碟還原,所以在選項上加上了密碼,避免誤觸
要注意的是 append initrd 到後面算是一行
# vim /var/lib/tftpboot/pxelinux.cfg/Backup_Restore
LABEL Clonezilla Livei Samba AutoBackup
        MENU LABEL Clonezilla Live Samba ^AutoBackup
        MENU PASSWD CloneZilla
        kernel images/Clonezilla/live/vmlinuz
        append initrd=images/Clonezilla/live/initrd.img boot=live config username=user quiet noswap edd=on nomodeset noeject locales=”zh_TW.UTF-8″ keyboard-layouts=”NONE” ocs_live_run=”/usr/sbin/ocs-sr -q2 -j2 -z1p -p true saveparts Win7Backup sda1″ ocs_live_extra_param=”” ocs_live_batch=”yes” ocs_prerun=”mount -t cifs //192.168.1.6/public /home/partimag” vga=788 ip=frommedia nosplash fetch=tftp://192.168.1.6/images/Clonezilla/live/filesystem.squashfs

LABEL Clonezilla Livei Samba AutoRestore
        MENU LABEL Clonezilla Live Samba ^AutoRestore
        MENU PASSWD CloneZilla
        kernel images/Clonezilla/live/vmlinuz
        append initrd=images/Clonezilla/live/initrd.img boot=live config username=user quiet noswap edd=on nomodeset noeject locales=”zh_TW.UTF-8″ keyboard-layouts=”NONE” ocs_live_run=”/usr/sbin/ocs-sr –batch -g auto -e1 auto -e2 -r -j2 -p reboot restoreparts Win7Backup sda1″ ocs_live_extra_param=”” ocs_live_batch=”yes” ocs_prerun=”mount -t cifs //192.168.1.6/public /home/partimag” vga=788 ip=frommedia nosplash fetch=tftp://192.168.1.6/images/Clonezilla/live/filesystem.squashfs

透過 PXE Server 使用 NFS 和 Clonezilla 自動備份及還原

主要是在 PXE Server 的功能表,使用 NFS 和 Clonezilla 做自動的備份及還原

修改 PXE Server 功能表,因為執行的時候會覆蓋原有的備份檔和把 Windows 系統磁碟還原,所以在選項上加上了密碼,避免誤觸
要注意的是 append initrd 到後面算是一行
# vim /var/lib/tftpboot/pxelinux.cfg/Backup_Restore
LABEL Clonezilla Livei nfs AutoBackup
        MENU LABEL Clonezilla Live nfs ^AutoBackup
        MENU PASSWD CloneZilla
        kernel images/Clonezilla/live/vmlinuz
        append initrd=images/Clonezilla/live/initrd.img boot=live config username=user quiet noswap edd=on nomodeset noeject locales=”zh_TW.UTF-8″ keyboard-layouts=”NONE” ocs_live_run=”/usr/sbin/ocs-sr -q2 -j2 -z1p -p true saveparts Win7Backup sda1″ ocs_live_extra_param=”” ocs_live_batch=”yes” ocs_prerun=”mount -t nfs4 192.168.1.6:/var/lib/tftpboot/Backup /home/partimag” vga=788 ip=frommedia nosplash netboot=nfs nfsroot=192.168.1.6:/var/lib/tftpboot/images/Clonezilla

LABEL Clonezilla Livei nfs AutoRestore
        MENU LABEL Clonezilla Live nfs ^AutoRestore
        MENU PASSWD CloneZilla
        kernel images/Clonezilla/live/vmlinuz
        append initrd=images/Clonezilla/live/initrd.img boot=live config username=user quiet noswap edd=on nomodeset noeject locales=”zh_TW.UTF-8″ keyboard-layouts=”NONE” ocs_live_run=”/usr/sbin/ocs-sr –batch -g auto -e1 auto -e2 -r -j2 -p reboot restoreparts Win7Backup sda1″ ocs_live_extra_param=”” ocs_live_batch=”yes” ocs_prerun=”mount -t nfs4 192.168.1.6:/var/lib/tftpboot/Backup /home/partimag” vga=788 ip=frommedia nosplash netboot=nfs nfsroot=192.168.1.6:/var/lib/tftpboot/images/Clonezilla

RSS 閱讀器

生在這個資訊化爆炸的時代,每天如果認真的話,有讀不完的資料,辜且不去評斷這些資料的優劣,值得值得花那個時間。如果有心,且想要這麼做的人,可能會覺得時間不夠用,因為這些資料可能散落在不同的網站,這時候可能要藉助 RSS 閱讀器的協助,會節省一部分的時間。
網頁型的 RSS 閱讀器,均可以用 Google 或 Facebook 帳號直接登入
Feedly
http://feedly.com

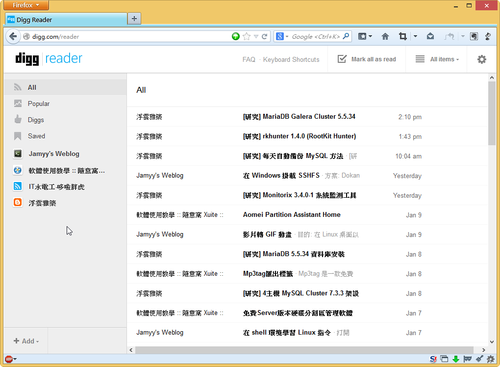
[@more@]Digg Reader
http://digg.com/reader

桌機版本
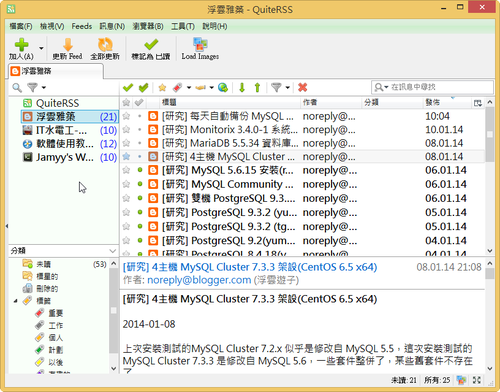
QuiteRSS
http://quiterss.org/

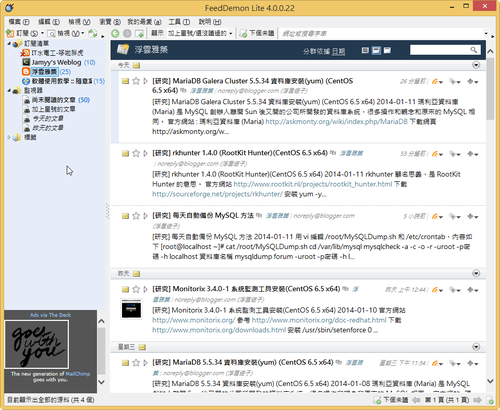
FeedDemon
http://www.feeddemon.com/

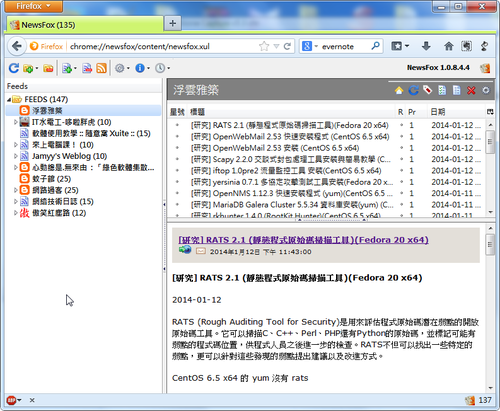
在 Firefox 上,目前是使用 NewsFox 和 Sage
NewsFox:https://addons.mozilla.org/zh-tw/firefox/addon/newsfox/

Sage:https://addons.mozilla.org/zh-tw/firefox/addon/sage/

在 CentOS 6.x 上安裝 Rootkit Hunter

Rootkit Hunter 是一套能偵測 Linux /BSD 作業系統是不是有中木馬、惡意程式、或是病毒的程式,也可以偵測系統是不是有一些不安全的設定,系統管理者可以安裝,用來檢測系統是否有問題,做為防護上的參考。
由於 Rootkit Hunter 不是官方套件庫中的套件,所以要利用 epel 套件庫來安裝
1. 安裝 Rootkit Hunter
# yum install rkhunter –enablerepo=epel

2. 更新 Rootkit Hunter
# rkhunter –update
[ Rootkit Hunter version 1.4.0 ]

Checking rkhunter data files…
  Checking file mirrors.dat                                  [ No update ]
  Checking file programs_bad.dat                             [ No update ]
  Checking file backdoorports.dat                            [ No update ]
  Checking file suspscan.dat                                 [ No update ]
  Checking file i18n/cn                                      [ No update ]
  Checking file i18n/de                                      [ No update ]
  Checking file i18n/en                                      [ No update ]
  Checking file i18n/zh                                      [ No update ]
  Checking file i18n/zh.utf8                                 [ No update ]

3. 使用方式 -c 代表 –check –lang 後面是顯示的語系,預設是英文
# rkhunter -c –lang zh.utf8
[ Rootkit Hunter 版本 1.4.0 ]

檢查系統命令…

  執行 ‘字串’ 命令檢查
    檢查 ‘字串’ 命令                                   [ 正常 ]

  執行 ‘函式庫’ 的檢查
    檢查預先載入的變數                              [ 沒發現 ]
    檢查預先載入的檔案                              [ 沒發現 ]
    檢查 LD_LIBRARY_PATH 變數                            [ 沒發現 ]

  執行檔案屬性檢查
    檢查重要的基本程式                              [ !注意! ]
    /sbin/chkconfig                                          [ 正常 ]
    /sbin/depmod                                             [ 正常 ]
    /sbin/fsck                                               [ 正常 ]
    /sbin/fuser                                              [ 正常 ]
    /sbin/ifconfig                                           [ 正常 ]
    /sbin/ifdown                                             [ 正常 ]
    /sbin/ifup                                               [ 正常 ]
    /sbin/init                                               [ 正常 ]
    /sbin/insmod                                             [ 正常 ]
[@more@]4. 加入到工作排程 cron
# vim /usr/local/bin/rkhunter_check.sh
#!/bin/bash
(
/usr/bin/rkhunter –update
/usr/bin/rkhunter –cronjob –report-warnings-only
) | /bin/mail -s ‘Rootkit Hunter Daily Run (PutYourServerNameHere)’ your@email.com

給檔案執行權限
# chmod 700 /usr/local/bin/rkhunter_check.sh

加入工作排,每天早上 3 點執行
# crontab -e
加入下面一行
0 3 * * * /usr/local/bin/rkhunter_check.sh

5. 更多的執行參數
# /usr/bin/rkhunter -h

在 CentOS 6.x 上安裝 MariaDB 資料庫

在安裝 Linux 時,大部分人在安裝資料庫時都會安裝 MySQL Server,而比較少安裝 PostgreSQL Server,在 Oracle 購買 MySQL 之後,有些使用者對於 Oracle 保持不信任的態度,轉而支持由 MySQL 公司原創辦人 Michael Widenius 先生另外開發了一個新的資料庫系統,就叫做 MariaDB,並且與原先的 MySQL 保持絕佳的相容性。
MariaDB 官方網站: https://mariadb.com/   https://mariadb.org/en/
[@more@]在 CentOS 6.x 下安裝方式:
1. 最好的方式是在安裝時,不安裝 MySQL 資料庫,否則移除相關套件時,會遇到一些問題,我是採用比較乾淨的方式來安裝
2. 依照官方網站上的 安裝說明 ,建立套件儲存庫,有  5.5 和 10.0 二個版本可以選擇
# vim /etc/yum.repos.d/mariadb.repo

# MariaDB 5.5 CentOS repository list - created 2014-01-10 13:53 UTC  
#
http://mariadb.org/mariadb/repositories/
[mariadb]

name = MariaDB
baseurl = http://yum.mariadb.org/5.5/centos6-amd64
gpgkey = https://yum.mariadb.org/RPM-GPG-KEY-MariaDB
gpgcheck=1


# MariaDB 10.0 CentOS repository list - created 2014-01-10 13:54 UTC
#
http://mariadb.org/mariadb/repositories/
[mariadb]

name = MariaDB
baseurl = http://yum.mariadb.org/10.0/centos6-amd64
gpgkey = https://yum.mariadb.org/RPM-GPG-KEY-MariaDB
gpgcheck=1

更新套件庫
# yum update

安裝 MariaDB
# yum -y install MariaDB-server MariaDB-client

啟動 MariaDB
# service mysql start

開機後啟動
# chkconfig –level 3 mysql on

安裝完成的設定
# /usr/bin/mysql_secure_installation
/usr/bin/mysql_secure_installation: line 379: find_mysql_client:命令找不到

NOTE: RUNNING ALL PARTS OF THIS SCRIPT IS RECOMMENDED FOR ALL MariaDB
      SERVERS IN PRODUCTION USE!  PLEASE READ EACH STEP CAREFULLY!

In order to log into MariaDB to secure it, we’ll need the current
password for the root user.  If you’ve just installed MariaDB, and
you haven’t set the root password yet, the password will be blank,
so you should just press enter here.

Enter current password for root (enter for none):
OK, successfully used password, moving on…

Setting the root password ensures that nobody can log into the MariaDB
root user without the proper authorisation.

Set root password? [Y/n]
New password:
Re-enter new password:
Password updated successfully!
Reloading privilege tables..
 … Success!

By default, a MariaDB installation has an anonymous user, allowing anyone
to log into MariaDB without having to have a user account created for
them.  This is intended only for testing, and to make the installation
go a bit smoother.  You should remove them before moving into a
production environment.

Remove anonymous users? [Y/n]
 … Success!

Normally, root should only be allowed to connect from ‘localhost’.  This
ensures that someone cannot guess at the root password from the network.

Disallow root login remotely? [Y/n]
 … Success!

By default, MariaDB comes with a database named ‘test’ that anyone can
access.  This is also intended only for testing, and should be removed
before moving into a production environment.

Remove test database and access to it? [Y/n]
 – Dropping test database…
 … Success!
 – Removing privileges on test database…
 … Success!

Reloading the privilege tables will ensure that all changes made so far
will take effect immediately.

Reload privilege tables now? [Y/n]
 … Success!

Cleaning up…

All done!  If you’ve completed all of the above steps, your MariaDB
installation should now be secure.

Thanks for using MariaDB!

PXE Client 端的功能表

PXE Client 端的功能表,預設會讀取 /var/lib/tftpboot/pxelinux.cfg 目錄下的 default 當做設定檔,但也可以每一台 PXE Client 端都有自己的功能表設定檔,如果是在電腦教室,每一台電腦的設備都會是一樣,所以使用共用的設定是沒有問題的,但如果像是辦公室,每個人的每一台電腦設備、作業系統……,和要求的功能也有所不同,這時候就有必要,為不同的 PXE Client 端設定不同的設定檔。[@more@]PXE Client 端在開機時,會搜尋 /var/lib/tftpboot/pxelinux.cfg 目錄之下是否有 01-aa-bb-cc-dd-ee-ff 的設定檔,其中 aa-bb-cc-dd-ee-ff 就是 PXE Client 端的網路卡卡號
   01:00:15:58:6b:7d –> 01-00-15-58-6b-7d

如果找不到,接著搜尋是否有 AABBCCDD 的設定檔,其中 AABBCCDD 就是 PXE Client 端的 IP 的 16 進位
   192.168.1.11 –> C0A8010B
   192 –> C0
   168 –> A8
   1 –> 01
   11 –> 0B

如果都找不到,就會抓取 /var/lib/tftpboot/pxelinux.cfg/default 當做是功能表

快速產生 DHCP Server 的 dhcpd.conf 格式檔

從 /var/lib/dhcpd/dhcpd.leases 取出要的網路卡卡號
# cat /var/lib/dhcpd/dhcpd.leases | grep hard | awk ‘{print $3}’
d0:df:c7:f9:5c:ef;
00:26:51:0d:53:40;
00:11:93:88:7a:00;
00:15:58:6b:7d:da;
00:15:58:6b:7d:da;
00:15:58:6b:7d:da;
00:15:58:6b:7d:da;

經過處理,只取出想要的部分
# cat /var/lib/dhcpd/dhcpd.leases | grep hard | awk ‘{print $3}’ | sed ‘s/.$//’ | sort | uniq
00:11:93:88:7a:00
00:15:58:6b:7d:da
00:26:51:0d:53:40
d0:df:c7:f9:5c:ef

整理完的資料檔
# cat /root/mac
server1,00:11:93:88:7a:00,192.168.1.11
server2,00:15:58:6b:7d:da,192.168.1.12
server3,00:26:51:0d:53:40,192.168.1.13
server4,d0:df:c7:f9:5c:ef,192.168.1.14
[@more@]
使用 awk
# cat /usr/local/bin/mkdhcpd
#!/bin/bash
cat /root/mac | awk -F”,” ‘BEGIN{OFS=” “}{print $1,$2,$3 }’ | while read i j k
do
   echo “host $i {“
   echo ”  hardware ethernet $j;”
   echo ”  fixed-address $k;”
   echo “}”
done

使用 sed
# cat /usr/local/bin/mkdhcpd
#!/bin/bash
cat /root/mac | sed ‘s/,/ /g’ | while read i j k
do
   echo “host $i {“
   echo ”  hardware ethernet $j;”
   echo ”  fixed-address $k;”
   echo “}”
done

測試
# sh /usr/local/bin/mkdhcpd
host server1 {
  hardware ethernet 00:11:93:88:7a:00;
  fixed-address 192.168.1.11;
}
host server2 {
  hardware ethernet 00:15:58:6b:7d:da;
  fixed-address 192.168.1.12;
}
host server3 {
  hardware ethernet 00:26:51:0d:53:40;
  fixed-address 192.168.1.13;
}
host server4 {
  hardware ethernet d0:df:c7:f9:5c:ef;
  fixed-address 192.168.1.14;
}

在 Linux Console 做 2 / 10 / 16 進位的轉換

人還是習慣用 10 進位,遇到 2 / 10 / 16 進位的轉換,可能就要藉助紙筆或是計算機的幫忙,底下是在 Linux Console 中使用 Bash Shell 內建的功能來做轉換。

2 進位轉成 10 進位
# echo $((2#111111))
63

16 進位轉成 10 進位
# echo $((16#c0))
192

10 進位轉成 2 進位
# echo “obase=2;17″|bc
10001

10 進位轉成 16 進位
# echo “obase=16;17″|bc
11

多層 PXE 功能表

因為 PXE 功能表的選項愈來愈多,一個頁面放不下,所以修改 PXE 功能表,讓 PXE 功能表可以有很多層。
底下文章參考: http://wiki.centos.org/HowTos/PXE/PXE_Setup/Menus

# vim /var/lib/tftpboot/pxelinux.cfg/default
default menu.c32
prompt 0
timeout 300
ONTIMEOUT local

MENU TITLE Welcom to Tou-Cheng Elementary School PXE Server System

LABEL local
MENU LABEL Boot from local hard drive
LOCALBOOT 0

LABEL Install CentOS 6.5 x86_64 Servers
MENU LABEL Install CentOS 6.5 x86_64 Servers
MENU PASSWD CentOS
KERNEL menu.c32
APPEND pxelinux.cfg/x86_64_Servers

LABEL Install CentOS 6.5 x86 Servers
MENU LABEL Install CentOS 6.5 x86 Servers
MENU PASSWD CentOS
KERNEL menu.c32
APPEND pxelinux.cfg/x86_Servers

LABEL Backup / Restore
MENU LABEL Backup / Restore
MENU PASSWD BR
KERNEL menu.c32
APPEND pxelinux.cfg/Backup_Restore

LABEL Tools
MENU LABEL Tools
KERNEL menu.c32
APPEND pxelinux.cfg/tools[@more@]# cat /var/lib/tftpboot/pxelinux.cfg/x86_64_Servers
MENU TITLE Install CentOS 6.5 x86_64 Server Menu

LABEL Main Menu
MENU LABEL ^Return Main Menu
KERNEL menu.c32
APPEND pxelinux.cfg/default

LABEL Install CentOS 6.5 x86_64 from FTP
MENU LABEL Install CentOS 6.5 x86_64 from FTP
kernel images/CentOS/6.5/x86_64/vmlinuz
append initrd=images/CentOS/6.5/x86_64/initrd.img method=ftp://192.168.1.6/CentOS/6.5/os/x86_64/

LABEL Install CentOS 6.5 x86_64 from HTTP
MENU LABEL Install CentOS 6.5 x86_64 from HTTP
kernel images/CentOS/6.5/x86_64/vmlinuz
append initrd=images/CentOS/6.5/x86_64/initrd.img method=http://192.168.1.6/CentOS/6.5/os/x86_64/

LABEL Install CentOS 6.5 x86_64 from NFS
MENU LABEL Install CentOS 6.5 x86_64 from NFS
kernel images/CentOS/6.5/x86_64/vmlinuz
append initrd=images/CentOS/6.5/x86_64/initrd.img method=http://192.168.1.6/CentOS/6.5/os/x86_64/

LABEL AutoInstall CentOS 6.5 x86_64 from FTP
MENU LABEL AutoInstall CentOS 6.5 x86_64 from FTP
kernel images/CentOS/6.5/x86_64/vmlinuz
append initrd=images/CentOS/6.5/x86_64/initrd.img ks=ftp://192.168.1.6/ks/ks.cfg method=ftp://192.168.1.6/CentOS/6.5/os/x86_64/

LABEL AutoInstall CentOS 6.5 x86_64 from HTTP
MENU LABEL AutoInstall CentOS 6.5 x86_64 from HTTP
kernel images/CentOS/6.5/x86_64/vmlinuz
append initrd=images/CentOS/6.5/x86_64/initrd.img ks=http://192.168.1.6/ks/ks.cfg method=http://192.168.1.6/CentOS/6.5/os/x86_64/

LABEL AutoInstall CentOS 6.5 x86_64 from NFS
MENU LABEL AutoInstall CentOS 6.5 x86_64 from NFS
kernel images/CentOS/6.5/x86_64/vmlinuz
append initrd=images/CentOS/6.5/x86_64/initrd.img ks=http://192.168.1.6/ks/ks.cfg method=http://192.168.1.6/CentOS/6.5/os/x86_64/

# cat /var/lib/tftpboot/pxelinux.cfg/x86_Servers
MENU TITLE Install CentOS 6.5 x86 Server Menu

LABEL Main Menu
MENU LABEL ^Return Main Menu
KERNEL menu.c32
APPEND pxelinux.cfg/default

LABEL Install CentOS 6.5 i386 from FTP
MENU LABEL Install CentOS 6.5 i386 from FTP
kernel images/CentOS/6.5/i386/vmlinuz
append initrd=images/CentOS/6.5/i386/initrd.img method=ftp://192.168.1.6/CentOS/6.5/os/i386/

LABEL Install CentOS 6.5 i386 from HTTP
MENU LABEL Install CentOS 6.5 i386 from HTTP
kernel images/CentOS/6.5/i386/vmlinuz
append initrd=images/CentOS/6.5/i386/initrd.img method=http://192.168.1.6/CentOS/6.5/os/i386/

LABEL Install CentOS 6.5 i386 from NFS
MENU LABEL Install CentOS 6.5 i386 from NFS
kernel images/CentOS/6.5/i386/vmlinuz
append initrd=images/CentOS/6.5/i386/initrd.img method=http://192.168.1.6/CentOS/6.5/os/i386/

LABEL AutoInstall CentOS 6.5 i386 from FTP
MENU LABEL AutoInstall CentOS 6.5 i386 from FTP
kernel images/CentOS/6.5/i386/vmlinuz
append initrd=images/CentOS/6.5/i386/initrd.img ks=ftp://192.168.1.6/ks/ks.cfg method=ftp://192.168.1.6/CentOS/6.5/os/i386/

LABEL AutoInstall CentOS 6.5 i386 from HTTP
MENU LABEL AutoInstall CentOS 6.5 i386 from HTTP
kernel images/CentOS/6.5/i386/vmlinuz
append initrd=images/CentOS/6.5/i386/initrd.img ks=http://192.168.1.6/ks/ks.cfg method=http://192.168.1.6/CentOS/6.5/os/i386/

LABEL AutoInstall CentOS 6.5 i386 from NFS
MENU LABEL AutoInstall CentOS 6.5 i386 from NFS
kernel images/CentOS/6.5/i386/vmlinuz
append initrd=images/CentOS/6.5/i386/initrd.img ks=http://192.168.1.6/ks/ks.cfg method=http://192.168.1.6/CentOS/6.5/os/i386/

# cat /var/lib/tftpboot/pxelinux.cfg/Backup_Restore
MENU TITLE Backup / Restore Menu

LABEL Main Menu
MENU LABEL ^Return Main Menu
KERNEL menu.c32
APPEND pxelinux.cfg/default

LABEL Symantec Ghost
MENU LABEL ^Symantec Ghost
MENU PASSWD Ghost
kernel memdisk
append initrd=images/dos/GHO1151.IMG

LABEL Clonezilla Live tftp
MENU LABEL Clonezilla Live ^tftp
MENU PASSWD CloneZilla
kernel images/Clonezilla/live/vmlinuz
append initrd=images/Clonezilla/live/initrd.img boot=live config username=user quiet noswap edd=on nomodeset noeject locales=”zh_TW.UTF-8″ keyboard-layouts=”NONE” ocs_live_run=”ocs-live-general” ocs_live_extra_param=”” ocs_live_batch=no vga=788 ip=frommedia nosplash fetch=tftp://192.168.1.6/images/Clonezilla/live/filesystem.squashfs

LABEL Clonezilla Livei nfs
MENU LABEL Clonezilla Live ^nfs
MENU PASSWD CloneZilla
kernel images/Clonezilla/live/vmlinuz
append initrd=images/Clonezilla/live/initrd.img boot=live config username=user quiet noswap edd=on nomodeset noeject locales=”zh_TW.UTF-8″ keyboard-layouts=”NONE” ocs_live_run=”ocs-live-general” ocs_live_extra_param=”” ocs_live_batch=no vga=788 ip=frommedia nosplash netboot=nfs nfsroot=192.168.1.6:/var/lib/tftpboot/images/Clonezilla

# cat /var/lib/tftpboot/pxelinux.cfg/tools
MENU TITLE Tools Menu

LABEL Main Menu
MENU LABEL ^Return Main Menu
KERNEL menu.c32
APPEND pxelinux.cfg/default

LABEL Memory Test
MENU LABEL ^Memory Test – memtest86+
kernel images/memtest/memtest86+-5.01

LABEL SPFDisk
MENU LABEL ^SPFDisk
MENU PASSWD SPFDisk
kernel memdisk
append initrd=images/dos/spfdisk.img

label FreeDOS 1.0 Bootdisk
MENU LABEL ^FreeDOS 1.0 bootdisk
MENU PASSWD FreeDOS
kernel memdisk
append initrd=images/dos/balder10.img