Nagios 的 Web 管理介面 – vshell

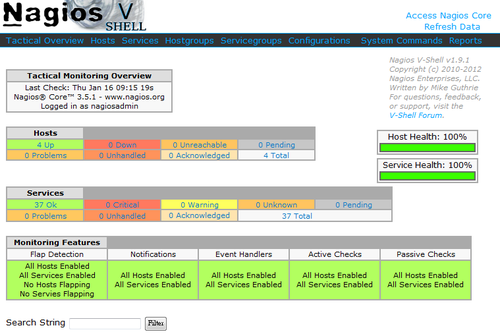
Nagios 本身就有一個 Web 管理介面,只是畫面有些稍微複雜,所以有一個使用 PHP 開發的 Web 介面,比較精簡直覺。
Nagios vshell 下載網站:Here 
目前最新版本是 1.9.1 版,適用於 Nagios 3.x 和 Nagios XI
[@more@]
底下是安裝步驟:
1.下載 vshell
# wget http://assets.nagios.com/downloads/exchange/nagiosvshell/vshell.tar.gz

2.解壓縮
# tar xvzf vshell.tar.gz

3.搬移目錄
# mv vshell /usr/local

4.複製檔案到 /etc/httpd/conf.d 目錄之下
# cp /usr/local/vshell/config/vshell_apache.conf /etc/httpd/conf.d

5.修改 /etc/httpd/conf.d/vshell_apache.conf
# vim /etc/httpd/conf.d/vshell_apache.conf

#modify this file to fit your apache configuration

Alias /vshell “/usr/local/vshell”

<Directory “/usr/local/vshell”>
#  SSLRequireSSL
   Options None
   AllowOverride None
#   Order allow,deny
#   Allow from all
   Order deny,allow
   Deny from all
   Allow from 127.0.0.1 192.168.1.0/24
   Allow from ::1

#  Allow from 127.0.0.1

#use the below lines for Nagios XI
 # AuthName “Nagios Monitor XI”
 #  AuthType Basic
 # AuthUserFile /usr/local/nagiosxi/etc/htpasswd.users

#Use the below lines for a typical Nagios Core installation
   AuthName “Nagios Access”
   AuthType Basic
   AuthUserFile /etc/nagios/passwd

   Require valid-user
</Directory>

6.修改 /usr/local/vshell/config/vshell.conf 設定檔
# vim /usr/local/vshell/config/vshell.conf

; Full filesystem path to the Nagios status file
STATUSFILE = “/usr/local/nagios/var/status.dat”

; Full filesystem path to the Nagios object cache file
OBJECTSFILE = “/usr/local/nagios/var/objects.cache”

; Full filesystem path to the Nagios CGI permissions configuration file
CGICFG = “/usr/local/nagios/etc/cgi.cfg”

; Full filesystem path to the Nagios command pipe
NAGCMD = “/usr/local/nagios/var/rw/nagios.cmd”

修改成
; Full filesystem path to the Nagios status file
STATUSFILE = “/var/log/nagios/status.dat

; Full filesystem path to the Nagios object cache file
OBJECTSFILE = “/var/log/nagios/objects.cache

; Full filesystem path to the Nagios CGI permissions configuration file
CGICFG = “/etc/nagios/cgi.cfg

; Full filesystem path to the Nagios command pipe
NAGCMD = “/var/spool/nagios/cmd/nagios.cmd

7.重新啟動 Apache Web Server
# service httpd restart

8. 如果有問題,可以將設定檔複製到 /etc 目錄之下
# cp /usr/local/vshell/config/vshell.conf /etc

9.一切 OK 了!

 後記:其實後來發現,vshell 有提供直接從網頁上安裝的功能,可以直接執行 http://Server’IP/vshell/install.php
但我試了之後好像沒有成功,所以後來還是直接用手動安裝的方式來完成。

最後記得要把安裝目錄中的 install.php 檔案刪除
# rm -rf /usr/local/vshell/install.php

Nagios Exchange 網站

Nagios Exchange 下載網站:http://exchange.nagios.org/

以 CentOS 6.5 x86_64 為例,Nagios Plugin 提供的檢查命令都是放在 /usr/lib64/nagios/plugins/ 目錄之下
# cd /usr/lib64/nagios/plugins
# ls
check_breeze*    check_game*       check_mrtgtraf*     check_overcr*   check_swap*
check_by_ssh*    check_hpjd*       check_mysql*        check_pgsql*    check_tcp*
check_clamd@     check_http*       check_mysql_query*  check_ping*     check_time*
check_cluster*   check_icmp*       check_nagios*       check_pop@      check_udp@
check_dhcp*      check_ide_smart*  check_nntp@         check_procs*    check_ups*
check_dig*       check_imap@       check_nntps@        check_real*     check_users*
check_disk*      check_ircd*       check_nrpe*         check_rpc*      check_wave*
check_disk_smb*  check_jabber@     check_nt*           check_sensors*  eventhandlers/
check_dns*       check_ldap*       check_ntp*          check_simap@    negate*
check_dummy*     check_ldaps@      check_ntp_peer*     check_smtp*     urlize*
check_file_age*  check_load*       check_ntp.pl*       check_snmp*     utils.pm
check_flexlm*    check_log*        check_ntp_time*     check_spop@     utils.sh*
check_fping*     check_mailq*      check_nwstat*       check_ssh*
check_ftp@       check_mrtg*       check_oracle*       check_ssmtp@

如果覺得不夠,可以到上面提到的 Nagios Exchange 網站下載來使用,或者自己寫,可以使用 Bash Shell / Perl / PHP 等工具來撰寫。

使用 Nagios 來偵測 Server 狀態

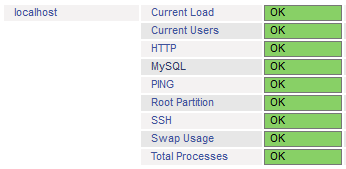
利用 Nagios 可以偵測目前 Server 的使用狀態,如:系統目前負載 / 線上使用者 / Ping 通連狀況 / root 根目錄使用狀態 / SWAP 記憶使用狀況 /  所有的 Process 等等……,當然也可以用來偵測各種不同的服務,如:SSH / FTP / HTTP / LDAP / DNS……。

以本機 localhost 來做說明:[@more@]# vim /etc/nagios/objects/localhost.cfg
###############################################################################
###############################################################################
#
# SERVICE DEFINITIONS
#
###############################################################################
###############################################################################

# ping 的通連狀態
# Define a service to “ping” the local machine

define service{
        use                             local-service         ; Name of service template to use
        host_name                       localhost
        service_description             PING
        check_command                   check_ping!100.0,20%!500.0,60%
        }

# root 磁碟分割區使用狀態
# Define a service to check the disk space of the root partition
# on the local machine.  Warning if < 20% free, critical if
# < 10% free space on partition.

define service{
        use                             local-service         ; Name of service template to use
        host_name                       localhost
        service_description             Root Partition
        check_command                   check_local_disk!20%!10%!/
        }

# 線上使用者
# Define a service to check the number of currently logged in
# users on the local machine.  Warning if > 20 users, critical
# if > 50 users.

define service{
        use                             local-service         ; Name of service template to use
        host_name                       localhost
        service_description             Current Users
        check_command                   check_local_users!20!50
        }

# Process 使用數量
# Define a service to check the number of currently running procs
# on the local machine.  Warning if > 250 processes, critical if
# > 400 users.

define service{
        use                             local-service         ; Name of service template to use
        host_name                       localhost
        service_description             Total Processes
        check_command                   check_local_procs!250!400!RSZDT
        }

# 系統負載
# Define a service to check the load on the local machine.

define service{
        use                             local-service         ; Name of service template to use
        host_name                       localhost
        service_description             Current Load
        check_command                   check_local_load!5.0,4.0,3.0!10.0,6.0,4.0
        }

# SWAP 置換記憶體使用狀態
# Define a service to check the swap usage the local machine.
# Critical if less than 10% of swap is free, warning if less than 20% is free

define service{
        use                             local-service         ; Name of service template to use
        host_name                       localhost
        service_description             Swap Usage
        check_command                   check_local_swap!20!10
        }

修改完畢,重新啟動 Nagios
# service nagios restart
Running configuration check…done.
Stopping nagios: done.
Starting nagios: done.

如果沒有出現錯誤訊息,代表設定值是沒有問題。

在 CentOS 6.x 上安裝 OpenNMS

OpenNMS 是一套 OpenSource 的網路管理軟體,可以利用 Ping 及 SNMP 的方式來偵測網路設備或服務的啟動狀態。
OpenNMS 官方網站:http://www.opennms.org/
本篇文章參考:浮雲雅築: [研究] OpenNMS 1.12.3 快速安裝程式 (yum)(CentOS 6.5 x64)

[@more@]
下載 OpenNMS 套件庫 rpm
# wget http://yum.opennms.org/repofiles/opennms-repo-stable-rhel6.noarch.rpm

進行安裝
# rpm -Uvh opennms-repo-stable-rhel6.noarch.rpm

安裝 PostgreSQL 資料庫
# yum install postgresql postgresql-server

PostgreSQL 初始化資料庫
# service postgresql initdb
正在初始化資料庫:                                         [  確定  ]

啟動 PostgreSQL Server
# service postgresql start
正在啟動 postgresql 服務:                                 [  確定  ]

如果沒有先初始化資料庫,而直接啟動,則會出現下面的錯誤訊息
# service postgresql start

/var/lib/pgsql/data is missing. Use “service postgresql initdb” to initialize the cluster first.
                                                           [失敗]

設定開機時啟動
# chkconfig –level 3 postgresql on

先備份設定檔,再進行修改
# cp /var/lib/pgsql/data/pg_hba.conf /var/lib/pgsql/data/pg_hba.conf.$(date +%F)

將 70 行後的 ident 取代成 trust
# sed -i ’70,$s/ident/trust/’ /var/lib/pgsql/data/pg_hba.conf

重新啟動 PostgreSQL Server
# service postgresql restart                                               
正在停止 postgresql 服務:                                 [  確定  ]
正在啟動 postgresql 服務:                                 [  確定  ]

檢查是否有正常啟動 PostgreSQL Server
# netstat -antulp | grep 5432
tcp        0      0 127.0.0.1:5432              0.0.0.0:*                   LISTEN      8092/postmaster
tcp        0      0 ::1:5432                    :::*                        LISTEN      8092/postmaster

安裝 Oracle Java JDK
Oracle Java JDK 下載網頁:
http://www.oracle.com/technetwork/java/javase/downloads/jdk7-downloads-1880260.html
# rpm -ivh jdk-7u45-linux-x64.rpm

進行 Oracle Java JDK 設定
# alternatives –install /usr/bin/java  java  /usr/java/jdk1.7.0_45/bin/java  100
# alternatives –set  java /usr/java/jdk1.7.0_45/bin/java
# echo ‘export JAVA_HOME=/usr/java/jdk1.7.0_45’ >> /etc/profile
# echo ‘export PATH=$PATH:$JAVA_HOME/bin’ >> /etc/profile
# echo ‘export CLASSPATH=$JAVA_HOME/jre/lib/ext:$JAVA_HOME/lib/tools.jar’ >> /etc/profile
# source /etc/profile

檢查 Java 版本
# java -version
java version “1.7.0_45”
Java(TM) SE Runtime Environment (build 1.7.0_45-b18)
Java HotSpot(TM) 64-Bit Server VM (build 24.45-b08, mixed mode)

安裝 OpenNMS
# yum -y install opennms opennms-plugins opennms-remote-poller mib2opennms iplike
 *** Installation complete.  You must still run the installer at
 *** $OPENNMS_HOME/bin/install to be sure your database is up
 *** to date before you start OpenNMS.  See the install guide at
 *** http://www.opennms.org/wiki/Installation:RPM and the
 *** release notes for details.

設定 OpenNMS 環境變數
# export OPENNMS_HOME=/opt/opennms
# echo ‘export PATH=$PATH:$OPENNMS_HOME/bin’ >> /etc/profile

設定 OpenNMS 使用的 Java
# /opt/opennms/bin/runjava -S /usr/java/latest/bin/java
runjava: checking specified JRE: “/usr/java/latest/bin/java”…
runjava: specified JRE is good.
runjava: value of “/usr/java/latest/bin/java” stored in configuration file

# $OPENNMS_HOME/bin/runjava -s
runjava: Looking for an appropriate JRE…
runjava: Checking for an appropriate JRE in JAVA_HOME…
runjava: found: “/usr/java/jdk1.7.0_45/bin/java” is an appropriate JRE
runjava: value of “/usr/java/jdk1.7.0_45/bin/java” stored in configuration file

建立 OpenNMS 需要的資料庫
# $OPENNMS_HOME/bin/install -dis

最後會出現
Upgrade completed successfully!

啟動 OpenNMS
# service opennms start
Starting OpenNMS: Started OpenNMS, but it has not finished starting up
                                                           [失敗]

設定開機時啟動
# chkconfig –level 3 opennms on

雖然最後的訊息出現失敗,但有正常執行
# netstat -antulp | grep 8980
tcp        0      0 :::8980                     :::*                        LISTEN      8956/java
tcp        0      0 :::18980                    :::*                        LISTEN      8956/java

如果不放心,可以檢查 log 檔的訊息
# cat /opt/opennms/logs/daemon/output.log
[DEBUG] System property ‘opennms.library.jicmp’ set to ‘/usr/lib64/libjicmp.so.  Attempting to load jicmp library from this location.
[INFO] Successfully loaded jicmp library.
[DEBUG] System property ‘opennms.library.jicmp6’ set to ‘/usr/lib64/libjicmp6.so.  Attempting to load jicmp6 library from this location.
[INFO] Successfully loaded jicmp6 library.

顯示 OpenNMS 執行狀態
# /opt/opennms/bin/opennms -v status
OpenNMS.Eventd         : running
OpenNMS.Trapd          : running
OpenNMS.Queued         : running
OpenNMS.Actiond        : running
OpenNMS.Notifd         : running
OpenNMS.Scriptd        : running
OpenNMS.Rtcd           : running
OpenNMS.Pollerd        : running
OpenNMS.PollerBackEnd  : running
OpenNMS.Ticketer       : running
OpenNMS.Collectd       : running
OpenNMS.Discovery      : running
OpenNMS.Vacuumd        : running
OpenNMS.EventTranslator: running
OpenNMS.PassiveStatusd : running
OpenNMS.Statsd         : running
OpenNMS.Provisiond     : running
OpenNMS.Reportd        : running
OpenNMS.Alarmd         : running
OpenNMS.Ackd           : running
OpenNMS.JettyServer    : running
opennms is running

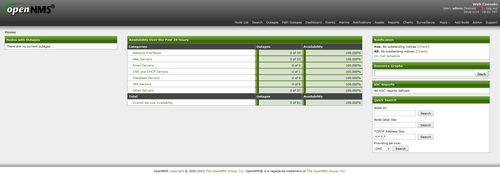
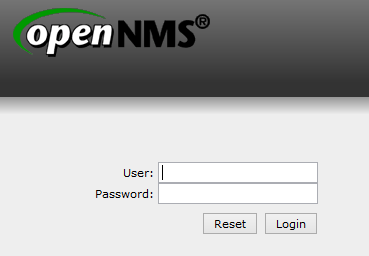
開啟瀏覽器,在網址列上輸入 http://Server’IP:8980/opennms
預設帳號和密碼都是 admin,可以在 Web 介面中更改密碼
設定 OpenNMS 要偵測的網段,也可以在 Web 介面設定
# vim /opt/opennms/etc/discovery-configuration.xml
<discovery-configuration threads=”1″ packets-per-second=”1″
        initial-sleep-time=”30000″ restart-sleep-time=”86400000″
        retries=”1″ timeout=”2000″>

    <include-range>
        <begin>192.168.1.1</begin>
        <end>192.168.1.254</end>
    </include-range>

</discovery-configuration>

在網段中所偵測到的主機及服務

在防火牆中設定
iptables -A INPUT -p tcp  -m state –state NEW –dport 389 -j ACCEPT
Install VMware tools for Linux

# mkdir /mnt/cdrom
# mount /dev/cdrom /mnt/cdrom
mount: block device /dev/sr0 is write-protected, mounting read-only
# cd /mnt/cdrom
# ls
manifest.txt     VMwareTools-9.6.1-1378637.tar.gz  vmware-tools-upgrader-64
run_upgrader.sh  vmware-tools-upgrader-32
# cp VMwareTools-9.6.1-1378637.tar.gz /var/tmp/
# cd /var/tmp
# tar xvzf VMwareTools-9.6.1-1378637.tar.gz

SELinux 備忘

SELinux 設定檔
# cat /etc/selinux/config

# This file controls the state of SELinux on the system.
# SELINUX= can take one of these three values:
#     enforcing – SELinux security policy is enforced.
#     permissive – SELinux prints warnings instead of enforcing.
#     disabled – No SELinux policy is loaded.
SELINUX=enforcing
# SELINUXTYPE= can take one of these two values:
#     targeted – Targeted processes are protected,
#     mls – Multi Level Security protection.
SELINUXTYPE=targeted

顯示目前 SELinux 狀態
# sestatus
SELinux status:                 enabled
SELinuxfs mount:                /selinux
Current mode:                   enforcing
Mode from config file:          enforcing
Policy version:                 24
Policy from config file:        targeted

# sestatus
SELinux status:                 disabled
[@more@]
改變 SELinux 模式
# getenforce
Enforcing
# setenforce 0
# getenforce
Permissive
# setenforce 1
# getenforce
Enforcing
# setenforce –help
usage:  setenforce [ Enforcing | Permissive | 1 | 0 ]

Display SELinux Contexts
# ls -Z /root/anaconda-ks.cfg
-rw——-. root root system_u:object_r:admin_home_t:s0 /root/anaconda-ks.cfg
# ls -dZ /var/www/html
drwxr-xr-x. root root system_u:object_r:httpd_sys_content_t:s0 /var/www/html/

Set SELinux Contexts
# touch index-1.html
# touch /var/www/html/index.html
# mv index-1.html /var/www/html/
# ls -Z /var/www/html/*.html
-rw-r–r–. root root unconfined_u:object_r:admin_home_t:s0 /var/www/html/index-1.html
-rw-r–r–. root root unconfined_u:object_r:httpd_sys_content_t:s0 /var/www/html/index.html
# chcon -t httpd_sys_content_t /var/www/html/index-1.html
# ls -Z /var/www/html/*.html
-rw-r–r–. root root unconfined_u:object_r:httpd_sys_content_t:s0 /var/www/html/index-1.html
-rw-r–r–. root root unconfined_u:object_r:httpd_sys_content_t:s0 /var/www/html/index.html

# touch index-2.html
# mv index-2.html /var/www/html
# ls -Z /var/www/html/*.html
-rw-r–r–. root root unconfined_u:object_r:httpd_sys_content_t:s0 /var/www/html/index-1.html
-rw-r–r–. root root unconfined_u:object_r:admin_home_t:s0 /var/www/html/index-2.html
-rw-r–r–. root root unconfined_u:object_r:httpd_sys_content_t:s0 /var/www/html/index.html
# restorecon -v /var/www/html/index-2.html
restorecon reset /var/www/html/index-2.html context unconfined_u:object_r:admin_home_t:s0->unconfined_u:object_r:httpd_sys_content_t:s0
# ls -Z /var/www/html/*.html
-rw-r–r–. root root unconfined_u:object_r:httpd_sys_content_t:s0 /var/www/html/index-1.html
-rw-r–r–. root root unconfined_u:object_r:httpd_sys_content_t:s0 /var/www/html/index-2.html
-rw-r–r–. root root unconfined_u:object_r:httpd_sys_content_t:s0 /var/www/html/index.html

Get SELinux booleans
# getsebool -a | head -10
abrt_anon_write –> off
abrt_handle_event –> off
allow_console_login –> on
allow_cvs_read_shadow –> off
allow_daemons_dump_core –> on
allow_daemons_use_tcp_wrapper –> off
allow_daemons_use_tty –> on
allow_domain_fd_use –> on
allow_execheap –> off
allow_execmem –> on

# getsebool -a | grep ftp
allow_ftpd_anon_write –> off
allow_ftpd_full_access –> off
allow_ftpd_use_cifs –> off
allow_ftpd_use_nfs –> off
ftp_home_dir –> off
ftpd_connect_db –> off
ftpd_use_fusefs –> off
ftpd_use_passive_mode –> off
httpd_enable_ftp_server –> off
tftp_anon_write –> off
tftp_use_cifs –> off
tftp_use_nfs –> off

# getsebool ftp_home_dir
ftp_home_dir –> off

Set SELinux booleans
# setsebool ftp_home_dir 1
# getsebool ftp_home_dir
ftp_home_dir –> on
# setsebool ftp_home_dir 0
# getsebool ftp_home_dir
ftp_home_dir –> off

讓設定永遠生效
# setsebool -P ftp_home_dir 1

# yum install policycoreutils-python

取得相關資訊
# semanage boolean -l | grep ftp_home_dir
ftp_home_dir                   (開啟   ,   開啟)  Allow ftp to read and write files in the user home directories

在 CentOS 6.x 上安裝 Nagios

Nagios 是一套功能非常強大的網路監控系統,可以協助網管人員即時監控系統服務的狀態,並且在系統服務發生異狀時,以 email 通知管理者。
Nagios 官方網站:http://www.nagios.org/
安裝 Nagios
# yum install nagios nagios-plugins-all nagios-plugins-nrpe nrpe –enablerepo=epel
啟動 Nagios
# service nagios start
Starting nagios: done.

設定開機時啟動 Nagios
# chkconfig –level 3 nagios on
[@more@]
設定 Nagios 的管理帳號及密碼 nagiosadmin / 123456
# htpasswd -cb /etc/nagios/passwd nagiosadmin 123456
Adding password for user nagiosadmin

開啟瀏覽器,在網址列輸入 http://Server’IP/nagios

啟動 NRPE 服務
# service nrpe start
Starting nrpe:    
                                        [  確定  ]

設定開機時啟動
# chkconfig –level 3 nrpe on

檢查是否有正常啟動
# netstat -antulp | grep nrpe
tcp        0      0 0.0.0.0:5666                0.0.0.0:*                   LISTEN      57902/nrpe

在 CentOS 6.x 上安裝 Monitorix

Monitorix 官方網站:http://www.monitorix.org/

安裝 Monitorix 所須套件
# yum install perl-Config-General perl-HTTP-Server-Simple perl-MIME-Lite perl-MailTools perl-XML-Simple rrdtool rrdtool-perl

下載 Monitorix
# wget http://www.monitorix.org/monitorix-3.4.0-1.noarch.rpm
進行安裝
# rpm -ivh monitorix-3.4.0-1.noarch.rpm


# yum install monitorix –enablerepo=epel

啟動 Monitorix 服務
# service monitorix start
正在啟動 monitorix:                                       [  確定  ]

設定開機時啟動
# chkconfig –level 3 monitorix on

檢查 Monitorix 服務是否有正常啟動
# netstat -antulp | grep monitorix
tcp        0      0 0.0.0.0:8080                0.0.0.0:*                   LISTEN      47040/monitorix-htt
[@more@]
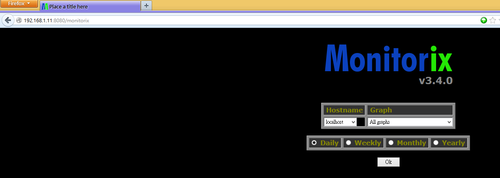
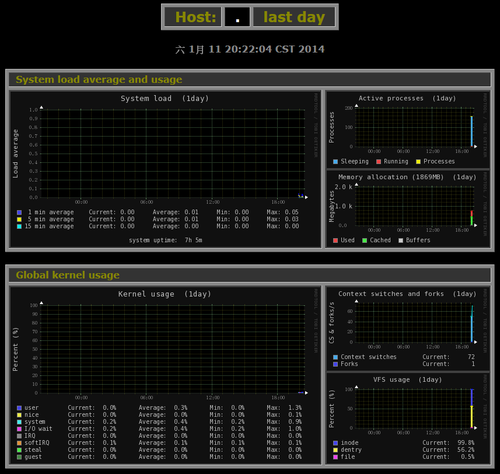
開啟瀏覽器,輸入 http://Server’IP:8080/monitorix

限制可以連線的範圍 192.168.1.0/24
# sed -i ‘s/hosts_deny =/hosts_deny = all/’ /etc/monitorix.conf
# sed -i ‘s/hosts_allow =/hosts_allow = 192.168.1.0/24/’ /etc/monitorix.conf

設定連線時須要輸入密碼
# sed -i ’34s/enabled = n/enabled = y/’ /etc/monitorix.conf
設定可以連線的使用者 admin 密碼 123456
# htpasswd -cb /var/lib/monitorix/htpasswd admin 123456
Adding password for user admin